4 Benefits Of A Backyard Shrub Island Berm And How To Build Your Own

We may receive a commission on purchases made from links.
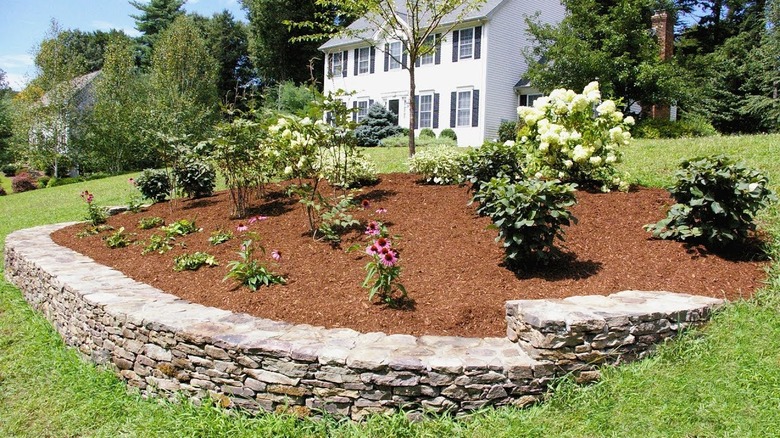
A "shrub island" is a grouping of shrubs planted in the middle of a lawn rather than shrubbery planted around the perimeter of a yard or as a hedge. A shrub island could be part of a regular garden bed planted flush with the level of the surrounding landscape, planted in a raised bed, or on a berm.
Berms Control Water Runoff
Berms Control Water Runoff
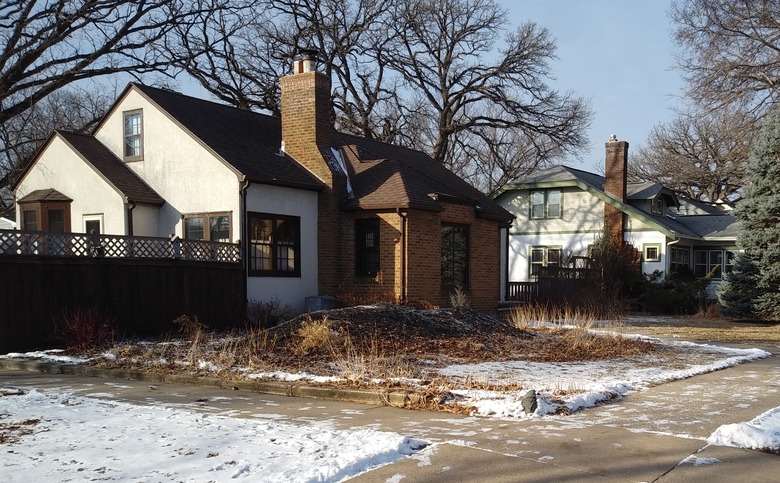
If you have a yard with a steep slope in an area with heavy rainfall, you may want to install a berm to control water runoff and direct it away from your home.
Orient an outlet from the berm toward a swale to carry water away from structures. A combination of a berm and a swale (a depression to direct water flow) gives a source of materials for building the raised berm when the swale is excavated. A series of berms arranged along a hillside creates multiple points for slowing water flow. The berm itself can be planted with plants, shrubs, or trees, and the cup of the berm can be planted with water-loving plants.
In dry climates, berms slow down runoff from heavy rainfall and allow more moisture to soak into the soil while also preventing erosion. A crescent-shaped berm, with the open side facing uphill, will hold water and sediment, allowing for more gradual absorption of the water and preventing the sediment from flowing into storm drains, streams or lakes. Trees and shrubs can be planted in the cup of the berm to take advantage of the additional water supply.
To Add Visual Interest to Your Yard

To Add Visual Interest to Your Yard
Berms are used most often to provide visual interest by breaking a flat space into an undulating space. A common place to see berms is a golf course. If you have ever golfed, you can picture how an undulating course filled with numerous berms is more visually interesting than a flat course. Because many yards are perfectly flat, even a small berm can add interest and dimension. A combination of berms and beds lends texture and height to any flat yard.
For Privacy or Light- or Sound-Reduction
For Privacy or Light- or Sound-Reduction
Chances are, you are not going to install 5-foot-tall embankments for privacy — but even a low berm can add to the privacy of your yard. A berm topped with dense shrubbery is a perfect privacy enhancer. For year-round privacy, consider evergreen shrubs and trees or a short fence running across the top of the berm. In areas where fence heights are restricted, a 6- or 12-inch-tall berm topped with a fence gives just that little bit of extra privacy. Berms and evergreens can also serve as blocks against headlights and street noise.
To Enhance the Growing Season
To Enhance the Growing Season
In colder climates, a berm can be used to create a slightly warmer growing area. The amount of warmth absorbed from the sun is affected by the angle of the exposed area. The southern face of a berm will absorb more heat on the angled surface, allowing for slightly earlier blooming of spring bulbs. Creating a protected area with a crescent-shaped berm can allow you to grow shrubs or perennials typically not possible in your hardiness zone.
Berm Design
Berm Design
A berm does not have to be a huge earthwork — it can be as simple as a 3- to 4-inch elevation rise from surrounding areas. Don't just throw up a single ovoid berm. Think in terms of sinuous shapes, crescent shapes, or perhaps repeating or staggered small berms. Curved, asymmetrical shapes are typically more appealing than square shapes, and placing the high point of the berm slightly off-center makes it look more natural. Plant berms with vegetation that progresses from shorter to taller as you move up the slope of the berm. This helps guide the eye upward.
Shrub Island Design
Shrub Island Design
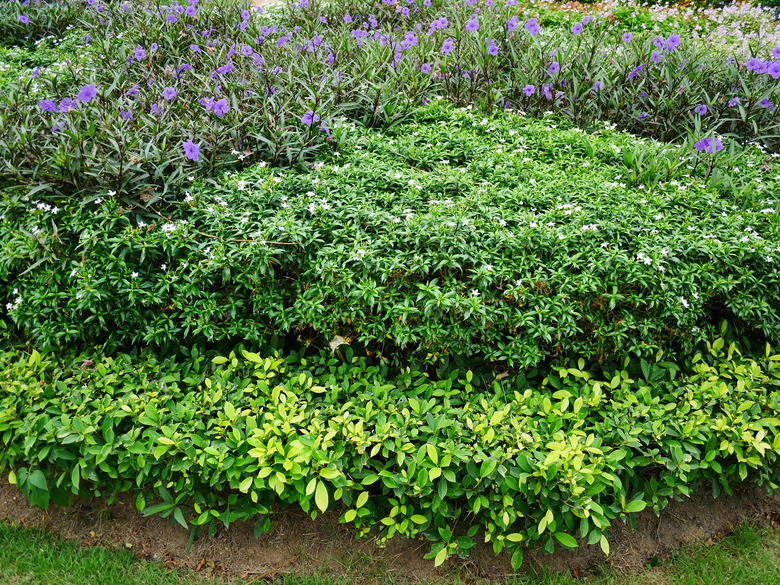
Consider which shrubs you want to plant on your berm before building the berm. If the shrub island is strictly for visual interest, you can go for a mono look — all the same color or all the same shape — or you can go for a mixed look. The mono look or mass planting can provide a more modern aesthetic that is suitable for a less natural-looking berm.
For a more natural look, mix shapes, sizes, and colors. Include deciduous shrubs (meaning they drop their leaves in the fall) mixed with evergreen shrubs (meaning they keep their leaves year-round). For example, a weeping blue spruce has a columnar shape with drooping branches and a blue color and keeps its needles year round. This could be at the top of the berm. Mix this with a rounder shrub and a creeping deciduous shrub hanging over a flat boulder below. Shape the berm to correlate with the shrubs you will be planting and any decorative elements you will be adding.
When designing the shrub island, pay close attention to the mature dimensions of the shrubs you are choosing. Your shrubs will start out small; there will seem to be too much empty space at first, but the shrubs will soon grow to fill in the spaces. Note that shrubs and trees labeled "dwarf" are dwarf in comparison to their standard size. Carefully note the mature height and spread, which might be as much as 10 or 15 feet. A common error is to plant shrubs and trees too close together, which means they become crowded as they grow. If you do not like the empty spaces, you can plant perennial or annual plants in the voids until the shrubs mature.
Things to Consider When Building a Landscape Berm
Things to Consider When Building a Landscape Berm
Choose the site for the berm and lay out the shape using a rope or hose. Start small, because even a small berm requires a deceptively large amount of material. This is why landscapers often build berms in conjunction with projects that will be removing soil, such as patios, sidewalks, or swimming pools. Some considerations to keep in mind:
- Water runoff — the berm should open uphill.
- Sun exposure — the berm should open toward the south for warmer temperatures or toward the north or east for cooler ones.
- Sight lines — the berm should distract from undesirable views and direct toward desirable views.
- Shade — trees and shrubs planted on the berm should create desired shade.
- Prevailing wind direction — the berm and plantings should slow down cold winter wind but shouldn't block cooling summer breezes.
Berms look best with curvy shapes and gradual slopes. An abruptly rising berm creates erosion problems and will be difficult to maintain. At a minimum, a berm should be four times wider than its height and five or six times longer — so an 8-inch-high berm should be at least 32 inches wide and 40 inches long.
How to Build a Landscape Berm
How to Build a Landscape Berm
Here are some step-by-step instructions on how to build your own landscape berm:
- Once you have established the location and shape of the berm, remove the sod or other existing vegetation from the area and discard.
- Remove the topsoil from the berm area and reserve it. If you are creating a large berm, use coarser materials for the lower layers of the berm — quality topsoil is only needed for the top 8 to 12 inches.
- Create the bulk of the berm with fill material such as rocks, concrete chunks, or less desirable soil, except in the areas where you will be planting trees and shrubs. Do not use asphalt or railroad ties (they are toxic) or wood or construction debris (wood will decompose and cause uneven sinking). Build up the fill to a level less than the final desired height to allow for replacing the topsoil.
- Water the berm to encourage the material to settle and fill in gaps before adding topsoil.
- Adjust the size and shape as desired and return the topsoil to the top of the berm. Remember that a gradual transition from surrounding areas to the berm is best.
How to Plant a Shrub Island on the Berm
How to Plant a Shrub Island on the Berm
Plant the berm with the grasses, plants, shrubs, or trees you have chosen. Follow the planting directions given on the plant tag. Here are some general instructions for planting a shrub island:
- Dig a hole only as deep as the container, but 2 to 3 times greater diameter.
- Place the shrub in the hole still in the pot. The dirt level in the pot should match the surrounding dirt level. Add or remove dirt if needed.
- Remove the shrub from the pot by cutting down the sides of the pot. Orient the shrub in the hole with the best side facing out. Replace the soil, then water and mulch the shrub.
- Place occasional boulders or artistic features on the berm to attract the eye and to fill visual space until the plants mature.
- Mulch with shredded or large chip mulch that will not wash away as easily.
- Plan for increased irrigation of shrubbery along the top of a berm. Because water will flow off the top of the berm, moisture availability for plants along the top will be lower than for plants around the perimeter.
- Water new shrubs and trees daily for the first two weeks, every other day for the next 12 weeks, then weekly for the next year.
- Refer to the plant tags, the grower's website, or other sources for specific pruning instructions for your selected shrubs. Many shrubs need regular pruning to look their best.