Working With Drywall Corner Bead
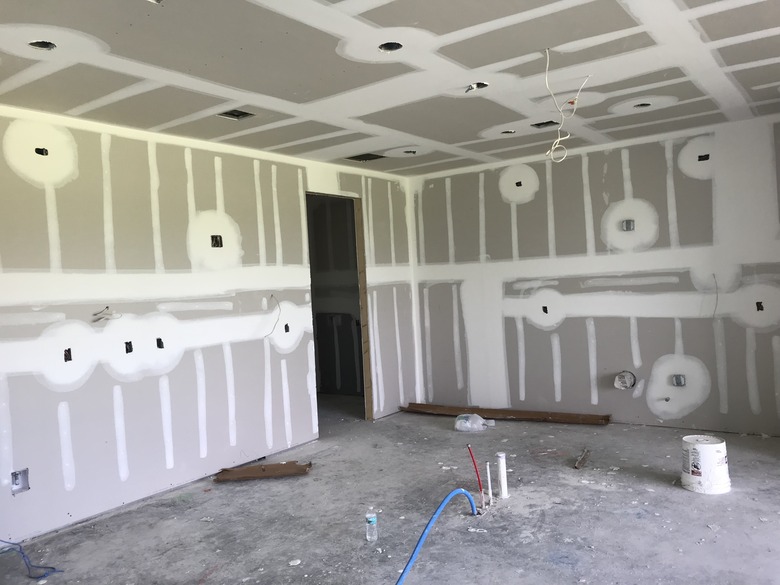
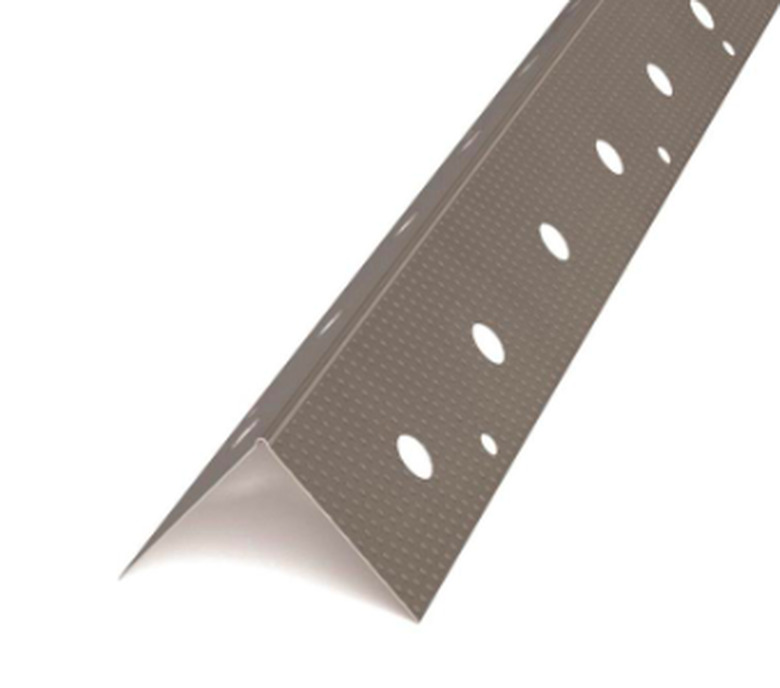
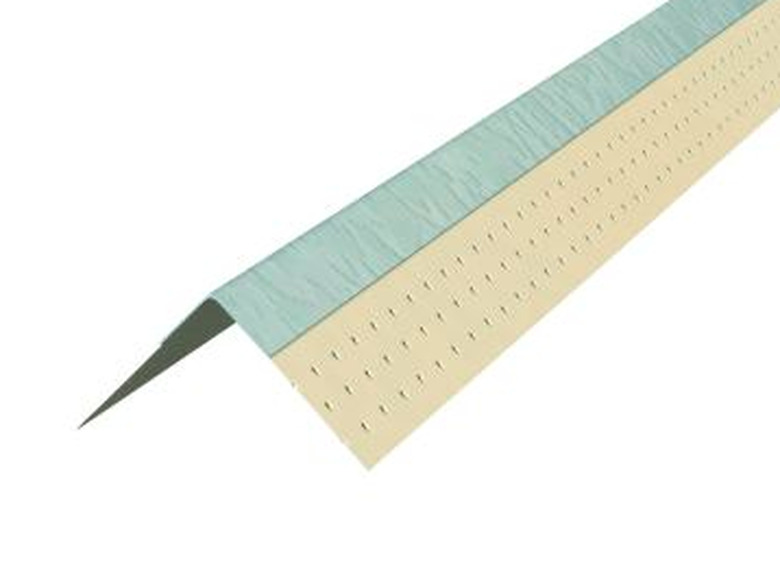
Anyone who works with drywall is familiar with metal corner bead. It has been the staple for finishing the outside corners of walls since drywall became popular in the mid-20th century. You can still use metal beading to finish outside corners, but today there are also other options, including vinyl or metal corner beading with attached paper or mesh edges. These newer forms of corner bead stick to the wall with glue or joint compound rather than nails or screws, and this eliminates the buckling and crimping that sometimes occurs when you fasten solid metal beading. Because paper-faced beading is so easy to use, many pros also install it on inside corners that they would have simply taped in the past.
Despite the advantages of paper-faced beading, many old-schoolers still prefer the metal variety, so it's a good idea to be familiar with installation techniques for both types.
 Dietrich
Installing Metal Beading
Installing Metal Beading
At a cost of around $2 for a 10-foot length, metal corner beading is less expensive than paper-faced beading, which costs about 50 percent more. Don't forget you need fasteners for metal beading, though. That drives the cost slightly higher, but it is still less expensive than paper-faced beading.
You can install metal beading with drywall screws, drywall nails, or staples. If you have a choice, opt for screws, which are easier to drive than nails and are less likely to pop out a few years down the road. Metal beading is suitable only for outside corners—it can't be used for inside corners.
Things Needed
-
Tape measure
-
Tin snips
-
Straightedge
-
Fasteners (drywall screws or nails)
-
Drywall hammer, drill or screw gun
-
All-purpose joint compound
1. Measure and Cut
Measure the length of the corner you need to cover, using a tape measure. A standard 8-foot wall is often an inch or two short of 8 feet, owing to the floor covering. Reduce the length of the beading by about 1/2 inch to allow you to fit it comfortably without forcing or bending. Use tin snips to cut the beading to length.
2. Square the Beading on the Corner
Set the beading in place and adjust it so that it's directly over the drywall corner. Test this using a straightedge. If you notice a significant depression between the straight edge and the wall on one wall while the beading rests flush against the straightedge on the other wall, move the beading slightly to make the depressions on both walls about the same. These discrepancies occur because walls are sometimes out of square or bowed slightly, and the drywall has been bent slightly as it was installed.
3. Drive the Fasteners
Insert the nail or screw into one of the predrilled holes on the beading and drive it with a hammer or with a drill or screw gun. Make sure the fastener sinks deeply enough to make a slight depression in the drywall. Space the fasteners 6 to 12 inches apart on both walls. You may have to space them closer in some places if you need to flatten bulges in the beading. Make sure the beading in anchors close to the top and bottom ends on both flanges.
Tip
If you're attaching the beading with nails, drive them with a drywall hammer—not a regular hammer. A drywall hammer has a rounded face that automatically makes an easy-to-finish depression when the nail has been sunk all the way.
 Clark-Dietrich
Installing Paper-Backed Beading
Installing Paper-Backed Beading
You can install vinyl and paper-backed beading with adhesive or with joint compound. The adhesive comes in aerosol cans, and some brands of adhesive are colored so you can tell where you have sprayed it and where you haven't. After applying the spray, you stick the beading to the wall and scrape along the edges with a drywall blade to seat it. The bead is then ready to be mudded.
It's more common, however, to install paper-backed beading with joint compound. Joint compound holds the paper more securely, and it makes installation of the corner bead part of the taping and mudding procedure without creating an extra step. Use taping or all-purpose joint compound when installing the beading; it holds better than lightweight topping compound.
Things Needed
-
Tape measure
-
Tin snips
-
Paper-backed beading
-
Spray bottle filled with water
-
4-inch drywall knife
-
All-purpose joint compound
1. Measure and Cut
Measure the length of the outside or inside corner using a tape measure. Cut the beading to fit using tin snips, about 1/2 inch shorter than the corner; this makes it easier to fit the beading. If you leave the slight gap at the floor level, the baseboards will cover it.
2. Apply a Thick Coat of Mud
Spread the mud over the corner, using a 4-inch drywall knife.# Make sure the mud is evenly spread and that there are no voids. Be generous with the mud to ensure good bonding between the tape and the wall.
3. Lay the Beading
Moisten the paper flanges on the bead with a spray bottle filled with water to improve flexibility and adhesion. You don't need to soak the paper—just make sure it's uniformly damp. Press the beading in place in the corner, then square it, using a straightedge. Scrape along the tape with a straight 4-inch blade to seat the bead in the mud and remove the excess mud.
Finishing Up
Finishing Up
Things Needed
-
4-inch, 8-inch, and 12-inch drywall knives
-
All-purpose joint compound
-
Topping compound
Whether you use paper-faced or metal beading, you'll need at least two—and probably three—top coats of joint compound to finish off the corners after you've installed the beading. Apply each coat with a progressively wider blade to feather out the edges and blend them into the wall. A selection of blades should be part of your drywall tool kit.
Sometimes the depression between an outside corner and the wall can be deep, but don't be tempted to try to fill it completely with a single coat of mud. If you lay the mud on too thick, it takes longer to dry and it can crack. When in doubt, remember that two thin coats are better than one thick one, even if you have to wait for the mud to dry between coats.
It's best to use taping or all-purpose joint compound for the first top coat, but for subsequent coats, you may want to use topping compound. Topping compound is lighter, which makes it easier to use, and it dries faster and sands easier.