Tips For Hanging Pictures And Mirrors On Walls
Hanging framed pictures and mirrors on walls is something almost everyone has done but very few do it with confidence. Most people feel like they're just winging it and simply hope for the best: Did I use the right anchor? I think I hit a stud. Is it really level? Will it hold?! But the fact is, mastering picture hanging really is quite easy, even if it takes a little practice. With a few tips, you'll understand the basic strategy and techniques and will be able to choose the right anchor for any situation.
 Maskot/Maskot/GettyImages
Choosing Wall Anchors
Choosing Wall Anchors
Like toothpastes, there are far more types of wall anchors than you really need. Narrow your options by looking at the weight of the object you're hanging and the wall material you're hanging it on. Almost any anchor will work in drywall, but fewer are suitable for plaster walls. If your object is really heavy or if it may be subject to stress or vibration, plan on screwing directly into wall studs, or use a heavy-duty anchor like a toggle bolt.
Anchors can be grouped into a number of main types:
- Adhesive hangers: Self-adhesive strips that stick to the picture frame and the wall. Some have two halves that click together so the picture is removable. These are great for renters because the strips can be removed without damaging the wall paint (no holes!). They can be used on any smooth surface, including drywall and plaster walls, but are suitable only for lightweight items (up to about 12 pounds).
- Nail-on hooks: The go-to anchor for light- to medium-weight objects on drywall. These go anywhere and hold much better—to the wall and to the picture—than a nail by itself.
- Plaster picture hangers: A specialty version of standard nail-on hooks, these use hardened nails with ridged heads. The nails go into plaster without chipping it, and the ridged heads allow you to grip and twist the nails to pull them out—again, without chipping.
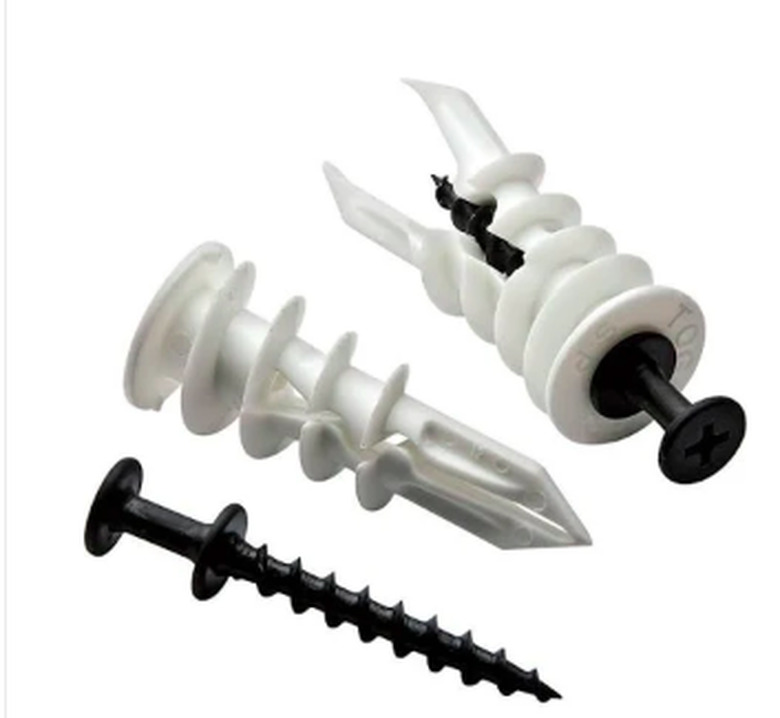
- Screw-in drywall anchors: Conical anchors with auger-like threads and a cutter point for drilling its way into drywall. These are vastly superior to the cheap plastic tap-in anchors that come with most hanging hardware. Do not try to use them in plaster, though; they'll just make a huge hole and won't hold.
 Hangman
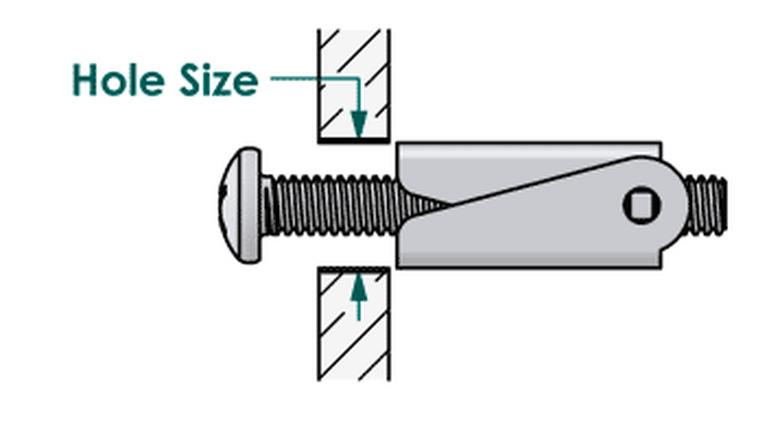
- Toggle bolts: The most heavy-duty anchors for drywall or plaster. Traditional types have spring-loaded wings threaded onto a bolt. When you close the wings and push them into the wall hole, they snap open behind the wall surface. Some newer types have a metal bar that you can rotate behind the wall; these are very strong installations, like grab bars. Toggles work in drywall and plaster, but make sure they are long enough to reach all the way through the plaster and lath, which can be 1 1/8 inch thick or thicker. Toggles must be tightened to the wall, along with the hanging hardware. If you need the anchor bolt to extend from the wall so you can hook onto it, for example, use a molly bolt (below) instead.
- Molly bolts: For similar applications to toggle bolts, in plaster and drywall. A bolt threads into a sleeve that you drive into the wall or insert into a hole. Tightening the bolt pulls the sleeve so it spreads open against the backside of the wall. These are not quite as strong as toggles, but you can remove the bolt after the anchor is in place (something you can't do with toggles).
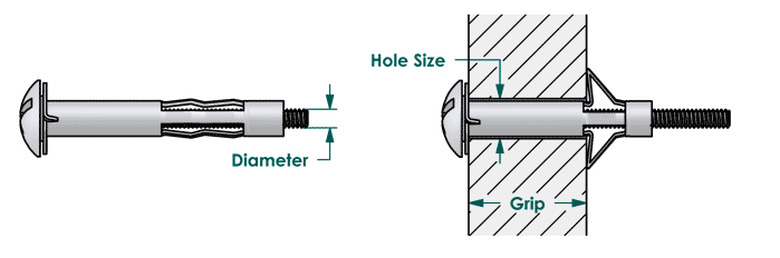 Bolt Depot
Tip
If it will help to know the actual weight of your picture or mirror, get on a scale and check your body weight. Then, pick up the picture and hold it close to your chest, and weigh yourself again. Subtract your body weight from the second reading to find the picture's weight.
How to Mark Wall Anchor Locations
How to Mark Wall Anchor Locations
Things Needed
-
Tape measure
-
Pencil
-
Level
-
Stud finder
-
Rag
-
Isopropyl alcohol
-
Drill-driver and screwdriver bit
-
Drill bit
-
Wall anchors
-
Picture hangers
1. Mark the Wall's Center and Picture Height
Marking the center of the wall space gives you a reference point for the other measurements. If you're not centering the picture (or mirror) on the wall, simply mark the location of the picture's center at the desired side-to-side location. The general recommendation for picture height is to place the top of the frame 57 to 60 inches above the floor.
- Measure the total width of the wall area, and divide this measurement by 2 to find the center.
- Make a mark at the wall's center.
- Mark the wall at the desired the height for the top of the picture. If necessary, remark the center to make a cross-hair with the height mark.
Tip
If you're hanging the picture from one or more wall studs, use a stud finder and a pencil to mark both edges of each stud in the installation area. You may need to adjust the picture location to line up with the studs.
 Stanley Tools
2. Measure the Picture Frame
The most accurate way to determine the proper anchor points on the wall is to measure directly to the hanger(s) on the back of the picture. If the picture is hung with wire or a single central hanger, you need to measure only the height of the hanger. If the picture has two hangers (one on each side), measure their height as well as the distance between the hangers.
- Measure the width of the picture frame, and divide by 2. Use this dimension to mark the center of the frame (along the top) for easy reference.
- Measure down from the top of the frame to the hanger(s). If the hanger is a wire, pull the wire taut toward the top of the frame before measuring to simulate how the picture will hang from the wall.
- Measure the distance between the hangers, if there is more than one. Divide this dimension by 2. Be sure to measure to the centers of the hangers, where the anchor will meet the hanger.
3. Mark the Anchor Locations
Use the dimensions from step 2 to mark the anchor locations on the wall.
- Measure down from the cross-hair on the wall and make a mark, using the height measurement for the picture hanger(s). This is where you will install an anchor for a single central hanger.
- Measure straight across from the new mark—if there are two hangers—using the dimension that equals half the distance between the hangers.
- Measure straight across from the first hanger and make a mark for the second hanger, using the full measured distance between hangers.
- Check with a level to make sure the two marks are level with each other; re-mark for the second hanger, as needed.
How to Use Adhesive Hangers
1. Mark the Wall
Mark the location of the top of the picture (or mirror) frame on the wall. Draw a short level line to represent the top of the frame, using a level.
2. Clean the Wall
Clean the wall surface where the picture will go, using a clean rag and isopropyl alcohol. Do not use standard cleaning products, which may leave a residue that can inhibit bonding.
3. Stick the Hangers to the Picture
Click the two parts of each hanger together. Remove the non-stick backing from one side of each hanger pair, then stick the hanger to the backside of the picture frame. If the hangers are one-part, simply stick each hanger to the frame.
4. Stick the Picture to the Wall
Remove the non-stick backing from the exposed half of each hanger. Hold the picture at an angle and position the top edge of the frame against the wall so it is aligned with the level line. Carefully rotate the frame down and against the wall so the hangers stick to the wall surface. Press the frame against the wall firmly for 30 seconds. For one-part hangers, the job is done.
5. Bond the Hangers
Remove the picture from the wall by pulling it away at the bottom and tipping it up, pivoting on the top of the frame. Press each hanger half onto the wall and onto the frame in three places (top, center and bottom), holding for 30 seconds in each position. Wait for 1 hour.
6. Hang the Picture
Reposition the picture onto the wall and click the hanger halves together to complete the installation.
How to Use Screw-In Drywall Anchors
1. Drive the Anchor
Maintain firm pressure on the anchor while driving it. Without adequate pressure, the anchor threads can act as a drill bit (rather than a screw) and may not go in cleanly.
- Fit the anchor onto the tip of a screwdriver bit in a drill-driver.
- Hold the drill level and push the tip of the anchor into the drywall to puncture through the paint and the drywall's face paper.
- Run the drill slowly while pushing the anchor firmly into the wall. The anchor's threads will quickly grip into the core of the drywall. Drive the anchor until it is flush with the wall surface.
2. Add the Anchor Screw or Hanger
Once the anchor is in place, you can screw into its center anytime. It's best to use the screws that come with the anchor to ensure a good fit, but other screws will also work, provided they thread into the anchor and hold firmly.
Be aware that screws driven into anchors often can be removed but not always. Sometimes the anchor itself will back out when you try to remove the screw.
How to Use Toggle Bolts
How to Use Toggle Bolts
1. Drill the Hole
Toggle bolts need relatively large holes to fit the folded-up wings of the anchor.
- Select a drill bit that is slightly larger in diameter than the widest part of the toggle wings (when the wings are folded up).
- Drill the hole all the way through the wall surface (drywall or plaster). If the wall is plaster, you likely will drill through wood lath behind the plaster finish.
2. Insert the Toggle
The hanging hardware must be installed along with the toggle bolt and tightened to the wall.
- Insert the toggle bolt through the hanging hardware, then thread the bolt into the wings so that the wings fold up against the bolt shank. Leave the wings near the end of the bolt so they will reach as far as possible into the wall cavity.
- Fold up the wings and push them into the wall hole.
- Push the bolt (with hanger) all the way to the wall surface to make sure the wings open up inside the wall cavity.
3. Tighten the Bolt
Pull the hanger and bolt head away toward you, away from the wall, so the wings are forced against the backside of the wall surface. Maintain this pressure while twisting the bolt clockwise by hand or with a screwdriver or drill. The hanger and bolt head will gradually pull toward the wall as you turn. Keep turning until the hanger is tight to the wall.