Your Garage Needs This DIY Copper Pipe Tool Organizer

If your garage situation is in need of a serious organizational overhaul, but you just don't do pegboards, we have the ideal alternative for you. Copper pipes are our jam (ICYMI see here and here), and they're the chicest answer to untidy garage woes. Easy on the wallet and the eyes, a copper pipe rail storage system can be installed by even the most novice DIYer, and it maximizes your wall storage as efficiently as it does stylishly.
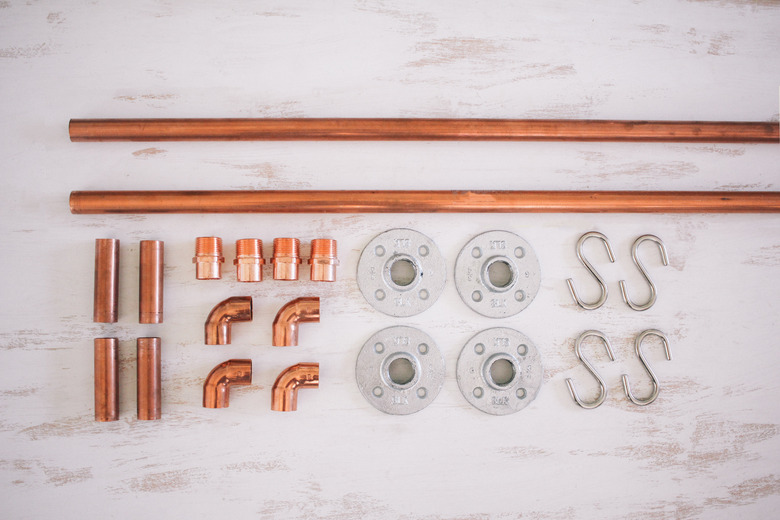
Things You'll Need
- 3/4-inch-by-10-foot copper pipe, ( 1 )
- 3/4-inch galvanized iron floor flanges, ( 4 )
- 3-inch S-hooks
- 3/4-inch-by-3/4-inch 90-degree copper elbow fittings, ( 4 )
- 3/4-inch copper pipe male adapters, ( 4 )
- Tape measure
- Copper pipe cutter
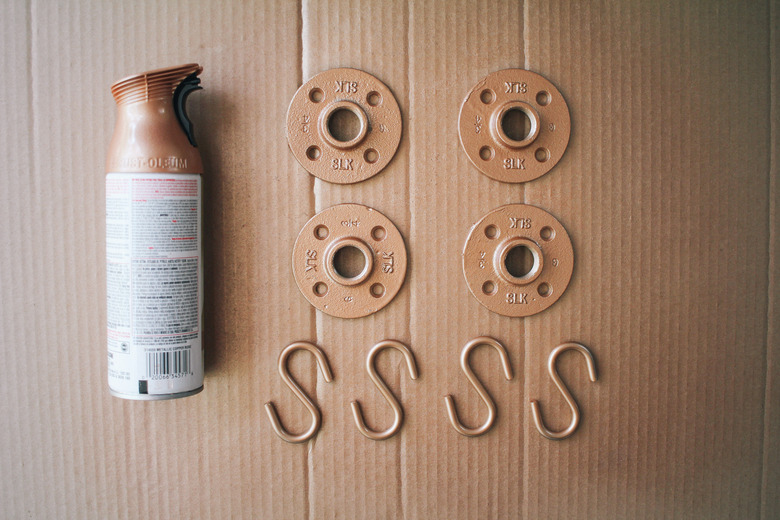
- Copper spray paint
- Power drill
- Wood screws, ( 16 )
- Optional: Garage utility hooks
 Trisha Sprouse
Step 1
Step 1
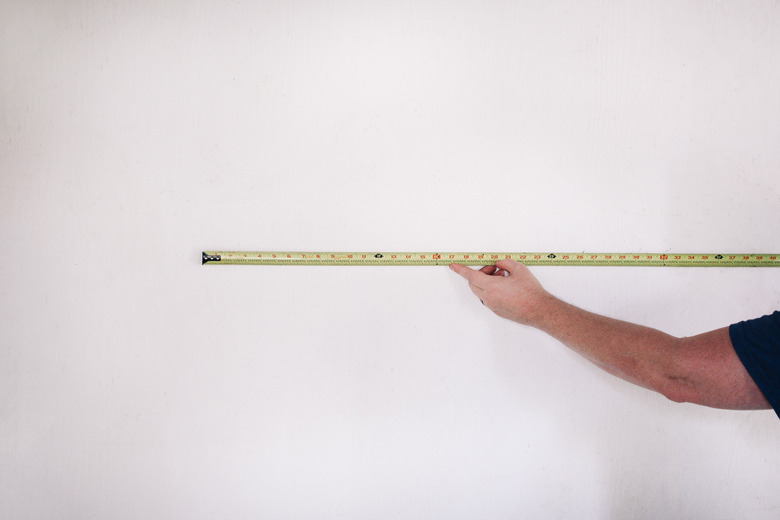
Measure the wall space inside your garage to determine how long you'd like your pipe organizers to be. For reference, we chose a length of four feet for our pipes.
 Trisha Sprouse
Step 2
Step 2
Cut the copper pipe into two segments according to the desired length. We cut our 10-foot pipe into two 4-foot segments.
 Trisha Sprouse
With the remaining two feet of pipe, we cut four small pipes that each measured three inches. You'll need these small pipes to connect the elbow fittings to the male adapters.
 Trisha Sprouse
Tip: To avoid bending the copper pipe while you're cutting it, tighten the pipe cutter slightly around the pipe, twist the pipe, and then tighten it a little more. Continue slightly tightening and twisting little by little until the pipe cuts off cleanly.
Step 3
Step 3
For a cohesive look, spray paint the floor flanges and S-hooks with copper spray paint, and allow the paint to dry. You probably already know the drill, but be sure to protect your work surface, and paint in a well-ventilated area.
 Trisha Sprouse
Step 4
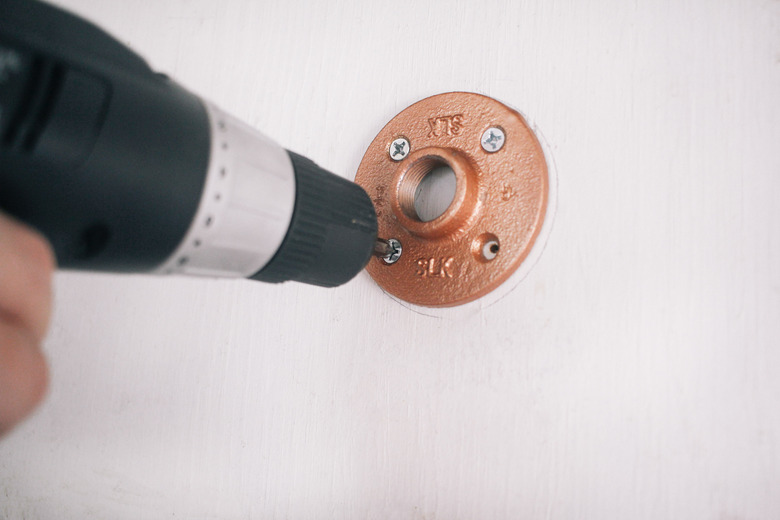
Step 4
Use the power drill to attach the first flange into the desired position on your garage wall. (Pssst: It helps to drill pilot holes first before drilling screws into the holes of the flange.)
 Trisha Sprouse
Step 5
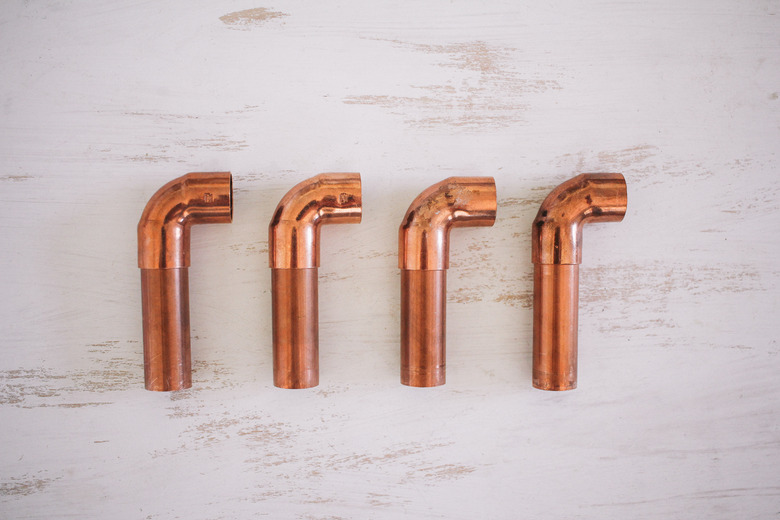
Step 5
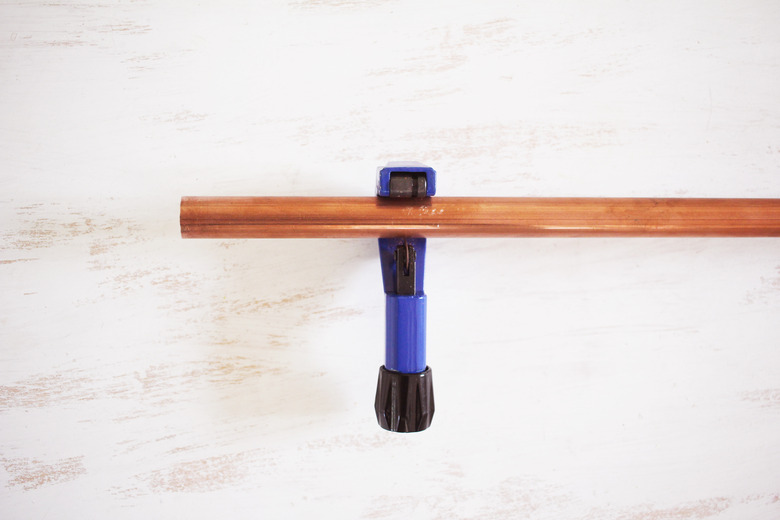
Connect each of the small 3-inch pipes to a 90-degree elbow fitting.
 Trisha Sprouse
Then connect a male adapter to the opposite end of each pipe.
 Trisha Sprouse
Step 6
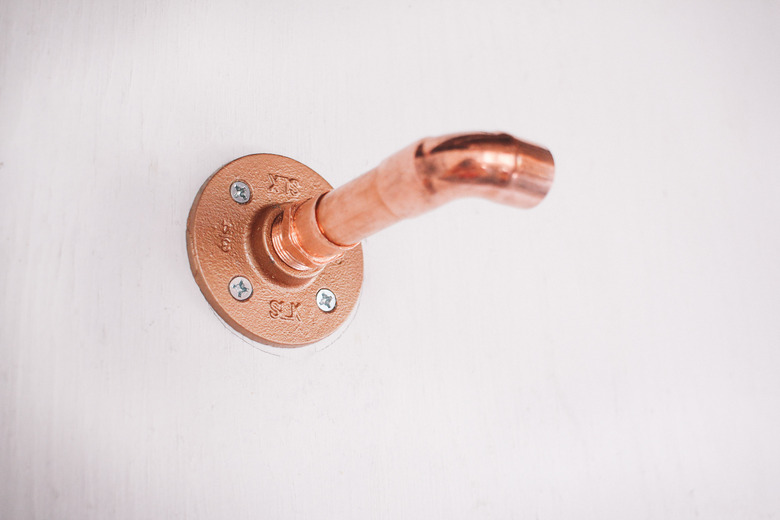
Step 6
Screw one of the male adapters into the flange that's mounted on the wall. Be sure to position the 90-degree elbow at the end of the pipe so that it's facing inward.
 Trisha Sprouse
Step 7
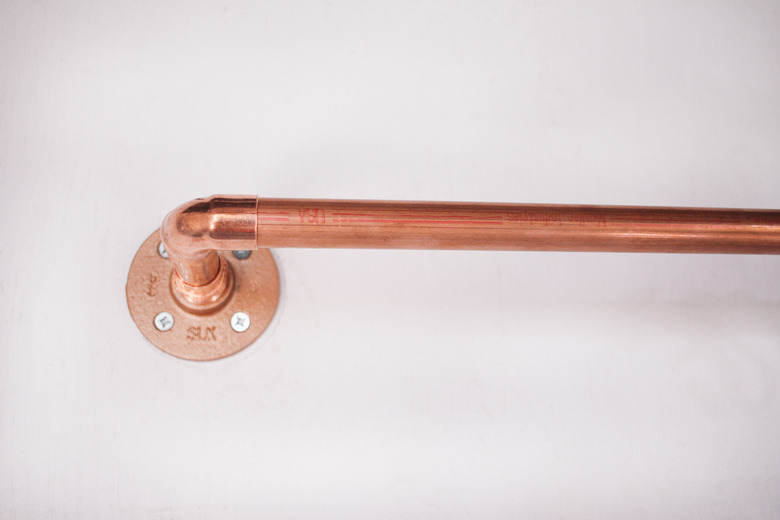
Step 7
Insert one of the 4-foot pipes horizontally into the 90-degree elbow fitting.
 Trisha Sprouse
Step 8
Step 8
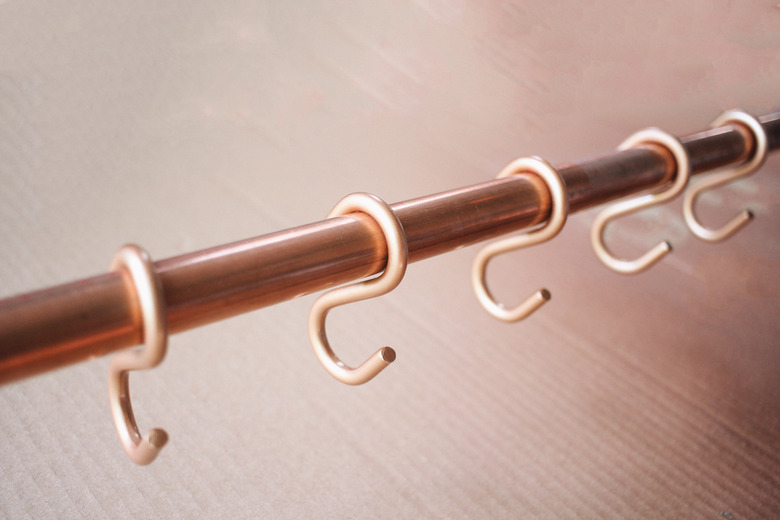
Slide the desired amount of S-hooks onto the pipe.
 Trisha Sprouse
Step 9
Step 9
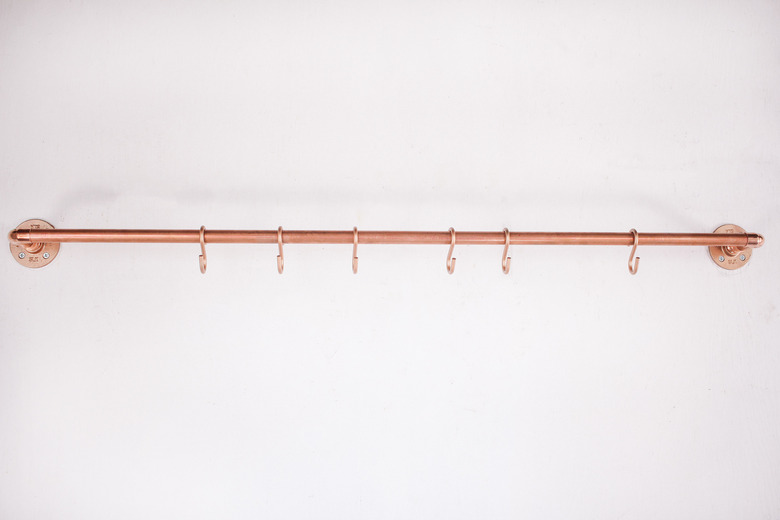
Attach another 90-degree elbow fitting at the opposite end of the 4-foot pipe and screw the male adapter into a floor flange. Drill the floor flange to the wall, making sure the pipe is level and straight.
 Trisha Sprouse
Step 10
Step 10
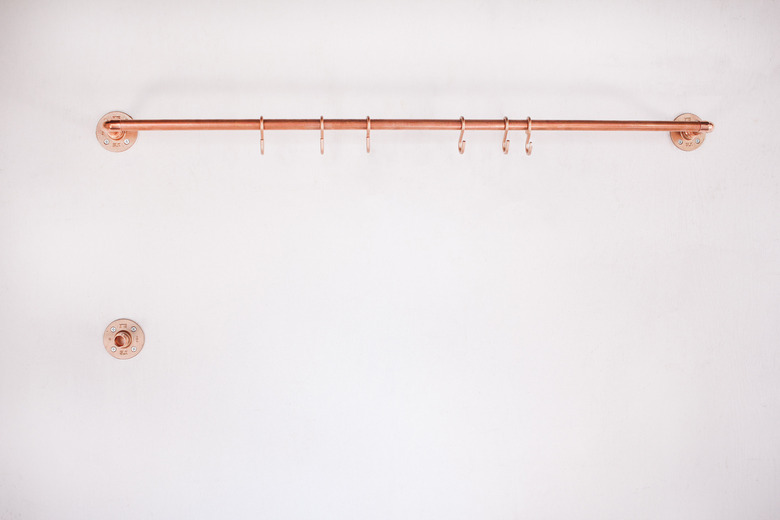
Use one of the flanges on the first pipe as a guide to align the flange for the second pipe directly below it. Keep in mind what kind of items you plan to hang on the organizer, as you'll want to space the pipes accordingly to allow room for items to hang freely.
 Trisha Sprouse
Step 11
Step 11
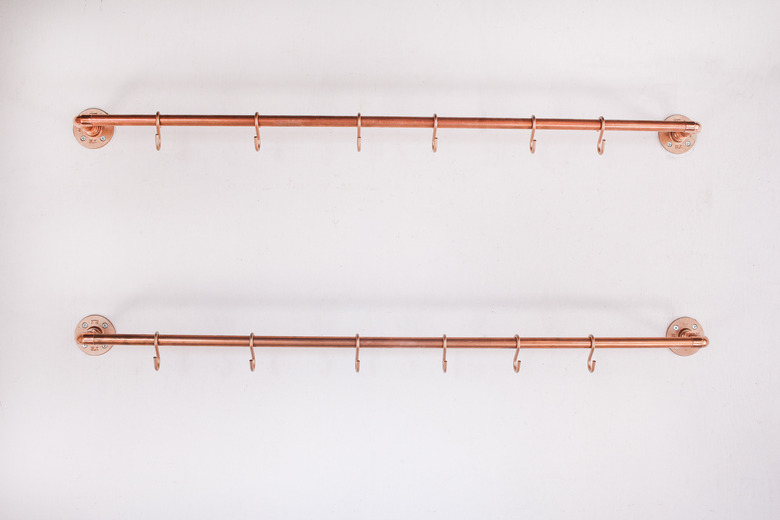
Attach the second pipe in the same manner as you did the first, making sure to slide the S-hooks on before mounting the pipe on the wall.
 Trisha Sprouse
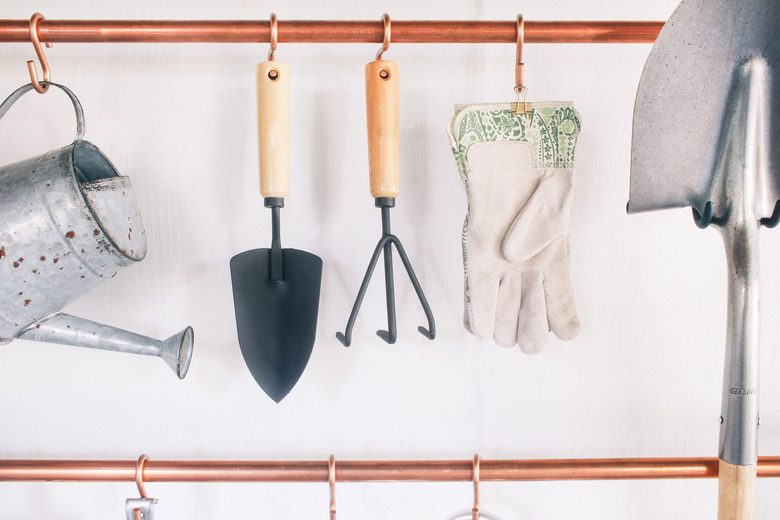
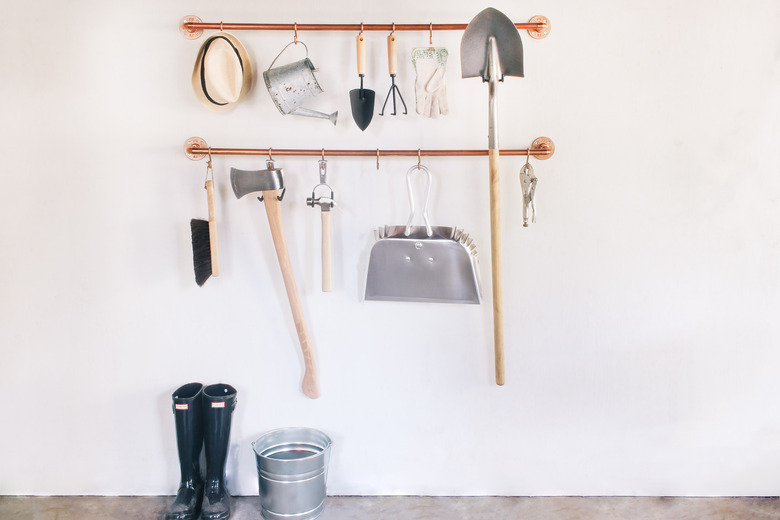
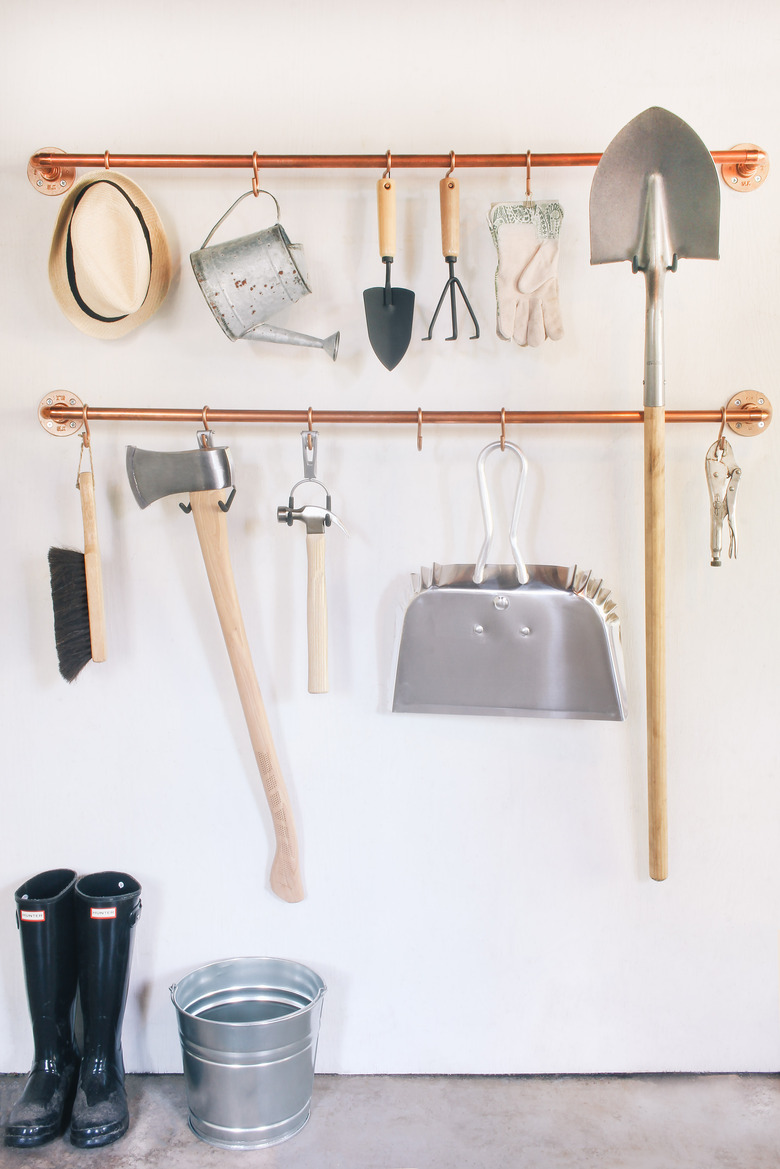
Hang your items from the S-hooks. If you have any items that don't fit perfectly on the S-hooks, you can attach them using garage utility hooks.
 Trisha Sprouse
Or you can use binder clips to hang flat items, like gloves, for example. Wire baskets would also work, if you need to store items that don't have hooks.
 Trisha Sprouse
Keep in mind that copper is a softer metal, so you probably won't want to hang anything super-duper heavy on it. But for most run-of-the-mill home and yard tools, it'll do the trick.
 Trisha Sprouse
Hope you enjoy makeovers because your garage just got a seriously stylish one.
 Trisha Sprouse