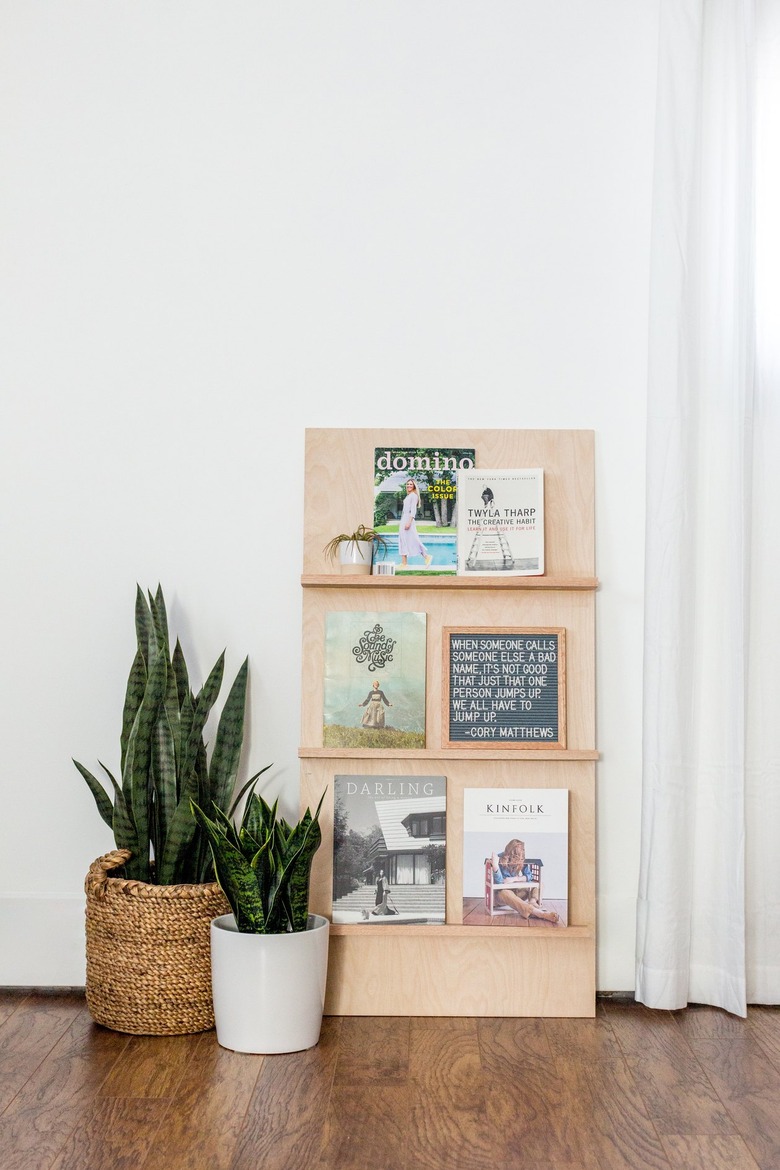
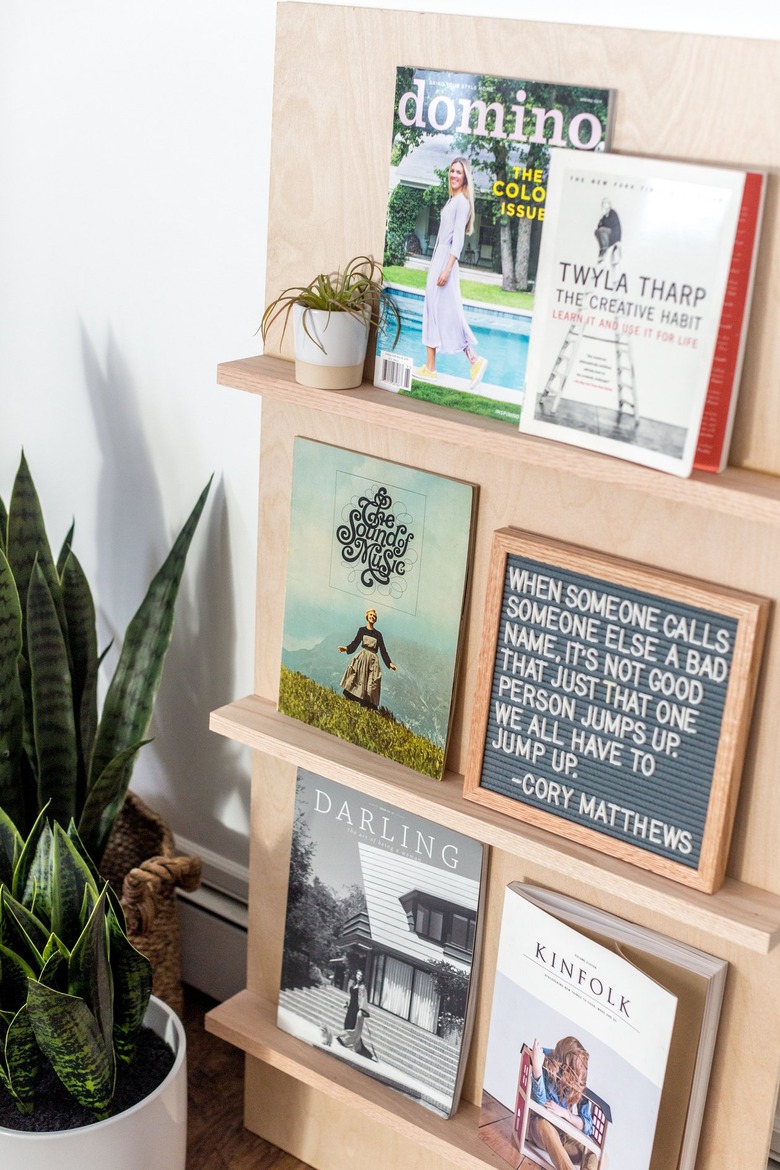
Free-Standing Plywood Magazine Rack Tutorial
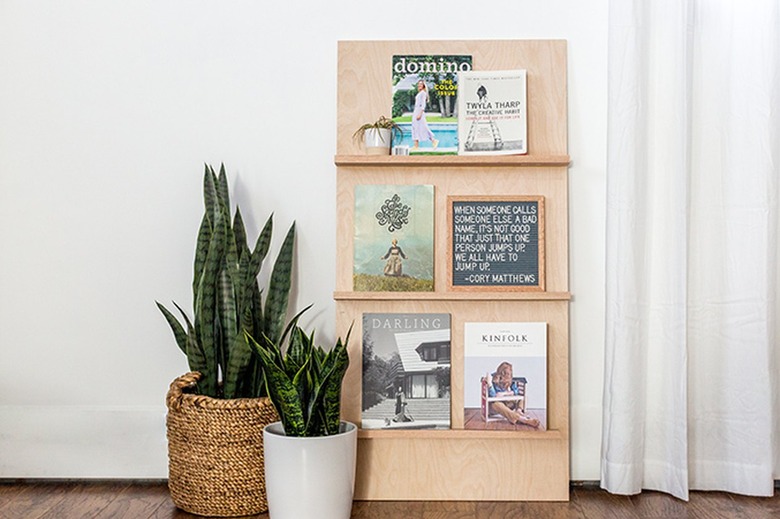
When you're searching design sites for minimalist home decor ideas, try looking to your favorite boutiques for inspiration as well. We've always been enamored with free-standing plywood displays at local design shops and bookstores, so we decided to try our hand at making a magazine rack using nothing but hardware store basics. Not only is the result beautiful in its simplicity, it's easy to make, too.
Things Needed
-
Plywood sheet measuring 2 feet by 4 feet, ½ inch thick ( 1 )
-
Oak boards, measuring 2 feet by 3 inches, 1 inch thick ( 3 )
-
Square
-
Level
-
Pencil
-
Cordless power drill and driver
-
Drill bit
-
Wood glue
-
Clamps
-
Wet paper towel or rag
-
2-inch wood screws ( 9 )
 Carrie Waller
Step 1
Step 1
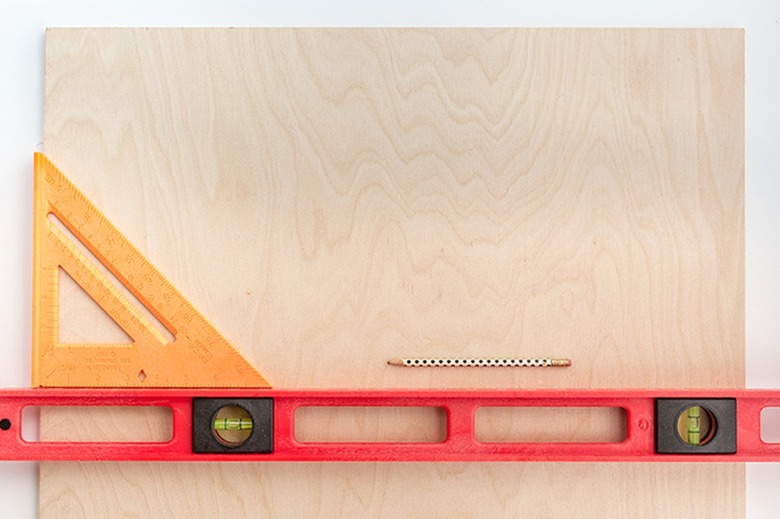
Decide how far apart you want your shelves to be on the board. We laid our shelves out 14 inches apart, which left plenty of room for oversized magazines to be displayed. Measure and mark where each of the three shelves will go using a level and square; make your lines as straight as possible.
 Carrie Waller for Hunker
Step 2
Step 2
Outfit your power drill with a bit to match the wood screws you plan to use, and then pre-drill three holes for each of the shelves to screw into — one in the center of the wood sheet, and two others roughly 6 inches from either end. Make sure to drill just below the line you marked, and push all the way through the wood to the other side.
 Carrie Waller for Hunker
Step 3
Step 3
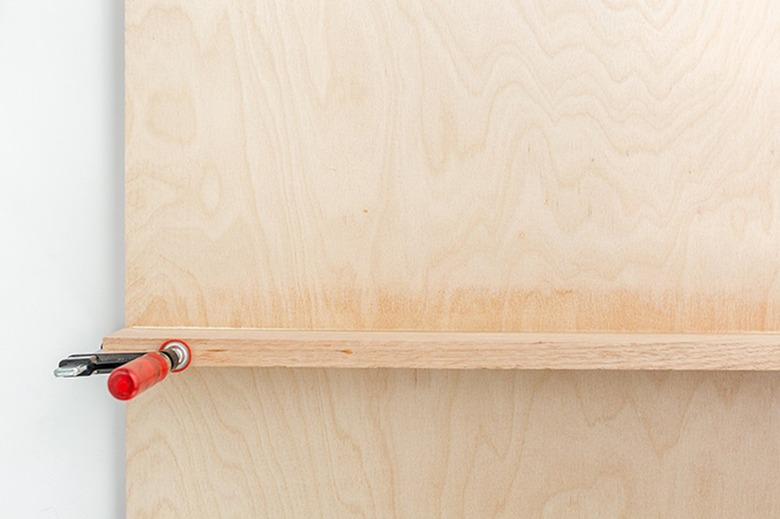
Squeeze a line of wood glue on the back edge of your first oak board, and line it up along the line you measured and marked in Step 1. Situate and tighten clamps on either end of the oak board to hold it in place on the face of the plywood sheet. Use a wet paper towel or rag to wipe off any excess wood glue that might have squeezed out from under the board when you clamped it down.
 Carrie Waller for Hunker
Step 4
Step 4
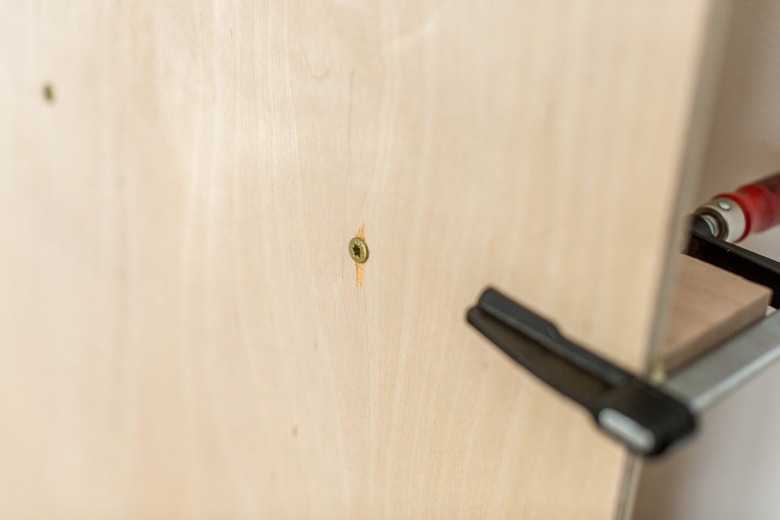
Lift the plywood board up off your work surface and gently lean it against a wall or solid surface with the back facing out toward you. Using the pre-drilled holes you made in the plywood in Step 2 as a guide, drill through the holes again using the same power drill and bit. You'll be drilling through to the shelves. Sink wood screws through the pre-drilled holes from behind, and remove the clamps.
 Carrie Waller for Hunker
Step 5
Step 5
Repeat steps 2 through 4 to attach all three shelves, and allow the finished unit to dry for 24 hours before handling.
 Carrie Waller for Hunker
The following day you may place your magazines and other items, such as art and books, on the rack for a layered minimalist look.
 Carrie Waller for Hunker