How To Install Paneling To Drywall
We may receive a commission on purchases made from links.
Installing wood paneling sheets over drywall can drastically change the look, feel, and design of any room, but how do you know which wall paneling ideas and wall paneling sheets will work best on your walls? This comprehensive guide will help you through the entire installation process.
Wall Paneling Materials
Wall Paneling Materials
As with all home renovation projects, a little preparation always goes a long way. Before you begin construction, research wall paneling ideas and select the wood paneling sheets you'd like to use.
There are many types of paneling that range in different levels of installation difficulty. The least expensive and easiest to install are 3-D printed panels, which come prefinished and can be cut to length with an Exacto knife. Similarly, horizontal barn-style paneling also comes prefinished but requires a moderate skill level to assemble and install.
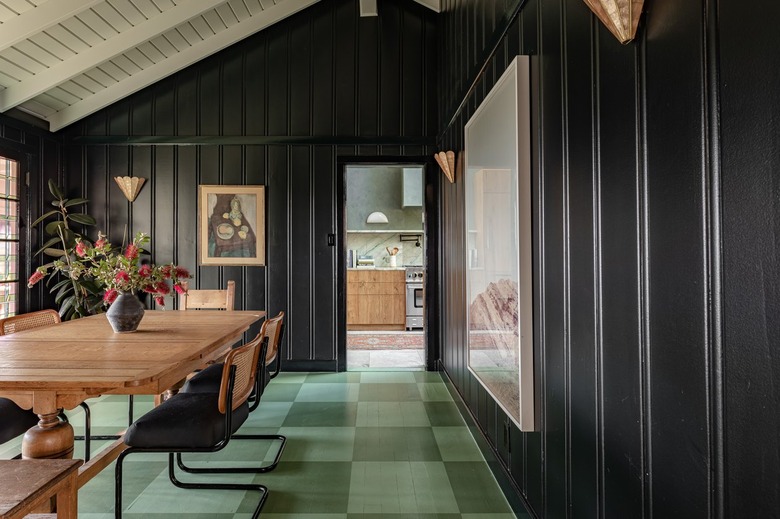
Another option is vertical groove patterned walls, like beadboard. These panels can either be installed on the entire length of any given wall or halfway capped by a chair rail.
Selecting Your Panels
Selecting Your Panels
When selecting your panels, keep in mind that you will be installing them around doors and windows. Therefore, you want to select a panel that will match or sit lower than the thickness on your door frames and window casings. If the panel is thicker than the frames and casings, the panels will protrude, and the difference may be noticeable.
How to Install Paneling on Drywall
1. Prepare your walls
Once you have selected the wall paneling materials you'd like to use, begin preparing your walls. First, remove all outlets, wall plates, hooks, nails, baseboards, and crown molding from the walls. Then, sand down any protrusions on your walls so that the panels lay flat.
2. Check to see if your wall is plumb
If your wall is not plumb (or perfectly straight), install furring strips in a gridlike pattern, adding shims when necessary to achieve plumbness. Begin at the top and add vertical strips every 16 inches. Then, add a horizontal strip and continue adding horizontal strips every 4 feet.
3. Condition the wood panels
Next, you'll need to make sure the wood panels acclimatize to the room. This will prevent any shrinking or expansion of the wood before installation. Place the panels flat with shims between the panels so that air can flow through them. If you're installing panels in a basement or anywhere below ground, wait 48 hours before installation. Otherwise, wait 24 hours.
Tip
If you're using barn siding or any other panel where the joints may show, then you'll want to paint the background wall a similar or darker color than your panels. This will help camouflage the gap that occurs when the panels contract and expand as humidity levels change.
4. Lay out the panels
To install the panels, you'll need to begin at the top corner of whichever part of the room you see first upon entering. Be sure to lay out the panels and check to make sure they are level before installing. All vertical and horizontal seams and grooves should appear straight. Also, cut out any electrical outlets and light switches as you place the panels.
5. Install the paneling
Using a caulking gun, apply panel adhesive to the back of the panels in a zig-zag pattern, making sure to spread the adhesive evenly. Then, place a panel on the wall and press into it. Release your pressure and pull back on the panel. Push it into the wall one last time. This will help set the adhesive.
6. Smooth everything out and apply finishing touches
Use a rubber roller to smooth out all of the adhesive and secure the panels in place with finish nails at the top and bottom of the walls. You can use wood putty to fill in any nail holes or cover them with crown molding and baseboards. Make sure to leave 1/4-inch gap at the top to allow for any seasonal wood expansion.