How To Decorate Windows With Spray Snow
Decorating windows with spray snow is one way to ensure the look of a winter wonderland regardless of the actual weather. Aerosol spray snow works a bit like spray paint in that your creativity is the only limitation to the designs you can create with it. Stencils make it easier to create large snowflakes, snowmen, or other winter-themed decorations. Read the label on the spray snow to ensure you're buying a type designed for use on windows, as not all spray snow products are the same.
Choosing a Spray Snow
Choosing a Spray Snow
Spray-on products that create a snow effect range from dimensional, clumpy white material to emulate the look of snow on trees through frosty, powdery translucent snow or even more translucent spray material that looks like ice crystals when used on glass. Use the dimensional spray snow for thick, opaque snow creations on your windows. Just be sure to purchase a water-based version rather than plastic-based, as the plastic-based one is meant to be more permanent, such as when adding snow to a holiday tabletop scene. The product label generally states where to use the product and how to clean it up, so read the label to make sure you buy the temporary window spray snow.
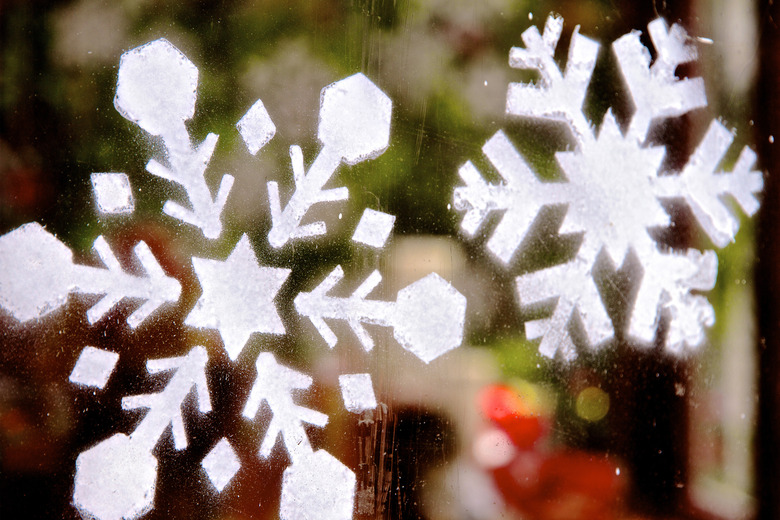
If you want light to shine through your window snow creations, use a product that creates a frosty snow effect or an ice crystal effect instead. These are thinner than the spray snow used on artificial tree branches, and they look more like frost. Though technically not the same as artificial snow, they tend to look better if you're creating numerous stenciled designs on the windows.
Using Spray Snow
Using Spray Snow
Clean the inside of your window with your favorite window-cleaning product for a nicer-looking completed design. Though some spray snow can be used on the outside of a window, the colder it is outside, the longer it takes to dry. Shake the can for a minute or so as directed on the label. Spray a small test amount on a piece of scrap cardboard or even wax paper to get an idea of both how it sprays and how it looks. Once you're familiar with how it works, it's easier to plot out a design for your snowy creation.
If using stencils, tape them onto the window by applying painter's tape to the perimeter of each stencil. If the stencil features any words, keep in mind that the words will look backward when viewed either from indoors or from outside depending on how you position the stencil. Move curtains and any furniture out of the way and if you're concerned about the faux snow dripping onto the windowsill, cover the sill with scrap paper or plastic film until you're finished spraying.
Hold the can about 12 inches away from the window and spray in short bursts as you create your design or fill in the stencils. If you're using the thick, clumpy snow spray, hold the can a bit farther away if you don't want thick blobs of snow. No matter which product you use, spray a consistent amount of snowy material in each area so it looks the same everywhere you spray. Allow the spray to dry as recommended on the can label before removing the stencils or before touching the spray snow. Clean up after the holiday season by brushing off or vacuuming clumpy snow and by washing off any type of snow product with your usual window-cleaning products.