How To Thread Galvanized Pipe
We may receive a commission on purchases made from links.
Whether you're working on a plumbing project or using galvanized pipe to build some type of framework, the job is a lot easier with threaded pipes and couplings. Sometimes, you need custom lengths of pipe, however, and that can mean running back and forth to the hardware store to have the pipe cut and then threaded. You can avoid this issue and save some time if you purchase your own pipe-threading kit. These kits are really easy to use and handy to have around.
Pipe-Threading Kit Basics
Pipe-Threading Kit Basics
A pipe-threading kit is a lot like a socket kit. It contains a ratcheting head that turns the pipe-threading die as you work and dies of several different sizes. The number stamped on the side of each die corresponds to the outer diameter of the pipe. If you want to cut a pipe with a 1/2-inch exterior diameter, you would choose the die marked 1/2.
For household projects, one of these manual die kits will work just fine. There's no need to spend more money on a power tool. A set of dies that range in size from 3/8 inch to 2 inches is a good choice for home use and will accomplish what you need it to do.
Things Needed
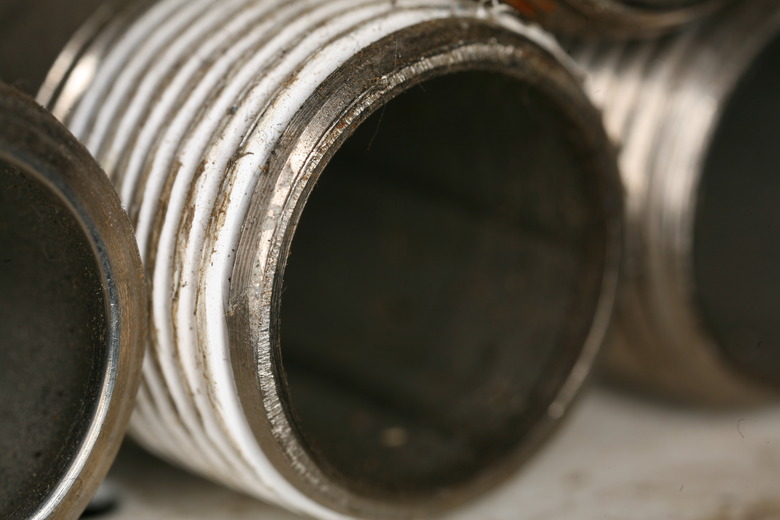
How to Thread Galvanized Pipe
1. Prepare Your Workspace
Threading a pipe is easy, but you do need to use the proper die size. If you're not sure how big your pipe is, measure from exterior to exterior to determine what size die you need. As long as you remember that it's the outside diameter you need, you won't have any issues.
- Place your pipe in a vise to hold it steady while you work.
- Position a bucket or old towel under the end of the pipe to catch your mess. Cutting oil and metal shavings will drop from the pipe while you work and are easier to clean up when they are contained.
- Choose the correct die and place it in the stock at the end of the ratcheting die handle. Most dies simply push into place on the end of the handle.
2. Start the Die
The trick to successfully starting the threading process is to apply pressure to the die when you first begin threading the pipe. All you need to do is put the die over the pipe and push on the end facing you as you start to use the threading tool. This isn't hard to do, but failing to apply a bit of pressure to the end of the die will allow it to spin without cutting into the pipe.
- Drizzle some cutting oil onto the end of the pipe.
- Slide the die over the end of the pipe.
- Push on the die, leaning into it a bit to apply some pressure to the end of the pipe. While pushing on the die, pull up the ratchet handle. You will feel the die bite into the pipe and begin to cut.
- Release the pressure you've been applying to the die.
3. Thread the Pipe
After the die has started cutting the thread, you'll want to continue threading the pipe. As you work, however, little shavings of metal will be cut into the threads. These are called chips, and you need to remove them every so often as you work. Known as breaking the chips, this process simply involves reversing the ratcheting action on your die handle for a turn.
- Continue turning the die handle as you would a ratchet and socket, pushing the handle backward when you run out of room.
- Stop every three or four turns and apply more cutting oil to the pipe. Squeeze the oil right down into the die to keep both it and the pipe well lubricated.
- Flip the switch or turn the knob to reverse the ratcheting direction on your die handle. Give the handle 1/2 or 1/4 of a turn in this new direction to break the chips.
- Return the ratcheting action to its original direction and continue turning the handle. Repeat the process of turning the handle, oiling the die, and reversing the ratchet for a few turns until the end of your pipe sticks out two or three threads past the teeth on the die.
- Flip the ratchet in the backward direction once again and keep turning the handle until the die comes off the pipe.
- Wipe the cutting oil off the pipe and off your die before putting it back into the pipe-threading kit for storage.