

Use PVC Pipes For A Hack You'll Love If You're Short On Closet Space
We may receive a commission on purchases made from links.
Have too many clothes and not enough space in your wardrobe? Declutter it and turn to small closet organization ideas to bring order to the chaos. However, if that doesn't help much and you still struggle to close the door, you may turn to the usual fixes, like buying a freestanding clothing rack. Sadly, they'll eat up your budget and rarely fit in your room unless you shoulder the costs for creating a custom closet. PVC pipes (yes, the same humble hardware-store staple used in plumbing) can solve these problems with a nifty hack. All you have to do is cut, connect, and assemble them into a DIY clothes rack.
It will not only fit in your exact space but also cost a fraction of what you'd spend at a furniture store for a fancy rack that's not all that durable. Plus, it won't take a lot of your time once you have the pipes cut and prepped to your exact specifications. Normally, you'll need three to four full-length PVC pipes (you can cut them to size later), ¾-inch or 1-inch PVC pipe, four 90-degree elbow joints, two Tee connectors for PVC pipes, two PVC end caps, a PVC pipe cutter or hacksaw, a measuring tape, and a marker. Keep superglue handy as well if you want a permanent build. And though optional, a can of spray paint or some leftover contact paper can give your cheap clothing rack a polished appearance that will blend right in with your other décor.
Cutting the PVC pipes to size before building a clothes rack
You can choose between two types of PVC supplies for this project. The first option uses furniture-grade PVC fittings, which don't have stamps, barcodes, and such and have smooth, rounded edges for a cleaner look. The second option uses standard PVC fittings, with pipe lengths you can adjust to suit your room and the clothes you'll hang.
Once you've settled on a fitting type, prep your chosen pipes. To start with, cut standard 1-inch diameter full-length PVC pipe into eight pieces: two long (about 30 inches) horizontal pieces (one for the top hanging rail and one for a mid-height support bar), four equal-length pieces (8 inches should do it) for the feet, and two vertical pieces (they can be as long or as short you want your clothes rack to be).
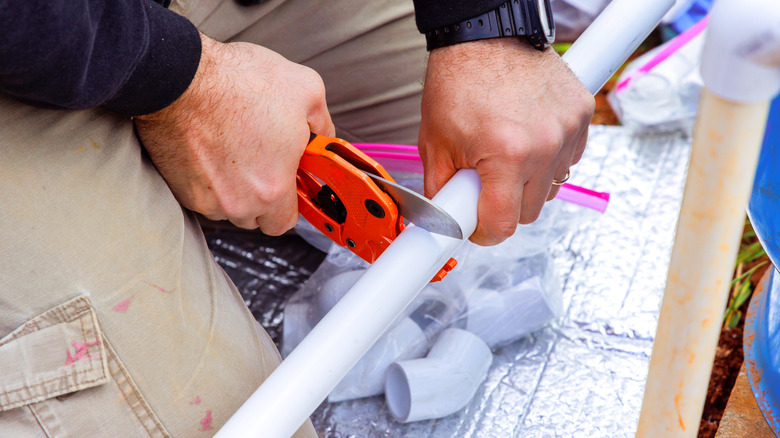
Next, settle on your footprint dimensions. If you can't spare the full 30 inches, aim for a base footprint of 18 to 24 inches to ensure stability and prevent the rack from tipping over under heavy coats. Mark all required pipe lengths using a tape measure and marker. Cut the pipe segments using a ratchet-style PVC pipe cutter (like the Bates PVC Pipe Cutter) or a hacksaw. Sand the edges down with sandpaper to ensure your clothes don't snag on the ends. But if you're not that good with saws and can't make clean cuts or are buying new pipes altogether, you could go to your nearest hardware store and have them cut the pipes directly to your desired measurements upon purchase (this service is generally free).
How to turn your cut PVC pipes into a clothing rack

Before you start building, decide whether you want to paint. PVC isn't much to look at unfinished, but a coat of spray paint can make the rack blend into your closet rather than stick out. If the answer is yes, put on solvent-resistant gloves, then sand the outer surface of each cut pipe with 220-grit sandpaper in a cross-hatch pattern and wipe with acetone to clear off the residual dust. Now, take your pipes outside and give them a coat or two of spray paint in any color you like to spruce up your minimalist clothing stand. Peel-and-stick wallpaper will work, too.
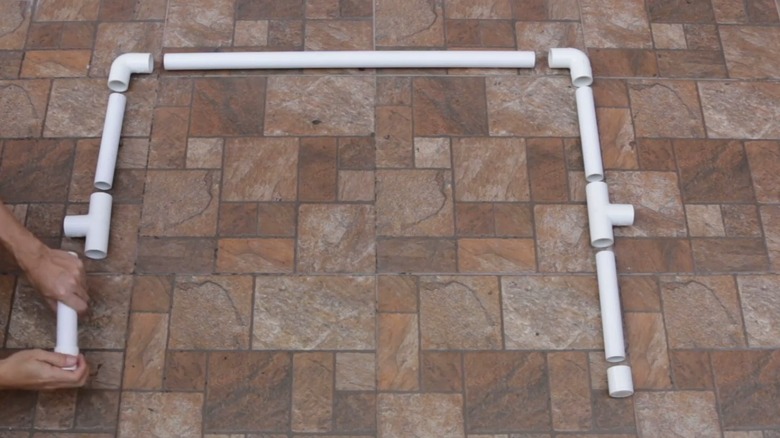
Once the pieces are cured, start assembling the base of your rack. Place two elbow joints on either side of one long horizontal piece. Then, connect two 8-inch pipes on either side before bringing out your Tee connectors (make sure the middle socket faces upward). Follow this up another two 8 inches pipes and complete the set up with two end caps.
Finally, start on the vertical part of your rack. Put another horizontal piece in the middle, flank it on either side with elbow joints, then insert two long vertical pipes (one on each side). Once all the pieces are in place, decide whether you want your rack to be flexible or a permanent accessory in your home. If you choose the former, pushing all joints firmly into their fittings by hand will be enough. You can twist them open whenever you want to transport your rack or change its height or width. Otherwise, superglue (solvent cement will work as well) all joint connections if you plan to keep it permanently assembled in one spot.