

Make Your Boring Floor Lamp Look Like A Giant Flower With This Easy DIY

We may receive a commission on purchases made from links.
Floor lamps do more than just brighten up a dark corner. When it comes to the best types of lamps for bringing height and drama into a space, they're hard to beat. Unfortunately, most floor lamps that make a big statement come with an evenbigger price tag. But one clever crafter figured out a way to completely transform a relatively affordable RÖDFLIK Floor Lamp from IKEA into a giant floral showstopper using thick foil, spray paint, heavy-duty adhesive, and plenty of imagination.
DIY home decor expert Ashley Wilson started this easy DIY by cutting large petal and leaf shapes out of a thick foil. Skip the aluminum roll in your kitchen drawer since it's likely to tear easily. Instead, opt for a product like the $14 Hipytoyi Aluminum Embossing Foil Roll from Amazon. You could also splurge on colored embossing foil which comes in several hues and textures, but be prepared to spend a little more on materials if you go this route. Spray paint is another option for achieving colored petals and leaves. Krylon Fusion All-in-One in either Spanish Moss or Pale Sage are close matches for the gray-green RÖDFLIK base.
To give your petals and leaves more texture, it can be helpful to have an embossing stylus, but a crochet hook, ballpoint pen cap, or wooden skewer are cheaper alternatives you may already have on hand. You'll need a sharp pair of scissors to cut your foil shapes, and heavy-duty gloves can be a good idea to avoid cutting yourself in the process. Finally, you'll need a tube of clear E6000 adhesive to assemble your giant flower lamp.
How to DIY a giant flower floor lamp using embossing foil
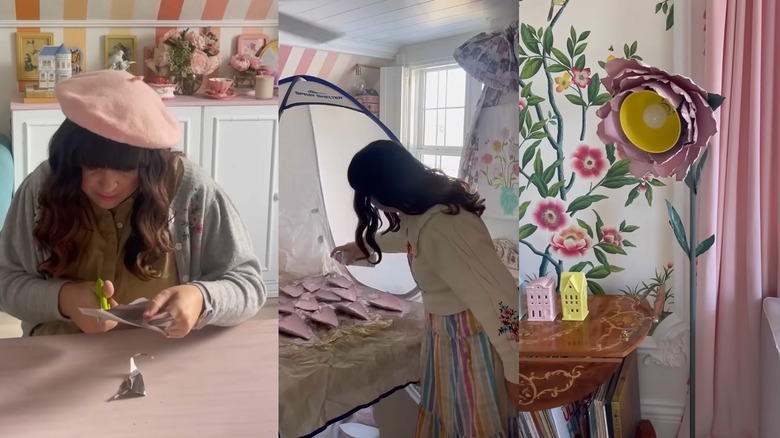
The construction of this DIY flower lamp is simple. You'll glue one end of each petal where the neck of your shade meets the lamp rod. While IKEA's RÖDFLIK lamp creates a convincing pistil that curves slightly at the top of a tall stem-like base, this project would work equally well with upright torchiere lamps, or multi-light fixtures. It's also a genius way to give a thrifted lamp new life.
The key to achieving a convincing floral result is to create petals that are proportional to the central shade. Each one will need to be slightly larger than the shade itself, so the exact size will vary depending on your unique lamp. The shape is another important element that will give you the opportunity to customize your lamp. You can mimic daisies with elongated oval petals, violets or pansies with heart-shaped ones, lilies with bulbous petals that come to a point, and poppies or hibiscus with a slightly fringed edge. It's also fine to combine shapes. If you plan to spray-paint the petals, do so in a well-ventilated area or outdoors.
Once you've cut your petal shapes, spray painted them if desired, and used your embossing tools to create subtle textural variations, the next step is attaching them to your lamp. Apply a small amount of E6000, one of the best glues and adhesives for this type of craft, to the end of each petal. Then, gently press it into place along the neck of your lamp. Continue overlapping the petals until you've achieved your desired fullness. You can bend the petals to catch the light in interesting ways. Finally, cut a few small leaf shapes and glue them at various heights along the length of your lamp.