

Brighten Your Garden Path With The Help Of Old Shutters And Solar Lights
We may receive a commission on purchases made from links.
Walking through the garden in the evening will feel a lot more enchanting if you have some light to guide the way. Even with a carved-out path, being able to see where you're going prevents you and your guests from face-planting in your gorgeous flower bed. Traditional path lights are an option, but DIY community Hometalk shared on Facebook a brilliant way to illuminate your outdoor walkway by transforming old shutters and lights into a sophisticated standing lantern.
This project will require a bit of know-how with equipment since you'll need a power saw and a drill. A reciprocating saw can help you cut the shutters, and using a drill to create properly sized pilot holes helps prevent splitting, which is especially important on more fragile pre-loved shutters. Two shutters provide enough material for one lantern, so you'll want at least four for two lanterns, and so on. A matching set is more convenient but not a dealbreaker since you'll be spray-painting them later. Don't forget to account for the additional wood for the lantern's two bases: 1-by-4-inch boards and ¼-inch plywood.
Hitting the nail on the head with this woodworking DIY
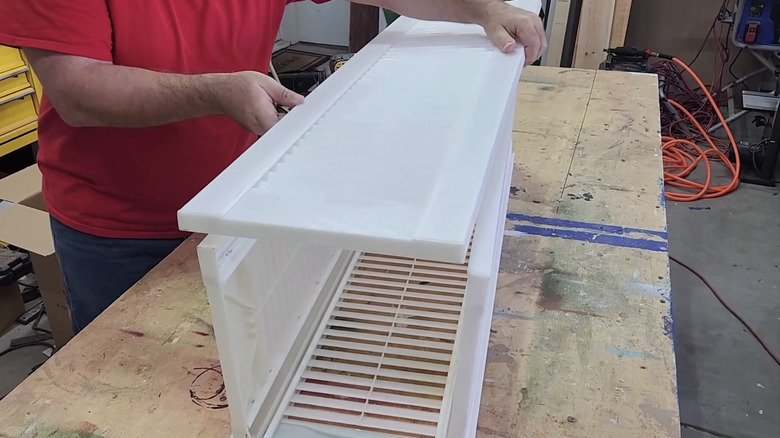
Because you'll be cutting the shutters in half, use a louvered style to make the process easier; they have a divider rail in the center that allows for an equal cut. If a shutter has a visible tilt rod, remove that first. Lay the shutters flat, measure their length, and saw evenly along the divider rail. The builder used each shutter half as a lantern wall, securing them with a small screw to create a box shape.
Next, measure the 1-by-4-inch boards to fit the lantern base's perimeter. The builder secured the boards with brad nails, which are thin wire nails that are tough to drive with a manual hammer. If you don't have a brad nailer, a 1.5-inch finish nail will still hold the 1-by-4-inch boards together. Measure and cut the plywood to fit the top of the board frame and secure it at the corners. You'll need to create a base for the top and bottom of the lantern.
On the top portion, glue two small pieces of scrap wood on the inside of the base to add support and prevent it from snapping during the next step. Cut enough space in the plywood for the solar lights to fit without falling through or being forced in. Then, just fit the base to the shutter box structure, and you're ready to add your lights.
A beautiful lantern to light the way
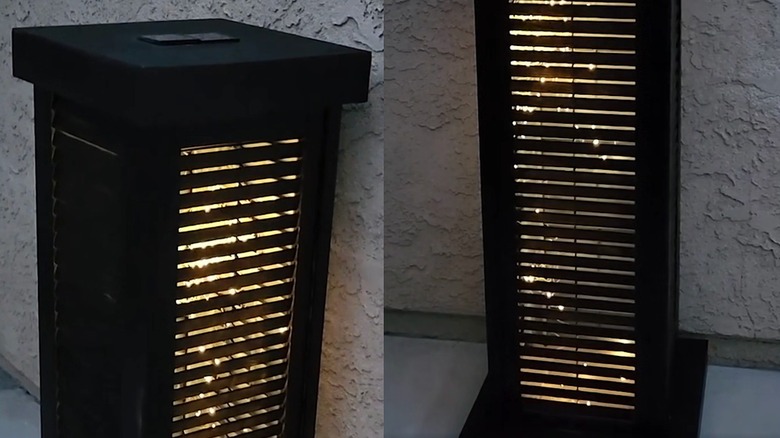
The Hometalk builder found plastic shutters at Habitat for Humanity ReStore, which is a great place to start if you have one nearby. Facebook Marketplace and Craigslist may offer a more local selection. Flea markets, antique sales, and estate sales are other options, but be sure to check for signs of rot or other damage in the vintage wood, as well as rust on metal hardware. Wooden shutters will also require a sealant to prevent them from being torn up by the elements.
If you already have a color palette for your garden decor, staying in the same color family achieves great cohesion. Black, gray, or white are common neutrals that add elegance in yard design with the warm glow of the lights, but a stronger accent color creates contrast and depth against your greenery. As for the solar lights, we'd follow the Hometalk builder's lead on an outdoor string option with a mini square solar panel, like the Daybetter Solar Fairy Lights. Because it has 40 feet of string, it will provide a nice glow to fill the length of the lantern. Plus, they're available in a two-pack.
With a removable top, the lantern could also double as outdoor storage for small items like umbrellas. But even if you don't store anything inside, routinely clean out cobwebs and debris so you don't get surprised by any spiders, insects, or even mice that slip through the cracks and take up residence inside.