

She Upcycles A Glass Vase Into Unique Home Decor Using Thrifted Tiles

We may receive a commission on purchases made from links.
Nothing elevates a beautiful floral or greenery arrangement quite like a showstopper of a vase. But scoring a statement piece like this, especially one that isn't mass produced, can often mean spending more than a few bucks. However, the internet strikes again, with one clever DIYer sharing how she created a one-of-a-kind, expensive-looking vase from thrifted and repurposed materials.YouTube user Liz Fenwick DIY used two sheets of thrifted mosaic tile to give a basic glass vase a stunning makeover. The transformation took something ordinary and turned it into a lovely home accent.
To create your own DIY vase, you must first source the tiles, which should be the smaller mosaic variety that comes pre-mounted on mesh sheets. The smaller the tile, the tighter the curve radius you can get for narrower vases. This type of product is typically sold by the case, which is why the YouTuber saved a ton of dough by thrifting individual sheets. However, you can also check your local hardware store or tile supply shop to see if they have any open cases that they're willing to sell single mosaic sheets from. Some online retailers also sell "open box" mosaic tile, where you can buy smaller quantities.
Choosing the right tile sheets and attaching them to the vase
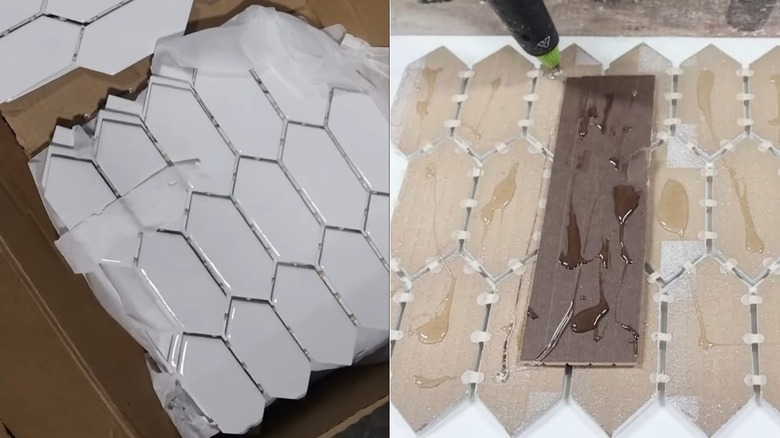
When you're choosing a vase, look for one that is cylindrical with straight sides. Depending on the circumference of your particular vase and the size of the tile sheet, you will likely need about two sheets to go all the way around. You may have to use a utility knife to trim the mosaic tile sheets to the right height and width. You want the tiles to line up with or extend slightly above the top of the glass vase. Lastly, if you choose a tile shape that doesn't have a flat border, like the picket shaped tile on YouTube or a curved penny tile, a bit of the vase will be visible at the very bottom. So, be aware of this when choosing the right one.
Once you've acquired your tile sheets, lay them face down on the table. Grab a scrap of wood pole wrap, a bendable yet solid material (which would make a gorgeous vase wrap in and of itself!) that's about the same height as your tile. Facing the wood side toward the back of the tile sheets, use a strong adhesive, like E6000 Glue, to bridge the seam with the pole wrap. Apply a generous amount of adhesive on the back of each tile, as well as the back side of the pole wrap, and secure it firmly to the vase. Use strips of painter's tape to hold the tiles in place while the glue dries.
Finishing and customizing your vase
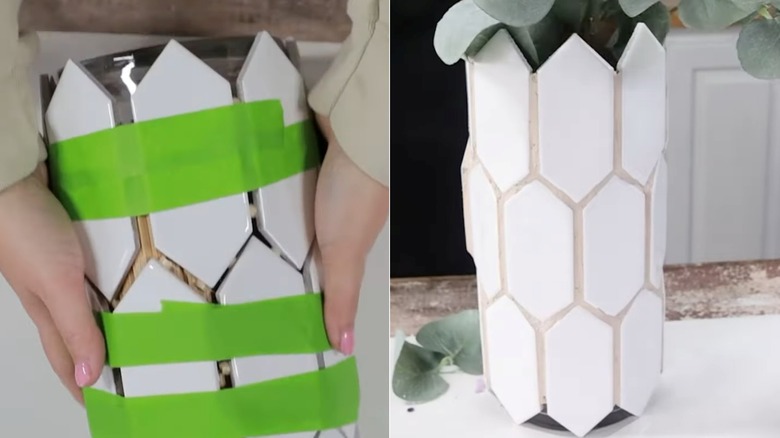
Once the adhesive has cured, it's time to grout. Again, the thrift store may have cheap or partial bags of grout, but you can also buy a single bag at the hardware store. Mix the grout according to the instructions to form a paste. Then, use a large wooden popsicle stick as a spatula to push the mixture into the gaps between tiles. They also make grout bags that allow you to neatly pipe it into the gaps for a cleaner application. Once you've let the grout set according to the time recommended, use a damp sponge or paper towel to remove excess from the tiled faces and smooth the seams. Let the grout fully cure, and you have a one-of-a-kind tiled vase that will turn heads.
The beauty of this DIY is that you can completely customize the look to your aesthetic based on the tile and grout color you choose. You could use white tiles with neutral grout for a tone-on-tone look, or choose a dark grout for a high-contrast vibe. Alternatively, opt for a colorful mosaic pattern for a fun twist and some serious personality. A quaint vintage-look tile would be charming, while a sleek modern tile will feel edgy and chic. No matter the look you decide to go with, this fairly beginner-friendly tutorial will result in a really cool piece of home decor.