

Turn Two Fluted Bowls From Dollar Tree Into Vintage-Style Planters
Planters make the perfect decorative accent, either perched on a mantelpiece, tucked into a windowsill, or nestled in a bookshelf. While you can certainly shell out for planters that match your design style at your local garden center, this Dollar Tree DIY makes a brilliant alternative for anyone looking to save a little cash. Facebook creator She's So CraftDee's design for two adorable vintage-style planters is a must-try for anyone looking to add a bit of antique elegance to their space on a Dollar Tree budget. Best of all, the construction process is simple, which will be welcome news to any novice DIYers looking to give this project a try.
This design calls for a two-pack of Carters Corner Clear Flared Bowls from Dollar Tree, which cost just $2. The design also calls for three Glass Taper Candleholders for $1.25 each, a hot glue gun, a paint sponge, and an antique wax. Finally, you'll need to choose between a primer, acrylic, or chalk paint. She's So CraftDee opts for Bulls Eye 1-2-3 Plus 13 oz. White Interior/Exterior Primer Spray, which is available from Home Depot for $11, but clarifies that either of the other two options will work.
How to make your planters
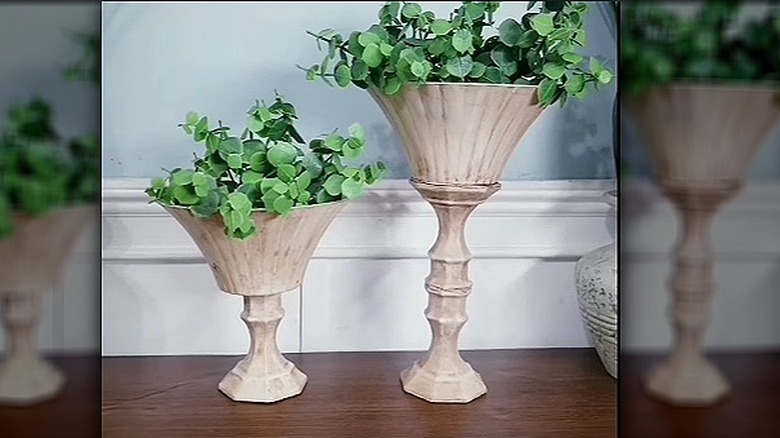
First, remove the labels from the bowls and candlesticks. Once they're clean, create the smaller of the two planters by using a glue gun and adding a bead of hot glue to the rim of one of the candlesticks. Press the bowl onto the candlestick and you've created the basic planter. For the taller one, take the remaining two candlesticks and glue them together such that their openings are connected. Then, take the second bowl and glue it to the base of one of the connected candle sticks.
Now that the planters are finished, apply your chosen primer or paint evenly across the entire piece, using multiple coats if necessary to create an even, opaque coverage. Put them aside to dry — if you've opted for She's So CraftDee's Bulls Eye 1-2-3 Primer Spray, this will take approximately 30 minutes. The final step is to apply the antique wax to create that vintage finish. Use a paint sponge to apply the wax lightly across the surface of both planters, then rub off with a paper towel. It's ok if the wax appears patchy in places, or heavier in some spots than others — this is the rustic look you're aiming for.
For anyone unfamiliar with antique wax, its name is slightly deceiving. The product is actually a water-based chalk paint, which doubles as a sealant. She's So CraftDee opted for the Waverly Inspirations Chalk Paint Wax, which is available from Walmart for $7.27. You can also find similar products on Amazon in a variety of colors if you want to customize your version of this project. Once your planters have had enough time to dry, don't forget to fill them with the cute cutting of your choice, faux or real!