

Transform Dollar Tree Bowls Into A Unique End Table With An Impressive DIY
We may receive a commission on purchases made from links.
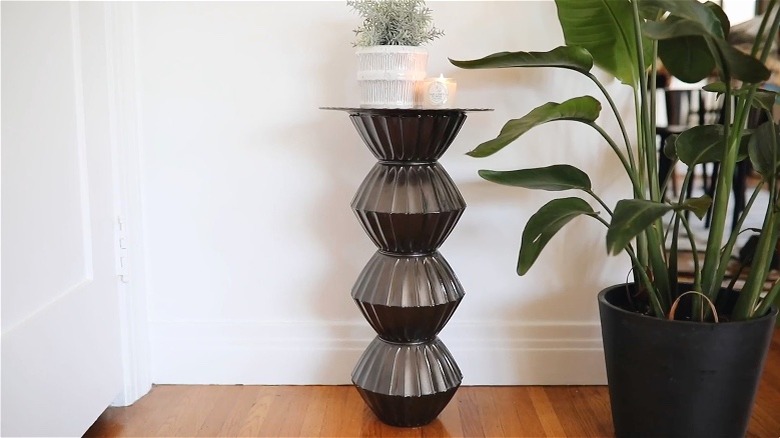
It's always fun when people mistake your Dollar Tree DIY for a luxury designer product. With this creative craft from Instagram creator @lonefoxhome, you can easily make a side table that belongs in any elegant home furnishings store without breaking the bank. In fact, @lonefoxhome boasts that his project cost him just $11 in 2021! The result is an almost space-age, ultra-modern side table with a slim profile that will nestle nicely next to a couch or armchair. While the final cost now might be a bit higher, the project is still an extremely piggy-bank-friendly end table idea.
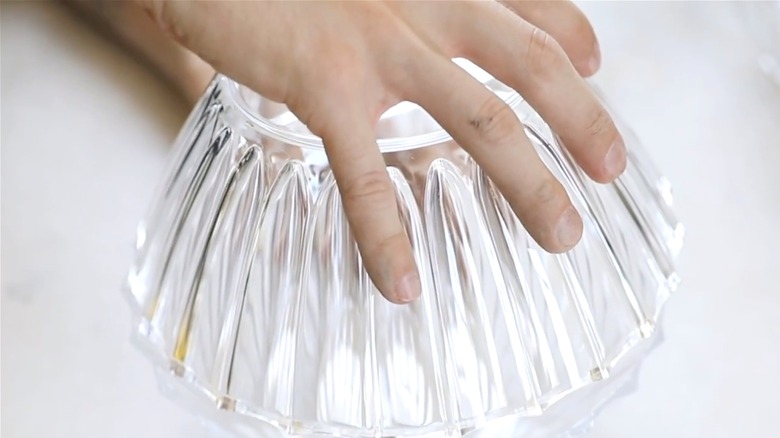
To recreate this clever design, you'll need seven Clear Plastic Fluted Serving Bowls, which are $2 each from Dollar Tree, and one Gold Plastic Charger Plate with Beaded Rims for $1.50. You'll also need a hot glue gun, concrete mix, and spray paint to finish off your look. @lonefoxhome opted for the Rust-Oleum Universal Forged Hammered Paint & Primer spray paint in burnished amber to achieve a metallic look, but you can choose any paint you like to create a table that will work well in your space. Just make sure it's one designed to adhere to plastic.
Making your side table
To create your side table, start by mixing your concrete according to the instructions on the packaging, filling one of the bowls halfway with the wet mixture. A ready-mix concrete like this anchoring cement from Home Depot will work particularly well for this, as it sets very quickly. Set this bowl aside to cure — it will serve as the base for the rest of the table, preventing it from being too easily tipped over. Next, take the hot glue gun and apply a line of glue to the rim of one of the bowls, then place the rim of a second bowl on top and hold them together until the glue dries and the two bowls form a sphere. Repeat this process again with another two bowls, then glue the two bowl spheres together. By now, your cement should have set, and you can take another bowl and glue it to the top of the one filled with cement, creating a third sphere which will serve as the base of the table. Glue the two affixed spheres to this one, and then glue the base of the single remaining bowl to the topmost sphere.
Now that you have the base of your table, run a line of hot glue around the bottom of the plate, and attach it to the rim of the topmost bowl. Give the completed table structure plenty of time to dry before trying to move it. As the final step, take your chosen spray paint and thoroughly cover the surface of the table, applying multiple coats if necessary. Give your completed side table time to dry again, and then it's ready to be placed in its desired location and decorated with whatever accents you'd like. Try finishing off your project with a scented candle, potted plant, or small coffee table book for a sophisticated final look.