

DIYer Turns Dollar Tree Lantern Into A Budget-Friendly Porch Light

We may receive a commission on purchases made from links.
Outdoor lighting can make an enormous difference to the appearance and safety of your home, but hardwiring new fixtures to an existing porch can be an expensive proposition. Fortunately, there's a budget-friendly way to illuminate any covered space using a few simple items from Dollar Tree. TikToker Kathryn Snearly, aka @DoItOnADimeOfficial, figured out how to turn an inexpensive metal lantern, some window cling film, and a strand of fairy lights into a DIY porch light that adds just the right amount of sparkle to a side table or picnic bench using nothing more than a sharp pair of scissors and some adhesive dots.
There are plenty of outdoor lighting ideas to brighten up your home, but this DIY project is more about creating a nice ambiance than dramatically increasing brightness. The window film design you choose will greatly influence the amount of light that shines through. Frosted or rainbow prism options are ideal if you want to maximize the illumination from your strand lights, while richly colored stained glass alternatives like the highly-rated Artscape Magnolia Window Film from Amazon will create a more subdued effect.
Dollar Tree's Home Decor Metal Lanterns are currently available for just $3 each, and since they measure just 10 inches high by 4 inches square, a single roll of window film should be plenty to create several porch lights. The cost of window film varies depending on the design and roll size, but you can find options that work for any budget, ranging from just $8 to $25 or more. You'll also need a pack of adhesive dots and a battery-powered strand of lights for each lantern, both of which cost under $2 each at Dollar Tree.
Attach window film to a metal lantern using adhesive dots to create a stunning porch light
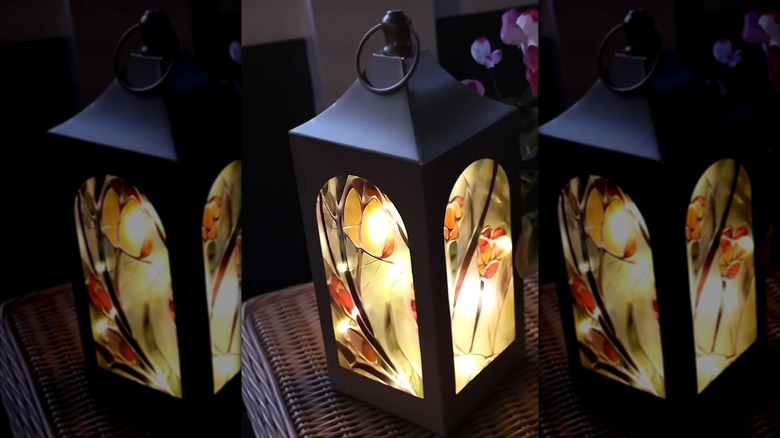
You may already know that window film is one of the most budget-friendly ways to add privacy to glass doors and windows, but it's also an outstanding way to create a stained glass effect to inexpensive metal lanterns. While you could absolutely substitute rice paper, semi-transparent vellum craft paper, or even lightweight lampshade fabrics like cotton or silk, window film offers significantly better weather-resistance for these DIY porch lights.
When it comes to different types of landscape lighting, these porch lanterns are easy to make even if you're a crafting beginner. Start by tracing each of the long sides of the lantern onto the window film. Cut out each rectangular piece with a sharp utility knife or a pair of scissors. Freeform patterns are the easiest to work with, but if you opt for a detailed pattern with scrollwork, lettering, figures, or floral elements, remember to preserve as much of the design as possible while making your tracing marks and cuts.
@doitonadimeofficial Dollar Tree DIY Lantern Hack! #doitonadime #dollartree #diy #porchdecor #dollartreefinds
Each rectangle will form a panel, which you'll install to cover the opening of your lantern on each side. Working on one side at a time, apply a small adhesive dot in each of the inside corners before removing the window film backing and pressing it firmly into place with the design-side facing out. Repeat this process on two additional sides. Before completing the final side, place your fairy lights inside the lantern. Then, carefully cut a small opening at the bottom of your panel to accommodate the strand's cord and battery pack before attaching it to the remaining adhesive dots.