

Woman Uses Dollar Tree Pool Noodles To Create A Functional Piece Of Furniture
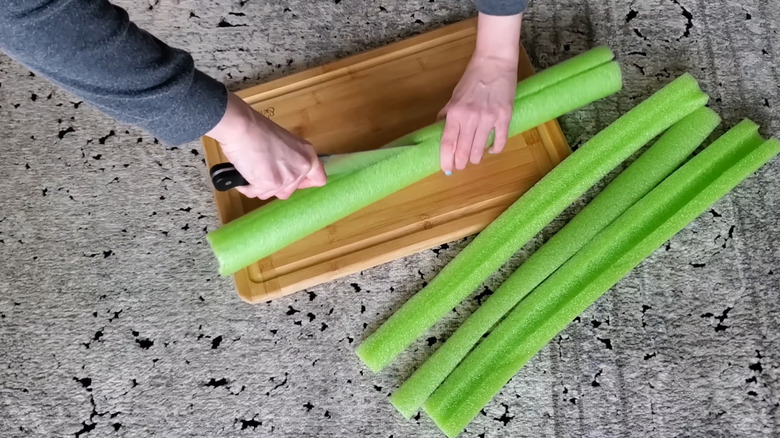
It seems like there's no end to the genius ways to transform Dollar Tree pool noodles into chic home decor. We've seen them turned into vases, wall art, and even functional pieces of furniture like ottomans. This time, TikToker cherry.l.a.d.y figured out a clever way to combine a few pieces of cardboard, pool noodles, and textural coating to create a lightweight side table. To make it, she created a cylinder cardboard base with a circular top, attached halved pool noodles all the way around, and then coated the entire structure in rough plaster.
It may sound complicated, but this DIY is actually very beginner-friendly. It relies on basic tools most people already have on hand, including sharp scissors, a hot glue gun, and a serrated bread knife. Yes, a bread knife — the serrated blade is ideal for making precise cuts through a pool noodle's foamy material. Other than that, you'll also need a dropcloth and a pair of disposable gloves to protect your work surface and your hands during the plastering process.
A standard side table is between 18 and 24 inches tall, something you'll need to keep in mind as you source pieces of cardboard for this project. Although you shouldn't expect your finished table to hold heavy objects or a person's body weight, the cardboard base is made from two distinct layers for added stability. That means you'll need plenty of cardboard, preferably corrugated so it can be bent and manipulated into shape without tearing.
Add texture to your pool noodle side table with smooth or rough plaster
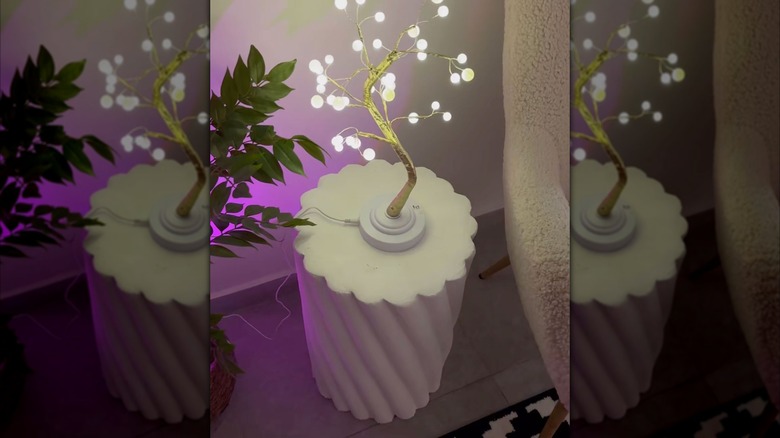
To make the DIY side table, start by cutting a cardboard circle to serve as the top of your table. The size is entirely up to you, and this construction technique works whether you want a dainty drinks table, a large coffee table, or a side table in between. Next, cut a rectangular piece of cardboard to the same length as the diameter of your circle. Bend it gently, accordion-style, so that it's easier to wrap around the cardboard top. Use hot glue to hold it into place against the circular top, as well as along the seam. Then, repeat the entire process to create the inner layer of the table, making it around ½ inch smaller so it fits neatly inside the outer form you just made. After inserting the inner layer inside the outer one, use more hot glue to secure it.
@cherry.l.a.d.y 🎧 Stranger by Barri Bash🔥🔥🔥 Making a coffee table for my room 🫰🏻💕 #papiermache #artprocess
Then, it's time to attach your pool noodles. Start by cutting them in half. While the original DIYer chose to put her pool noodles at a slight angle for added visual interest, you could also wrap them horizontally or vertically to create a striped effect. Either way, add a liberal amount of hot glue to the flat side of each pool noodle before pressing them firmly into place.
Once you've covered the entire side table, you've got some options. To create a chic plaster side table, use gloved hands to apply several thin coats of rough plaster over the entire table. Being intentionally erratic with the application will heighten the textural effect. If you prefer a smoother look, opt for a creamier plaster and use a moist paintbrush to smooth the surface before it has time to dry.