

This Affordable Dollar Tree DIY Turns Plastic Bowls Into A Stunning Porch Planter

We may receive a commission on purchases made from links.
In a bid to tidy up your porch and ensure it leaves a good impression on visitors, you might have accidentally rid it of all things that lent it personality. Or, maybe you just wish to spruce things up to give it a fresh look. But if you're on a tight budget or don't want to add dramatic touches yet (think a DIY garden arch), try an affordable Dollar Tree craft to upgrade your front porch. All you need to do is glue two plastic bowls together and paint them to fashion a stunning porch planter.
Not only is this DIY beginner-friendly, but it also won't commandeer too much of your time. Plus, you don't need a lot of supplies. You'll require two 8-inch Clear Plastic Fluted Serving Bowls for each planter you make. Additionally, you'll need your hot glue gun and a can of your preferred spray paint (whatever you have on hand works, too). And, to turn your simple planter into a show-stopper, you can go with real or artificial flowers (DT offers a good selection), depending on your lifestyle and preferences. Don't forget to factor in your green thumb — or lack thereof — or dead florals will upend your transformation plans. However, if you want the best of both worlds, plant low-maintenance succulents to give your porch a colorful upgrade. Grab your drill machine, too, if you wish to place real plants in the bowl-turned-planter. Alternatively, get a block of floral foam if you stick with imitation flowers.
How to turn your Dollar Tree plastic bowls into a stunning planter
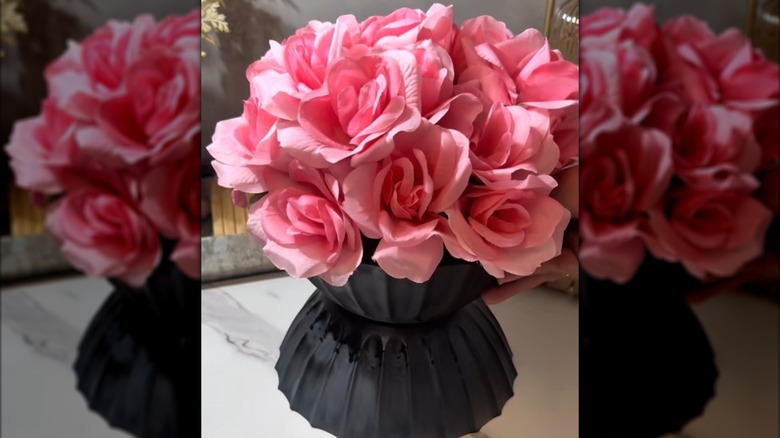
In case you'll be potting artificial plants, plug in your hot glue gun. Then, turn a plastic bowl upside-down and apply a generous amount of adhesive to its base. Now, adhere the other bowl on top (it should be right-side-up), and set them aside so the glue can cure properly. On the other hand, if you want to put in real plants, power on your drill and bore a small hole in the center of a bowl. Mark the spot in advance because a lopsided hole will ruin your plans. Repeat this process with the other one, then align the holes and glue the bowls together.
@juju.cares This diy idea from dollar tree is simply brilliant #DIY #dollartreediy #dollartree #dollartreefinds #dollartreehacks
Once you have the bare bones ready, think about how you'd like to turn this basic planter into a high-end one. For instance, if you've been meaning to ditch expensive concrete planters and DIY one instead, bring out a can of stone-textured spray paint (such as the White Onyx from Krylon) and breathe new life into your economical planter. You can, of course, stick with a neutral shade if you don't want the pot to detract from your gorgeous floral display. Then again, if you wish it to look designer-made, try different finishes like a two-toned checkerboard pattern to hide its humble origins. Whichever option you pick, remember to seal your planter afterward since it's going to remain outdoors. Something as simple as a coat of the Mod Podge Acrylic Spray Sealer will work wonders. Finally, add soil or a foam block, as the case may be, and arrange your planters inside the planter before displaying it on your porch.