

Woman Uses A Simple IKEA Hack To Keep Garden Hoses Neat And Organized
We may receive a commission on purchases made from links.
Storing a garden hose doesn't only extend its lifespan by providing protection from the elements. It also makes your landscaping look much tidier. One of the most essential garden tools when you're growing flowers or vegetables, garden hoses can be a pain to store since they're prone to getting kinked or tangled. Anyone who takes their watering sessions seriously also knows a hose always ends up wet and weirdly gritty, which makes unhooking it from a spigot and lugging it into a garage or shed a step many of us dread. TikToker @cosy_casa uses a simple IKEA hack to keep her garden hose neat and organized by attaching a lidded GÅRDSBUTIK Bin to the side of her house directly over the spigot.
The brainchild of IKEA's Henrik Preutz, the $40 recycling bin has outstanding reviews from hundreds of customers who appreciate its versatility and space-saving design. This hack takes advantage not just of the GÅRDSBUTIK Bin's six-gallon capacity but also its wall bracket that's intended for easy mounting. However, there's an important caveat: IKEA only recommends using the product indoors. The bin is made of recycled plastic, and we assume it's prone to degradation that makes it warp in warm weather or deteriorate with exposure to the elements over time. It also isn't airtight like some other garbage cans out there. So it might fill with water during heavy rainstorms, making it quite heavy. Finding a protected spot on a covered patio or under an eave is something to consider before embarking on this otherwise simple hack.
Repurpose a GÅRDSBUTIK Bin to organize your garden hoses
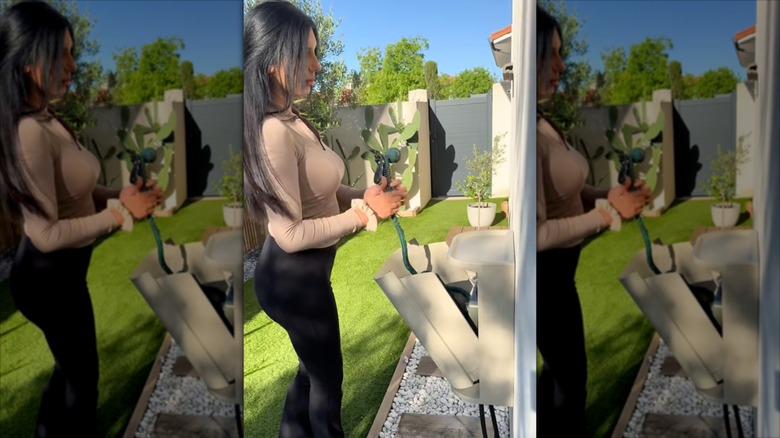
Making sure you have somewhere to store all of your gardening gear is one of the keys to outdoor storage and organization, and it takes only a few minutes and a few basic tools to pull off this project. The first step is using a sharp box cutter to create a hole in the back of your GÅRDSBUTIK wall bracket. Locate it at top-center and make it large enough to comfortably fit your garden hose spigot through. Then, follow the manufacturer's instructions to mount the bracket using a marking pencil, level, and power screwdriver. Screws aren't included, but you'll need one for each corner. Choose heavy-duty construction screws based on your home's exterior material to ensure a lasting hold.
@cosy_casa_ Hack IKEA 🤍 À la base, le Gardsbutik est une simple poubelle avec couvercle... Moi, j'en ai fait un rangement mural pour mon tuyau d'arrosage 💧 Fixé au mur, discret et pratique : plus de tuyau qui traîne, tout est caché 👌 J'ouvre, je prends le tuyau, j'arrose... et je referme. Simple, propre, esthétique 🔥 Franchement, on valide ou pas ? #ikeahack #decoration #garden #jardin #construction
Then, use either a rotary cutter or a manual knife to cut out the entire back of your bin, making sure to leave the small clip elements on either side intact. This will create more room to store your garden hose. Finally, clip the bin into the bracket before reattaching your hose to the spigot. Keeping things organized then becomes a simple matter of pulling the hose out when it's time to water, and dropping it back into the bin when you're finished.
If you're not entirely sold on using an indoor plastic bin for a permanent outdoor project, there's another stylish IKEA hack that can help you say goodbye to tangled garden hose eyesores using the popular TRONES Storage cabinet. Freestanding options are also worth considering, especially for storing larger hoses. The Suncast Hose Hideaway at Home Depot is a similar color and price.