

Not Paint Nor Hardware: There's A Cuter Way To Give Garage Doors An Upgrade
We may receive a commission on purchases made from links.
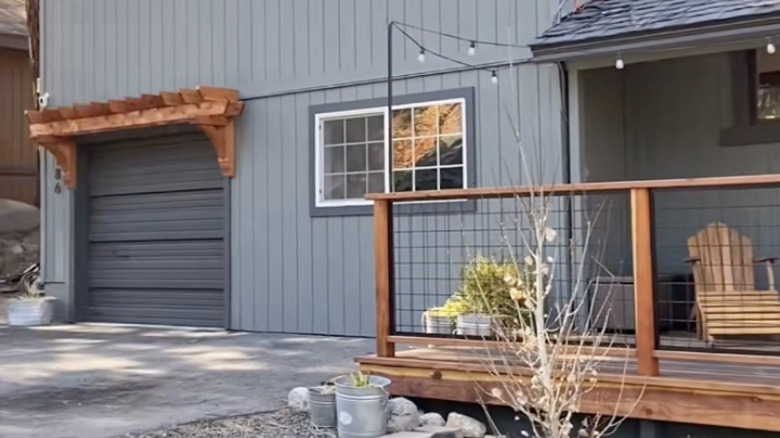
Great curb appeal goes a long way towards improving your home's first impression and sharing your overall aesthetic. However, the often-ignored garage door takes up a lot of visual real estate — especially when it's smack dab in the front of the house — and is too frequently left to be a drab eyesore without any design value. The good news is that TikTok user @surryplace shared a wonderful, DIY-friendly idea for transforming the entire facade of her garage (and therefore house) in an afternoon and for a few hundred dollars without the need for door modifications.
The TikToker elevated her basic, humdrum single-car garage by creating a custom cedar pergola to frame the opening. Using a pair of wooden corbel brackets, 2x6 decking boards, and fasteners, she seriously leveled up her home's curb appeal for only about $500, a small investment for such a massive exterior impact compared to other pricey exterior projects. Once the beautiful pergola frame is built, stain or paint it to beautifully match your home's style. Oversized planters on either side with a gorgeous climbing vine are optional, but encouraged.
This project works best on flat-faced garage walls with a decent span of wall over the garage — i.e., a second story or gabled attic on top that raises the home's natural roof overhang higher up, away from the garage door. This will give you space to incorporate the decorative pergola without crowding the house's roof overhang. Additionally, this DIY is for a standard 8- to 9-foot-wide single garage door — anything larger will need modifications in lumber widths, quantities, and additional supports. If your home fits the bill, tackle this beautiful garage upgrade that will make you the talk of the town (in the best way).
Shopping list for your custom DIY cedar garage pergola
Begin the garage pergola project by gathering your supplies. The TikToker purchased a pair of Timber Build Cedar Wood Brackets from Amazon for $149 apiece. The dimensions of the one she used (18x16) and the one currently available (17x14) are slightly different, but the company offers many different sizes so you can tailor your pergola dimensions as desired.
Since you want the long horizontal beams (parallel to the house) to overhang the eight- to nine-foot-wide garage door, purchase two 10-foot cedar decking boards to span the distance, like these 10-foot 2x6 Better Cedar Deck Boards for $26 each at Lowe's. For the upper rafters (the TikToker used 11) perpendicular to the house, buy two 8-foot boards, like these 8-foot 2x6 Better Cedar Deck Boards for $25 apiece at Lowe's, cut into pieces roughly the depth of the wood brackets — 14 to 16 inches, depending on your aesthetic preferences for the overhang. If your dimensions vary from a standard single garage, you'll need to recalculate lumber requirements accordingly.
If your wood bracket doesn't come with mounting hardware, grab two mending plates, like the 8-inch RELIABILT Steel Mending Plate at Lowe's for $4 each, to mount it to the house. Additionally, buy small $10 packs of three- and four-inch deck screws to attach your pieces together, as well as two 6-inch timber screws, like these TimberLOK 6-in Exterior Structural Wood Screws for $2 each at Lowe's, to further secure the brackets to the house. Finally, choose a gallon of exterior paint or stain/sealer of your choice to protect your hard work against the elements. The TikToker used an oil-based outdoor deck stain from Armstrong-Clark in Natural Transparent, which costs $85 on Amazon,to bring out a richness in the wood.
Assembling your custom garage pergola
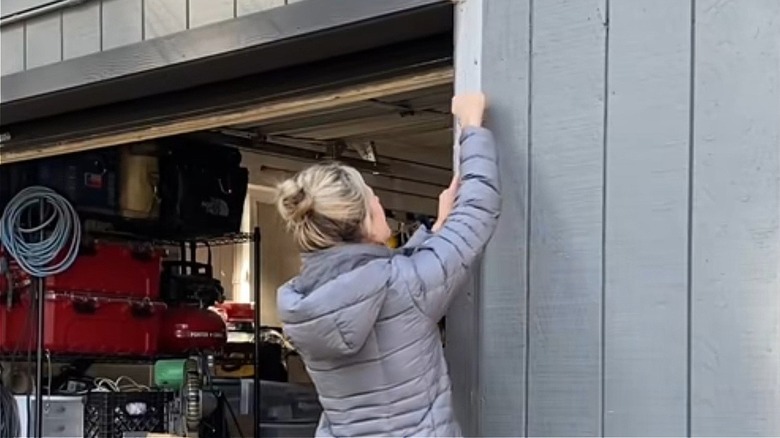
To assemble your DIY garage pergola, use a stud finder to locate the supports for the outermost brackets, and use a multi-tool to remove some exterior trim if needed to accommodate. For height placement of the corbel bracket, you can nestle it tight to the top of the garage or install it higher for a bit more visual breathing room if space allows. If your bracket comes with hanging hardware, install it at your desired height according to the instructions. If it has a flat back like this TikTok, use a chisel to notch out a rectangle at the top for half of the mending plate to sit flush with the back of the corbel. Use the upper half of the plate to secure the corbel to the stud using 4-inch screws. For added stability, use a countersink drill bit to countersink the 6-inch timber screws toward the bottom of the wood corbel.
@surryplace Watch to see how I DIYed this pergola! It was actually easier than you think and add so much warmth and character to my exterior! Material used: – 2- 18x16" cedar corbels – 4- 2x6 cedar deck boards – 3" and 4" deck screws – 2- 6" timber screws – 2- 8" steel mending brackets – First and foremost. Find your studs so you can mount it securely. -The corbels I purchased didn't have a mounting plate so I used chisels to notch out a space where I could secure a steel brace flush to the corbal. – I used 4" screws to mount the corbal into the studs – I drilled a hole in the bottom so I could sink a 6" timber lock screw to make it extra secure. – I used 2- 2x6 cedar boards for the base of the pergola and cut the edges at 35 degree angle to give it a decorative look. – I drilled pocket holes into the boards so the screws would be hidden, and secured them to the corbals with 3" deck screws -Lastly I made all my cuts for the top slats and secured them the same way. Let me know what you think! . . . If you're new here... 🙋🏼♀️I share budget friendly home design, DIYs, and interior design tips 🏠I offer several design services tailored to your specific needs and preferences. Click the link in my bio and navigate to the services tab. . . . #homedesign #homestyling #pergola #diypergola #curbappeal #exteriordecor #exteriordesign #diyhomeimprovement #homeimprovement #homeimprovementprojects #homeimprovementideas #homeimprovements #homeimprovementtips #homeimprovementproject #diyproject #diywin #diydecor #diyer #diypainting #diyprojects #diylife #diymom #diyhomeprojects
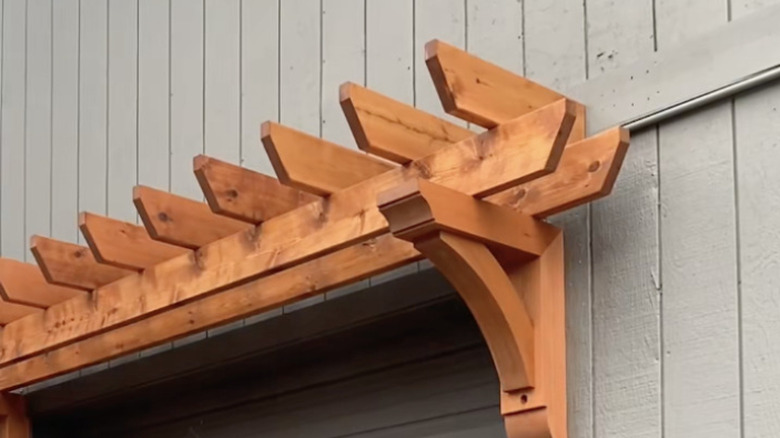
For the decorative edges on the pergola beams and pre-cut rafters (one side only), you can create whatever profile suits your style. The TikToker chose a partially-angled look with a 35-degree cut on the lower corner of each board. Spacing them about 8 inches apart, use a jig to drill pocket holes with 3-inch screws to attach the beams to the corbels, or use visible L-brackets on either side for a more rustic look. Repeat the pocket hole or L-bracket process to secure the perpendicular rafters to the top of the beams, decorative edge facing out. Line up your outermost rafters with the outside edge of the brackets to allow the beams to overhang. Evenly space the remaining rafters between them to finish the installation. Finally, stain or paint the pergola in your desired finish before enjoying all that extra garage curb appeal.