

Use An Old Plastic Lid For Organizing Clutter In Your Bathroom Instead Of Tossing
We may receive a commission on purchases made from links.
In a bid to reduce your carbon footprint and reduce the amount of trash your household generates, you might employ multiple genius ways to use old plastic containers in your garden and interiors. But what happens to the orphaned lids? Since tossing them will cancel out your upcycling efforts, you might relegate them to a junk drawer. However, if you have more stored there than you know what to do with, why not use a few to organize clutter in your bathroom? Indeed, turning them into soap dishes is a great way to use lids from old plastic containers.
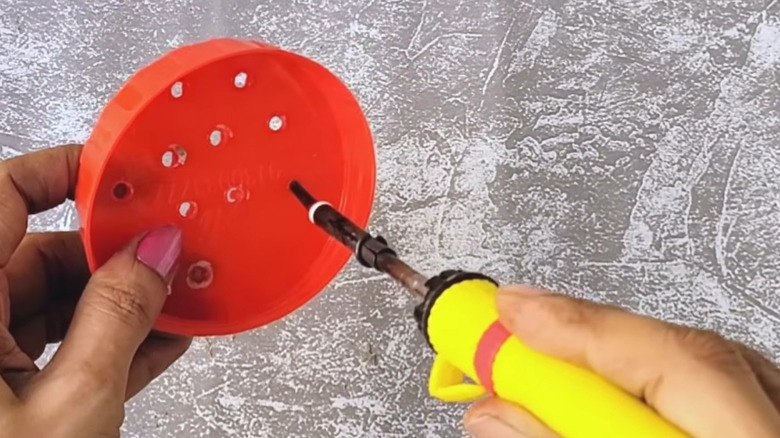
This nifty idea will minimize visual clutter and keep your bars contained. Plus, it'll keep your shower, bathtub, and sink ledge from turning into a sticky, soap scum-filled spot. This, in turn, will prevent bacteria from breeding freely in the constantly wet environment. Better yet, this DIY will allow excess water to drain through and allow your soap bars to dry, dramatically prolonging their life. Moreover, it'll survive accidental tumbles better than an expensive wood, ceramic, or marble dish. And you won't have to worry about adding a soap dish to your tile shower. The best part, though? You don't need a lot of supplies for this beginner-friendly project. You just need a lid large enough (check your peanut butter or body scrub jars) to accommodate a bar. Then, you can use a soldering tool, like the Meakest Soldering Iron, to poke drainage holes in the lid. Or, you can loop a few rubber bands around a lid to give your soap bars a resting place. Either way, don't forget to give the lid a soapy water bath before using.
How to turn your old plastic lid into a soap dish
If you want a permanent solution for your soapy mess, fit a narrow tip onto your soldering device and plug it in. Now, take a plastic lid and start poking holes. You can work in concentric circles or do lines — whichever style suits you best. But avoid moving willy-nilly, or you may end up with a side with too many holes and the other with not enough. This will lead to water pooling on the latter side and undo all your hard work.
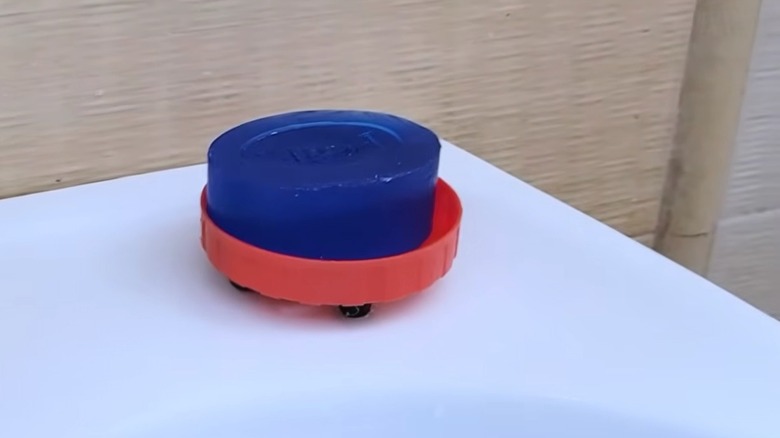
Once you're satisfied, place your soap bar inside the dish. If it looks too basic, give it a few coats of spray paint to hide its humble beginnings. Worried about airflow? Turn your dish upside-down and hot glue four wooden or plastic beads on either end to give it legs. This will ensure that excess water drains out. Place it on another lid if you don't want the soapy water sticking to your sink, tub, or shower.
However, if this seems like too much work, take at least two thick rubber bands, loop them tight around your lid, and your soap dish will be ready for use. The crisscrossed bands will keep your bar afloat and promote ample air circulation for it to dry. Plus, the drained water will stay within the dish, so you won't have to use another for a clean and dry bathroom. That being said, keep in mind that the bands won't last long, especially thin ones, under constant pressure. They'll snap eventually, so be prepared to change them out often.