Goodbye Countertop Clutter: This Dollar Tree DIY Turns Tilt Bins Into A Stunning Cabinet
We may receive a commission on purchases made from links.
The hardware section of Dollar Tree is hardly the first place you would consider when it comes to finding stylish countertop storage. But that's just where the creator behind Belinda's DIYS went for the supplies to DIY an apothecary-style storage unit. The key component of the project is the Tool Bench Stacking Tilt Bin. It's perfect for keeping nails, screws, and other small items organized in the garage, but this cute and functional bin is also easy to dress up for pretty storage on your countertop. You can definitely add it to the list of affordable Dollar Tree organization finds that double as decor.
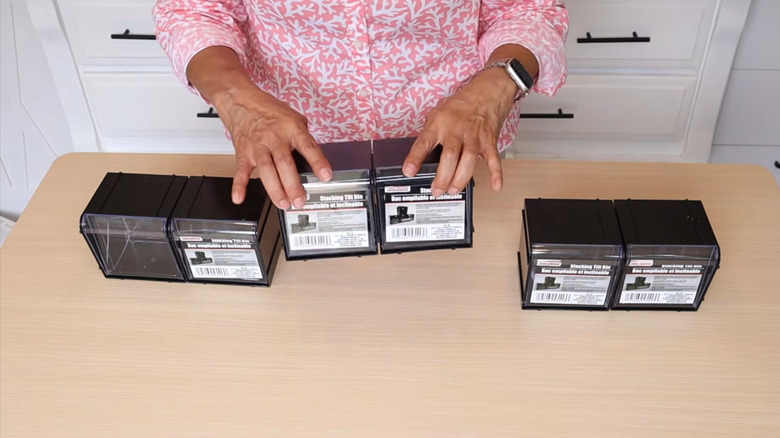
Each bin features a black plastic impact-resistant body with a clear transparent drawer on the front that tilts open. Even better, the bins are stackable and have interlocking grooves on the sides so you can connect several together into a stable storage unit. At just $1.50 each, these bins make an affordable basis for a storage solution.
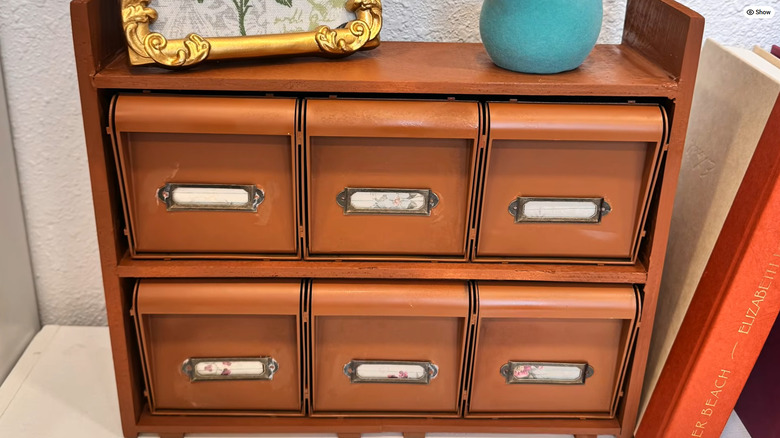
To give the bins a makeover fitting for a spot on your counters, grab spray paint. The original creator uses brown to mimic wood, but you can paint the bins whatever color you prefer. To make it look more like a cabinet, grab planks of wood from Dollar Tree or scrap wood to build a shelf customized to fit the bins. While the original features two rows of three, you can adjust the row sizes based on your needs and how much space you have available. To assemble the storage, you'll need wood glue and nails. You may also want drawer knobs, metal label holders, and other accents for your drawers. Decorative paper or peel-and-stick wallpaper add a fun pop of color inside the drawers.
Paint and stack Dollar Tree tilt bins into decorative storage
Dollar Tree is an affordable place to get storage containers, but you'll want to upgrade them. Remove the labels, and remove the tilt-out drawers for easier painting. You really only need to spray paint the fronts of the drawers and bins. The rest will be hidden inside the shelf you build. Paint those areas until they're fully covered. Once the paint is dry, put the drawers back in the bin and lock the individual units together in rows.
For a two-row shelf, cut three wood planks slightly longer than the assembled row of bins. Cut two side planks that are a few inches taller than the stacked bins and shelves. To assemble the stand, glue and nail the shelves between the two side pieces, leaving enough space for the bins to slide into the spaces. There will be extra space above the top shelf that you can use to display additional decorations. Paint the wood to match the drawers.
While the wood shelf dries, put the finishing touches on the drawers. The original creator adds metal holders, like these Virello Bronze Metal Label Frames, which you can paint or age with Rub 'N Buff. She also lines the inner drawers with decorative paper. To add a metallic touch, cover the curved handle of each drawer with gold leaf or glue a drawer pull onto it. Slide the rows onto the shelves, using a little hot glue to secure them. Label each drawer and add the items you want to store. To use it as extra kitchen storage, organize spices, tea bags, or other small items inside.