Say Goodbye To Grass Growing In Gravel With This Simple Driveway Edging Idea

We may receive a commission on purchases made from links.
Gravel is one of the easiest and cheapest materials for driveways that don't sacrifice aesthetics for budget. It looks so beautiful in the beginning, especially when the driveway is flanked with healthy green grass. But sometimes, that grass can creep in and make it nearly impossible to dig out from the gravel. Luckily, there's a way to cut off the creep: hammered-in edging.
Hammered-in edging is typically a strip of metal that's installed into a landscape design by — you guessed it — getting hammered into the ground. Its blunt, sharp ends cut off grass roots, preventing them from spreading into your driveway and will last much longer than that cheap plastic edging that breaks down over time. It comes in a variety of colors and designs, ranging from flat metallic strips to corrugated galvanized steel with protective coating. But the best thing about it is that you can decide how intricate you want it to be. Some people like to use stakes to help keep it anchored, like Ruppence's Heavy Duty Plastic Garden Stakes, or just hammer it into the ground as is. There is not only one right way to do it, so make it as decorative and sturdy as you want. The key is to make sure it's installed properly so that you get the most benefit without needing to break out the herbicides to keep your grass from growing where it shouldn't be.
How to install hammered-in edging to keep grass at bay
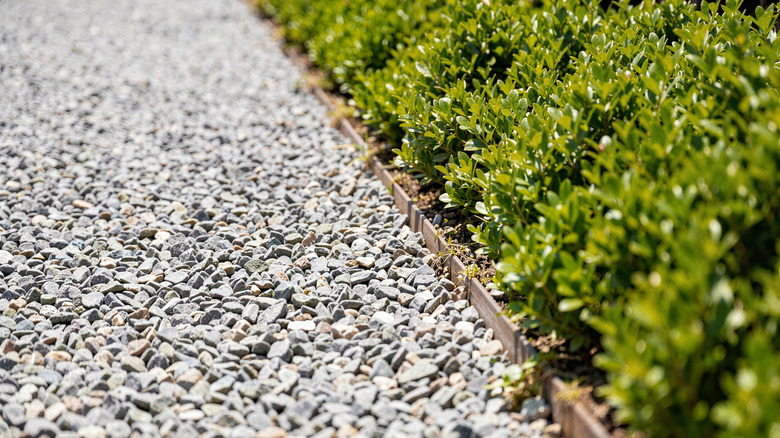
Start by measuring the length of your driveway and buy the right size edging. Grass roots can grow as much as a foot deep, so you'll want edging that's tall enough to prevent the roots from creeping under. But you'll also need to decide how much of the edging should stick above ground. If it's too low, you risk losing gravel or ground covers spilling into your driveway. However, too high of edging can be a trip hazard. Something like STIRLINGEAR's 40FT x 8IN Flexible Corrugated Metal Garden Edging Roll is great, but check out other options if you want a specific style.
Next, gather your tools: an edge-cutting tool like metal snips, a hammer, a shovel, safety gloves, and a wood block. Start by digging a trench to both loosen the dirt and define where the edging will go before it's installed — it's a lot harder to realign after it's installed, so this helps ensure you're on track. Next, unravel your edging and cut it to length with your snips. The metal can be sharp, so wear safety gloves to prevent cuts. Next, put your edging into the trench and set the wood block on top of it. You'll hammer the wood block instead of the edging directly to both spread the force and prevent the edging from denting. Once it's deep enough, backfill the trench and secure the edging with stakes if you're using them.