Forget Pavers And Gravel: This Natural Patio Alternative Looks Way More Unique
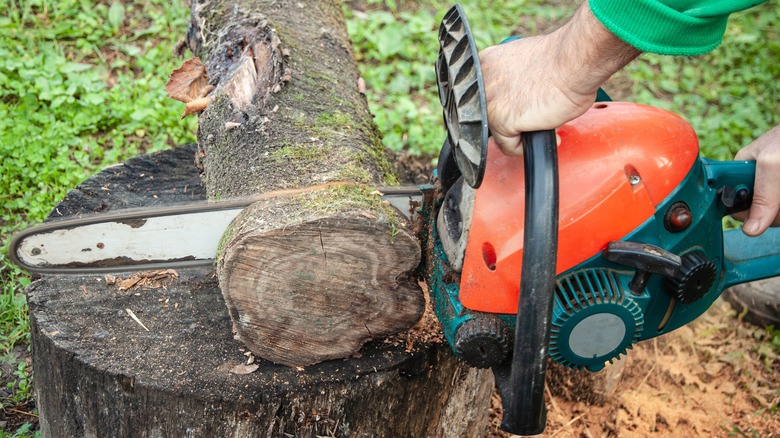
You're contemplating building a new patio in the yard, and at the same time, you need to get rid of an old tree. That's a lucky coincidence and also a great opportunity, because it means you can buck the tree into rounds and use them as paving stones. Combine the rounds with mulch or gravel to create an attractive, one-of-a-kind design that costs less to install than almost any other patio, while recycling the old tree into something useful. Not that the wood wouldn't be useful for making a fire, but a patio lasts a lot longer.
Of course, you don't have to cut your own rounds if there's a lumberyard nearby that will do it for you. Rounds are available online, but most of them are an inch or less thick, and that's too thin for a patio. You need extra thickness to prevent cracking and to make the rounds heavy enough to stay seated in the gravel without floating to the surface.
It's important to avoid using the wrong type of wood for your outdoor patio project, so stick with a rot-resistant tree like white oak, cedar, or redwood. You can use other species, such as pine or fir, but if you want them to last, they'll need to be sealed. A couple coats of spar varnish will protect the wood, discourage mold, and look great. Don't forget to stack and dry new wood (store-bought wood is typically pre-dried). Drying time depends on species, thickness and climate, but a year per inch of thickness is a good average.
Installing a wood round patio that looks fantastic and lasts
Prepare the patio area just as you would to lay conventional pavers. Dig out to a depth equal to the thickness of the rounds plus an extra 2 inches for a layer of sand. When you spread the sand and tamp it down with a hand tamper, it helps support the rounds and prevent them from moving. Don't forget to install a weed barrier cloth before you drop in the sand, or your patio could end up looking like the rest of the lawn in short order.
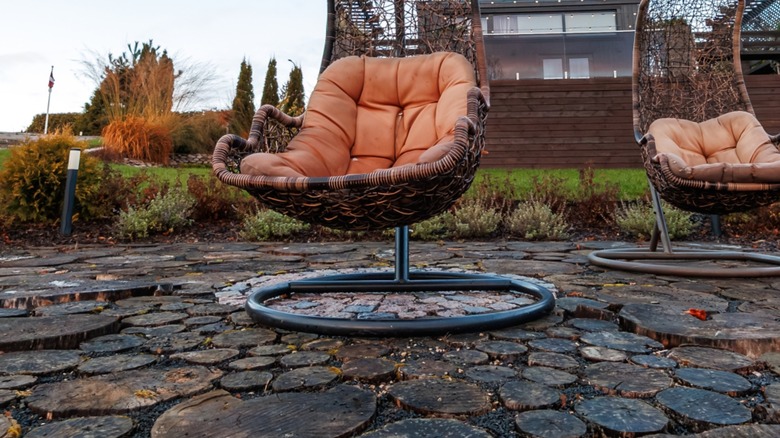
Now for the fun part: laying the rounds. You can set them close together or far apart, and the pattern depends on the sizes and shapes you have available and your own sense of style. If you've sealed both sides, you can lay the rounds with either side up, but if you sealed only one side to save money, make sure that's the side that's exposed. The rounds are likely to vary in thickness, so keep a rubber mallet handy to pound the ones that are too high a little deeper into the sand.
With the rounds in place, all you have to do is shovel in some wood chips, mulch or gravel to help them stay in place. You could also use pea gravel, which comes in various colors and blends well with the natural wood tones. Help the filler stay in place by spraying it with mulch glue after you've finished spreading it.