

Ditch Bathroom Trash Can Eyesores With One Genius, Affordable DIY

We may receive a commission on purchases made from links.
Even if you try make your bathroom feel like a spa, there's no getting around having a trash can. It's necessary, but it doesn't mean you have to put up with it being an eyesore. So, how do you enhance the look of an unsightly trash can? The answer is simple: you just need to decoupage it.
Decoupaging is a fun technique in the crafting world that involves gluing decorative paper to an item, then sealing it on. It's an easy and budget-friendly way to transform a boring object into a stylish piece of decor. A bathroom trash can is also the perfect candidate for decoupage, whether it's metal, wood, or plastic. One of the greatest perks of this DIY is how customizable it is. You can give your bathroom trash can a makeover with any color or pattern that you like, from florals to geometric shapes. Another plus is that decoupaging can be done using a wide range of materials, including scrapbook paper, napkins, and wrapping paper. Fabric and rice paper are also options, such as this Crtiin decorative rice tissue paper.
If you're a fan of affordable DIY bathroom ideas to elevate your space, consider choosing a material that you already own. Do you have a stack of pretty paper napkins in a drawer that you can spare? Or, perhaps you have tons of scrapbook paper leftover from a project. You could also check out a discount store. The other main supplies you'll need are a paint brush and decoupage glue, such as Mod Podge. You also might need sandpaper and spray paint, but that'll depend on the outside surface of your trash can.
Here's how to upgrade your bathroom trash can with decoupage
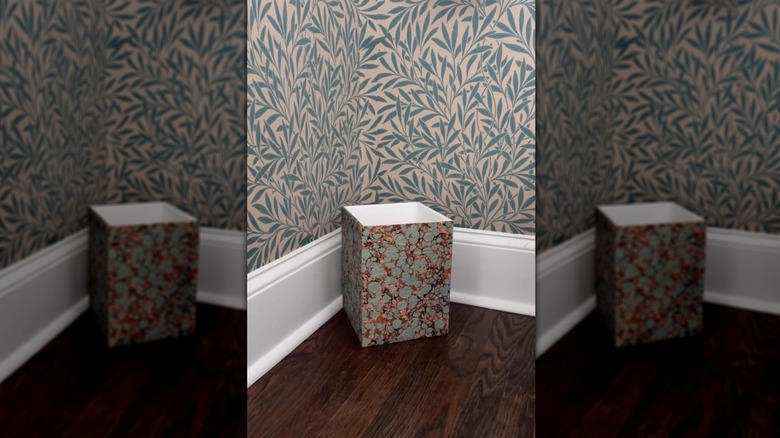
As with any project, it's best to start with a clean item before decorating it. Naturally, a bathroom trash can is no exception. After it's washed and dried, buff the outside with a piece of sandpaper if it has a smooth surface. Wipe it down with a rag. Next, spray paint the trash can using a light-colored base coat if it's a darker color, or simply to give it a fresh surface before applying the material. Prepare all of your supplies in order to make it an easier process. Keep in mind that if you're decoupaging with paper napkins, you only need the top layer featuring the pattern.
Paint a coat of Mod Podge onto the outside of your trash can and attach the paper. Smooth it with your fingertips to eliminate wrinkles. The shape of the can will likely determine how you work. For example, if it's a rectangular can, you might cover each side individually with measured-out sheets. Yet, if the can is round, you'll possibly tackle it in smaller sections. Set the trash can aside to dry for approximately 20 minutes. Next, paint a coat of Mod Podge on top of the decorative paper to help seal it on. Once it's dry, go back and give it one final coat.
Hopefully, you won't even recognize your trash can after its inexpensive, gorgeous glow-up. Set it in your bathroom and it should no longer stick out as an eyesore. Who knows, your guests might even mistake it as being just a lovely piece of decor. Well, that is unless they take a closer look. To help with the trash can's odor, try this cotton ball trick to make your bathroom smell fresher.