How An Old Tray Turns A Cluttered Deep Cabinet Into An Organized Space
We may receive a commission on purchases made from links.
At first glance, a deep storage cabinet seems like a blessing. With all that storage space, what could go wrong? Well, organizing the space effectively is often the challenge with deep closets. Deciding what goes at the back of the shelf (and hoping you see it again) can be a struggle. You might forget what you have way back there, and getting to it often involves removing everything in front of it from the shelf. Eliminate that problem when you organize your pantry or cabinets by turning an old wooden tray into a lazy Susan for that difficult storage space. With inexpensive hardware, like this ZTEOFO Turntable Rotating Plate, you can make the basic tray turn on a whim. That way, you can easily see what's at the back and grab what you need by spinning it to the front.
You'll save a lot of money on this project if you already have a wooden tray you can use. Something with a lip around the edge will keep items from sliding off when you turn it. If you don't have any trays, try thrifting a suitable option. Measure the cabinet shelf's depth to make sure you choose a tray that fits inside it. Style-wise, there is some flexibility since the turntable will be mostly hidden inside your closet. You can also paint, stain, or decoupage the wood to update the look.
To attach the hardware, you'll need a drill. Having a tape measure on hand is also helpful for centering it. And felt pads on the bottom of the turntable will keep it from scratching your shelves. The result is a small kitchen organization idea that helps you maximize space.
Turn a wooden tray into a turntable with hardware
Before adding the turntable hardware, clean the tray well, especially if you thrifted it. You'll also want to make any updates to the tray first, so it doesn't rotate while you're painting or staining it. Sand the wood before painting or staining it to help the new layer stick well. If your tray doesn't have much of a lip on it, consider gluing large wooden beads (or something similar) around the top edge. To add a design that'll be a conversation starter, you could use a wood-burning tool to add text or shapes. Or, decoupage pretty napkins onto the flat surface inside the tray. Stenciling, painting by hand, and applying vinyl transfers are also good options.
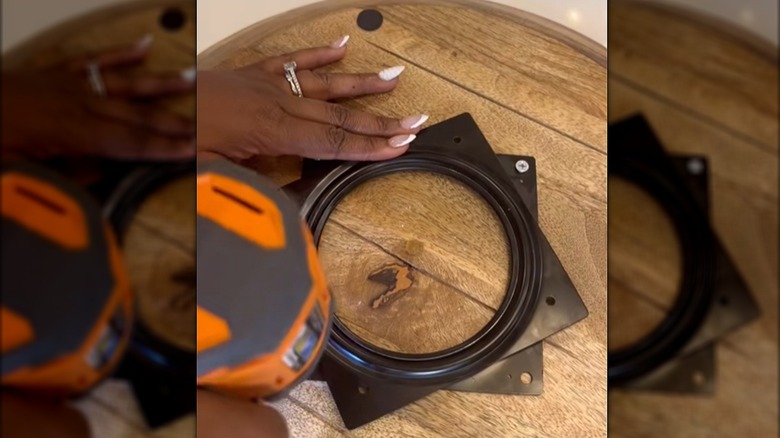
Next up is attaching the hardware. Flip the tray over, and find its center. Position the hardware in the center of the tray, and mark the screw holes for the base plate. Predrill holes for the screws, and then install the screws. If the turntable base has a slippery or rough bottom, add self-adhesive felt to the bottom. Test it out to make sure it rotates smoothly before putting it in your cabinet.
Your DIY lazy Susan would work well in a variety of closet and storage spaces. In the kitchen, it's a clever way to store and organize your spice collection. Or, put it under the sink in your kitchen or bathroom to hold cleaners and other essentials. For storing smaller items, consider placing small plastic, wood, or metal bins inside the tray.