Stop Stuffing Your Cabinets: A Smarter Way To Store Lids Without The Clutter
We may receive a commission on purchases made from links.
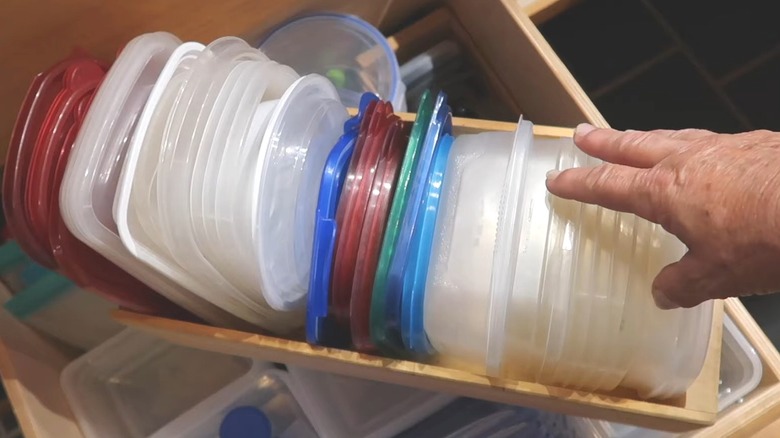
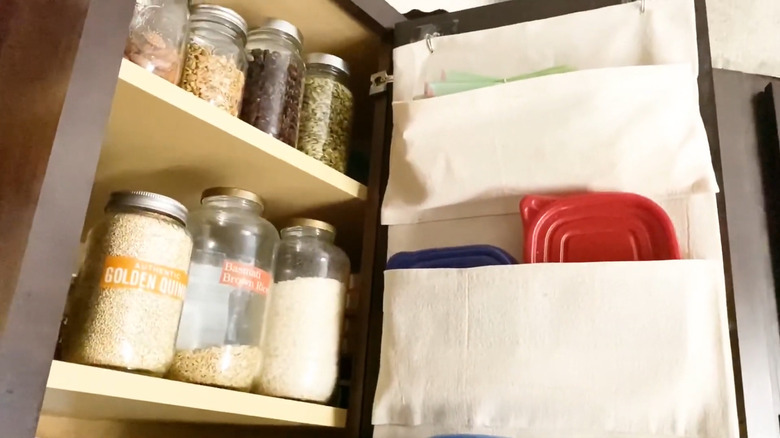
Finding the right lid for the food storage container you want to use can feel like an impossible task, especially when your goals of saving space and keeping lids tidy are completely at odds. On one hand, putting your lids on the containers means you can't stack them efficiently, leading to wasted space. If you leave the lids separate, though, they often end up all over the cabinet and become difficult to find. Rather than continue to awkwardly stuff their lids into their cabinets like this, several crafty creators have solved the dilemma for good by sewing simple food storage lid pouches that hang on the inside of the door, organizing the tops right near the containers. And if you don't sew, you can just use hem tape, hot glue, or fabric glue to craft your pouch. This lid storage solution works on all cabinet door styles, and there are several ways to hang it to ensure it won't cause any damage.
By crafting the storage pouch yourself, you're able to customize it to the size of your cabinet door and choose how many pouches you want to include. Since the pouch will go inside your cabinet and only be visible when you open it, the fabric pattern doesn't matter — using scrap fabric makes it one of the most cost-effective storage ideas to free up kitchen space. Choose all one type of fabric, or make each piece a different pattern. Heavier fabrics, like canvas, give the pouch more structure, or you can double up on the fabric by adding an extra layer as a backing.
How to make a lid storage pouch to reduce cabinet clutter
This DIY is one of the smartest small kitchen organization ideas because it is so easy, inexpensive, and versatile. Measure your cabinet door to determine the pouch dimensions. Cut your fabric for the backing a little larger than the door so that you'll have an extra or so on each side to fold over and hem. Fold over and iron the edges, and either sew along the edges or use hot glue, fabric glue (such as Aleene's Fabric Fusion), or seam tape to hem them.
Next, cut the pouches, using a few lids to help you determine how tall they need to be and how many rows of pouches will fit. The easiest and most space-saving option is to make each pouch the width of the backing. However, you could also make individual pouches if you want separate slots.
Cut the fabric for each pouch a little wider than the backing, so you can finish the seams and leave some slack along the opening at the top for the lids to fit. Hem the sides of the pouches. Then, attach the left and right sides of each pouch to the backing, and stitch or glue the bottom edge. You might need to tighten the ends of the pouch slightly to keep the mouth from opening too much and letting the lids fall out. If you want to embellish the pouch, add fun trim or stitch labels onto them. To attach it to the door, use peel-and-stick Velcro (attach a few pieces of Velcro Sticky Back for Fabrics Tape to the pouch) or add little fabric strips to the back to loop over Command hooks.