The Built-In Toilet Paper Storage Solution Anyone Can DIY Out Of Scrap Wood
We may receive a commission on purchases made from links.
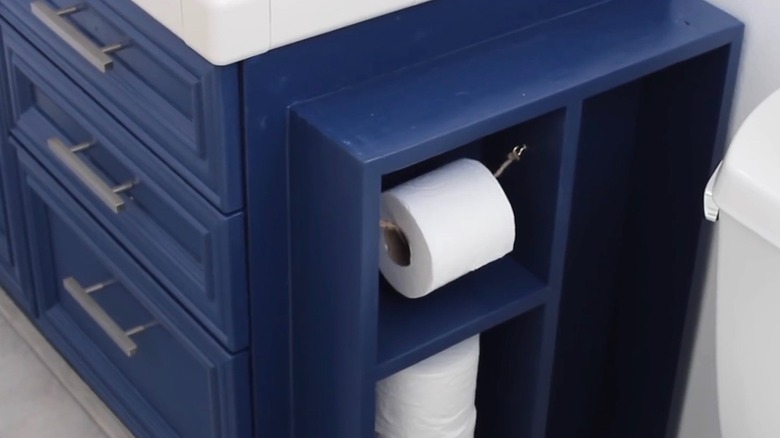
Unless you prefer to wash with a bidet, a toilet paper holder is a critical bathroom amenity. If your bathroom doesn't have one, you can always shop for a freestanding holder, but a good alternative is to install one yourself. YouTuber Living to DIY with Rachel Metz has an innovative design that also builds extra storage space into your cramped privy. The idea is to DIY a toilet paper shelving unit out of wood and attach it to the side of your bathroom vanity next to your toilet. The cubby has a compartment to hold the roll in use, another below it to store backup rolls, and a taller one on the side to hold cleaning supplies or a plunger. If you have leftover scrap wood from past projects to make it, this can be one of the most functional and budget-friendly toilet paper storage hacks you could try.
For this to work, the side of the cabinet should be next to your toilet but not too close, because you need to leave enough space for the toilet. Code requires 15 inches of clearance from the middle of the toilet to the cabinet you build. The materials you need to assemble this project include your scrap wood pieces (e.g., 1-by-6 or 2-by-6 pieces), finish nails, and wood glue, such as Titebond Wood Glue. If you want to stain or paint it, you'll need sandpaper to prepare the wood, as well as paint or stain and a clear protective finish, such as Varathane Water-Based Acrylic. If you decide to paint, don't forget wood primer. Without it, the bare wood may soak up the paint unevenly and leave blotches. Make your life easier by choosing fast-drying and easy-to-clean water-based finishing products.
How to DIY a side vanity toilet paper holder
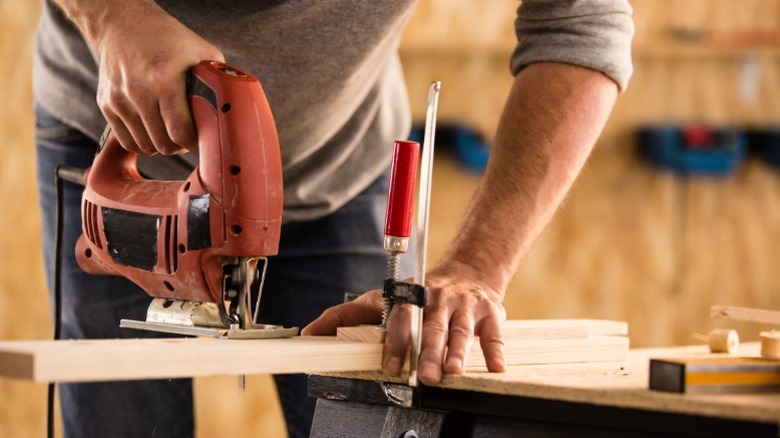
To start this DIY, you'll need four pieces of wood to make a rectangular box that fits against the side of the sink cabinet. Measure the dimensions for this frame, and use a table saw or miter saw to cut the four boards to the proper lengths. The cabinet should be wide enough to store a stack of toilet paper on one side and your plunger on the other. You'll then use one more piece of wood to divide the cabinet in half heightwise and a shorter piece to make the compartment for the toilet roll holder. That's six pieces altogether, all the same width.
Assemble the outer frame by spreading glue along the board edges where they'll meet the adjacent board. Tap each joint together with finishing nails. Next, install the dividers the same way. If glue oozes out of any joint, wipe it up immediately with a damp cloth — it's more difficult to remove if you wait. After the glue sets, you're ready to finish. The finishing tools you need are 120-grit and 220-grit sandpaper, rags, and paintbrushes. Sand the unit's surfaces with medium-grit sandpaper, and clean away the dust before applying the primer. After priming, sand again with fine-grit sandpaper, and it will be ready to paint.
To install the cabinet, drive screws into it from inside the sink cabinet. The screws won't be visible, and they'll be easy to access. You might want to add legs to lift the cabinet and ledges to prevent items from falling. Instead of suspending the roll on twine, as Metz proposes in the video, you could just as easily install closet pole hardware sockets, like Everbilt Sockets, and use a wooden dowel to hold the roll.