Don't Replace Them! Give Ugly Bifold Closet Doors A Gorgeous Glow-Up With This DIY

We may receive a commission on purchases made from links.
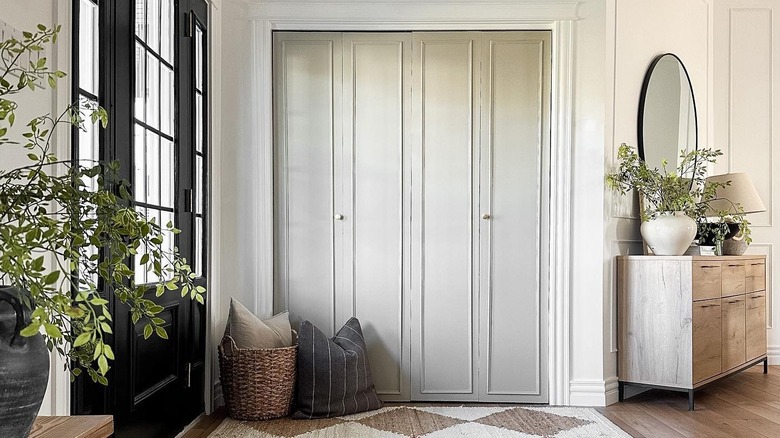
Bifold doors are commonly used in homes for smaller spaces (they're perfect to hide your washer and dryer) or as doors for storage areas like pantries and closets. There's a good chance your home might have a pair of these doors, as they provide an inexpensive option to create convenient access without taking up a ton of space. Though these features can certainly be beneficial, bifold doors are notorious for one major drawback — their bland aesthetic. In their basic form, bifold doors are often, dare we say, quite ugly. But with a little bit of creativity and time, you may be able to change all that and discover how these can be a surprisingly effective closet door type to add style and function to your home. By simply covering the face with some thin hardboard, you'll have a blank slate to transform into any style with trim and embellishments, bringing your doors from drab to fab on the cheap.
Instead of going through the trouble and expense of replacing boring bifold closet doors, use this simple DIY to give your bifold doors a glow up. It won't take expert skill and is perfect for beginners and experts alike, anyone who's looking for a different way to give plain bifold doors a modern upgrade. Start by grabbing some high-density fiberboard (HDF), like a Hardboard Tempered Panel from Home Depot, along with some wood trim to create a custom design. Otherwise, you'll need heavy-duty construction adhesive (like Liquid Nails), finishing nails, wood caulk, and your choice of paint and decorative molding. With the refreshed door face, it only makes sense to finish with some stylish new handles to bring the updated design home.
Decorative trim is a game changer for bifold doors
Before you start updating their looks, remove your bifold doors and hardware from the track. Then, cut your HDF to size, cutting a panel for each door section that fits perfectly flush to the top, bottom, and sides of the front face. Do some light prep by sanding the HDF, if needed, to scuff it slightly so it will adhere more readily to the door. Next, install the HDF boards to the outside of each bifold door using Liquid Nails. Apply a line of adhesive around the edges where the board will lay over the door, and add more around the middle face to ensure the strongest grip possible. You can even reinforce this by dropping in some brad nails around the edge.
@samantha.home.aesthetic For years I really did not like these bifold doors. They always felt like the most boring, builder-grade thing in the room. Even my husband kept saying we should either get rid of them or do something different with them. Then I saw a photo on Pinterest with this rope trim detail and similar hardware and I thought... wait a second. I could totally recreate that look. So I grabbed some masonite board, thin trim for the frame, and this flexible rope trim that was surprisingly easy to work with. A little bit of liquid nails, a few tiny finishing nails, and I used leftover Barista color paint from my pantry makeover. And now the ugliest bifold doors in the house might actually be one of my favorite details. #diyhomeprojects #homemakeover #budgetdiy #cozyhome #moderncottage
The next step is to add the trim in your desired pattern. Use plain trim or more decorative moulding, or use a combination to create custom detailed panel borders. There are no shortage of options here, such as a super-cute Nuanchu Decorative Wood Trim in a rope style that'll create a chic nautical theme or a more ornate design like House of Fara Chair Rail Moulding from Home Depot.
After choosing and cutting your trim to size, attach it to the hardboard with Liquid Nails. Use paintable wood caulk to fill any gaps for a sleeker look. Next, prime your updated door to prepare it for paint. When selecting your paint, choose a neutral color for doors that blend in with the room's aesthetic, like Farrow and Ball's trending Setting Plaster, or bold tones to make them a focal point like current favorite Hidden Gem by Behr. Lastly, add on your door hardware before reinstalling your door. Just like that, you've given your bifold doors the ultimate makeover!