DIY A Hanging Photo Display Using Leftover Jar Lids — It's So Cute And Easy!
There are tons of DIYs that use glass jars but leave the lids behind. If you've found yourself with a bunch of leftover lids from mason jars and other glass containers, they could help add personalized decor to your home. Surprisingly, jar lids are a great shape and size to hold photographs, and can act as small frames. By inserting pictures into the jar lids and connecting several of them together, you'll craft a unique photograph display. With this genius way to use lids from old jars, you can make your own hanging strings of pictures to adorn your walls with memories of family and friends. Besides a collection of jar lids and printed photographs, you'll also need hot glue or Mod Podge, a drill, some screw eye hooks, and string.
Whether you're working with mason jar lids that have rings or lids from food jars, there are different ways to complete this project using whatever you already have on hand. If you leave the lids plain, your photo display will have a rustic charm. Alternatively, decorating the outside of your jar lids allows you to style this DIY however you like. For those that truly have an over-abundance of lids, consider making several strings of pictures to hang side by side. This DIY could be a great addition when planning and styling a gallery wall. Otherwise, you might hang this adorable picture display in your living room, kitchen, office, or anywhere that needs a little decoration.
How to transform jar lids into a beautiful picture display
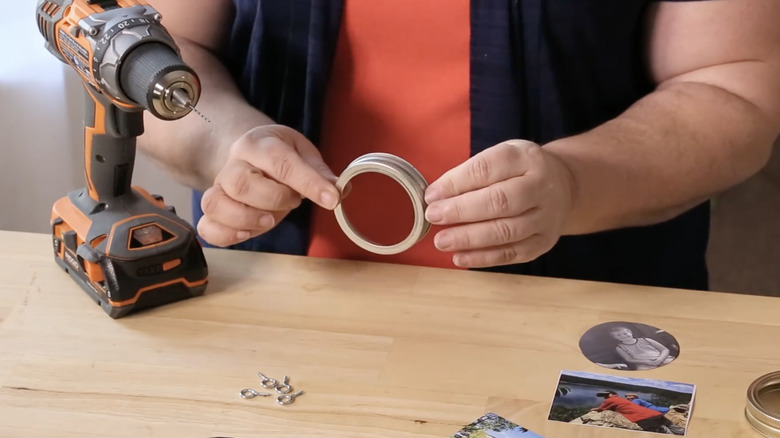
First, use your jar lid to trace a circle around your photos and cut them out. Depending on the type of lids you're using, there are a few options for this genius DIY to display photos without frames. With food jar lids, the picture should sit inside the lid, so that the rim is around the image. Mason jar lids provide more variations because of the removable ring. You could use only the metal rings to hold your photographs. With these types of lids, not using the flat middle piece allows you to face the picture through the jar lid. The lip of the ring borders your picture, creating a beautiful framed look. Alternatively, glue the flat lid inside the ring to get a similar style to food jars.
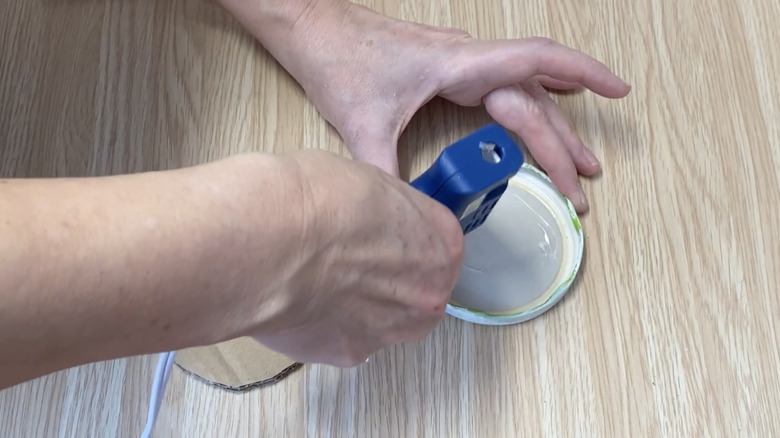
Now, simply glue your photos inside the jar lids. Applying hot glue to the back of the picture and sticking it inside the lid is an easy way to complete this DIY. Mod Podge can also attach the lid and picture. With the jar lid rings, add glue inside the lip.
To attach and hang your jar lids, you'll need to drill two holes into each lid. Make sure that the holes are directly across from each other, so that you can connect the tops and bottoms of each lid. Insert a screw eye hook into each opening, putting a little glue on the back to ensure it stays in place.
Hanging and decorating your jar lid photo display
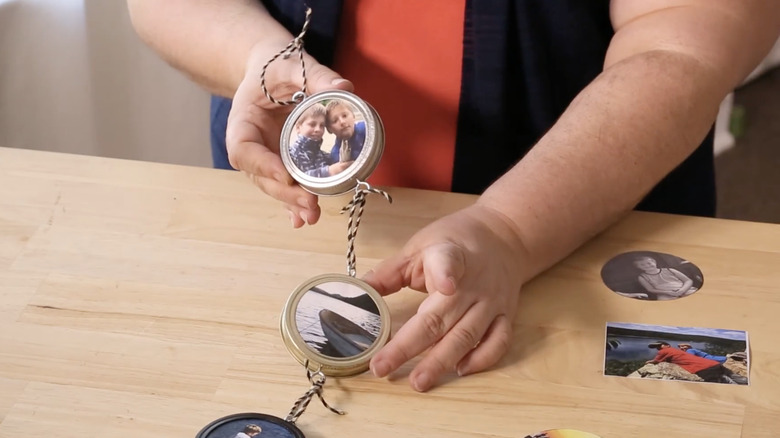
Once each of your lids has the picture and two eye hooks in place, you can create your hanging photo display. Arrange your lids into lines with your pictures in the order you'd like for your decoration. Make sure that each line has the same number of photos so that your display is symmetrical. Using several small pieces of string, tie the eye hooks of the lids together, creating a chain of photographs. Twine, ribbon, or whatever string you have on hand will work perfectly. Tie a loop of string around each of the top jars' eye hooks to hang your photos on the wall.
While leaving the jar lids as they are is cute, further decorating them helps to customize this project for your space. If you don't like the look of metal mason jar lids or colorful food jar lids, try spray-painting them before adding your pictures. Alternatively, you could wrap the exterior of the lid in cute twine or jute to give your DIY a more farmhouse aesthetic. Simply glue the jute down as you work around the lid. Glue on other accents, such as bows, ribbons, or even beads to personalize and decorate your jar lid picture frames.