Try Martha Stewart's Simple DIY To Transform Your Dated Porch

We may receive a commission on purchases made from links.
The porch is one of those spaces we use every day, but it can be tricky to update when the time comes to redecorate. If you've been giving some thought to your dated front steps or a veranda but don't want to undertake a whole renovation project, consider this smart glow-up on YouTube from home and garden guru Martha Stewart. It involves painting the floor and stairs of the porch with a diamond pattern stencil using slightly different shades for a very subtle change. This front-of-the-house refresh is porch goals and curb appeal in one, and the best bit is, Stewart takes all the guesswork out of the design.
Start with a solid base coat on the porch, then use stencils to mark the design for the second color. Stewart's greatest trick – and one that will save you a whole lot of time — is using a carpenter's chalk line to DIY your stencil. This is a tool that delivers a coating of chalk powder to a long string, which is held in place at one end, stretched out across the porch, and snapped against the surface to leave a straight edge that you can use as a guide to tape off an area for painting. This genius paint hack will help you get perfectly clean lines, whether you want to go with a diamond pattern, stripes, or checkerboard squares. There's no fuss and no need to tear up any floorboards to make the look work.
Putting your dated porch DIY to the test
To make Martha Stewart's hack for a stenciled diamond design work for you, you'll need a few supplies, including a carpenter's line, such as Irwin STRAIT-LINE compact chalk reel with chalk powder. Irwin's model comes with a 30-foot line and standard blue chalk. You'll also need painter's tape such as SmaringRobot premium painter's tape, a pencil, a thumb tack, a straight edge blade, a measuring tape, paint, and a paint brush. If you decide to refresh your dated door as well, look for front door colors that make a bright first impression and go well with the tone you've picked for the porch. Once you've applied the base coat of paint over the porch's entire surface and let it dry, it's time to tape off your stencil.
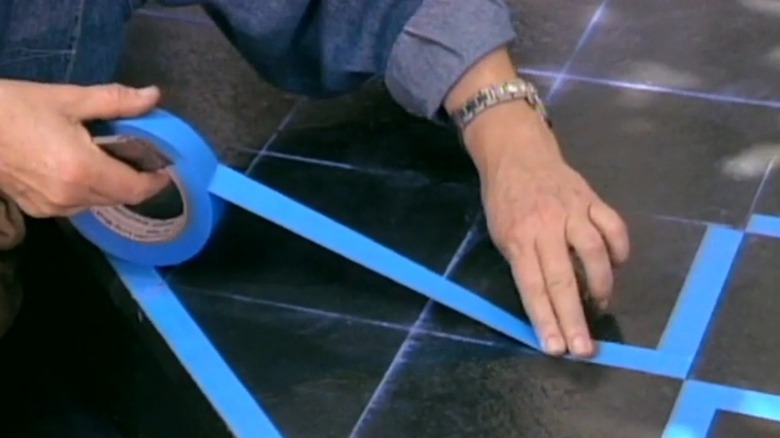
Tape a border around the outer edge of the porch. Measure the width to see how many diamonds you'd like for the space within the border. For example, with a 40-inch space between the two taped edges, you can easily fit four 10-inch diamonds. Use a pencil to mark the distances all the way around on your taped border. Fill the carpenter's line with chalk, stretch the string between two pencil marks, and snap to create a chalk line. Continue marking lines over the entire porch to create your diamond design. Then follow the lines to tape your pattern into place. Paint every second square.
Once it's done, you can enjoy the simple yet impactful change to your front porch. Customize the look by adding a decal to the center of each square or by going for a bold multi-colored look that fits your aesthetic. However you style it, you'll give your dated porch a whole new look without breaking your bank, or the porch, by DIYing it.