Turn An Old Cooler Into An Incredible DIY Water Feature For Your Garden
We may receive a commission on purchases made from links.
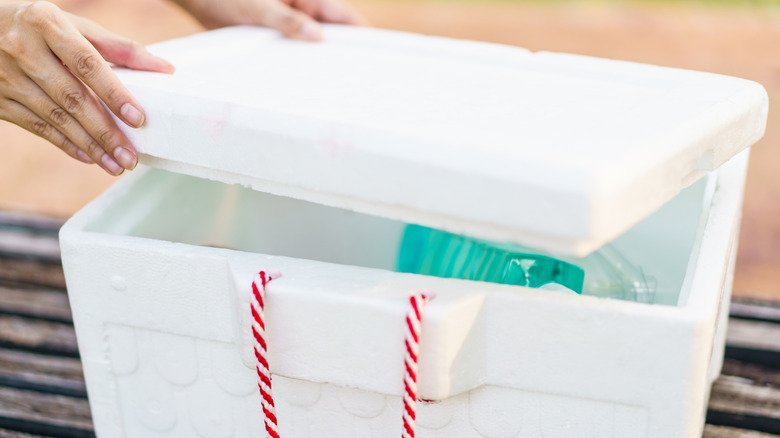
Do you have an old Styrofoam cooler left over from an impromptu beach day or festival weekend? While there's something to be said for letting your Styrofoam cooler turn into a spider palace in the garage, one TikToker has a better idea. @samantha.home.aesthetic kept her old cooler out of the landfill by turning it into an incredible DIY water feature for her garden. To make it, she drilled a hole in the bottom of her cooler, coated it in vinyl concrete patcher aged with watered-down paint, sealed the inside before adding a water pump, and then used a copper pipe to create a spout.
Adding a fountain is an excellent way to enhance your outdoor space, but as we all know, purchasing a water feature at your local garden center can be expensive. Luckily, even if you don't have an old Styrofoam cooler lying around at home, they're relatively affordable. For example, Walmart's Lifoam 45-Quart Foam Cooler sells for just under $20. No matter what you're using for your vessel, successfully constructing a DIY garden water fountain requires a submersible pump to make the water bubble. You can find electric and solar-powered options at big-box stores, local aquarium shops, or online. Just don't forget to consider where you plan to situate your fountain before making your selection, since you'll either need to have plenty of sun exposure or proximity to a dedicated outlet.
Remember to waterproof your DIY fountain
Although this is a messy project you'll definitely want to do outside, the end result is surprisingly high-end. To begin, gather your supplies. Besides the cooler and submersible pump, you'll need a vinyl concrete patcher (like the Quikrete 10-Pound Vinyl Concrete Patch from Lowes), black and brown watered-down acrylic paint, a bottle of Flex Seal Waterproof Rubber Spray, waterproof caulk, and a copper pipe (this will prevent algae growth). Also make sure you have a bucket for mixing, rubber gloves, a drill, and an old rag.
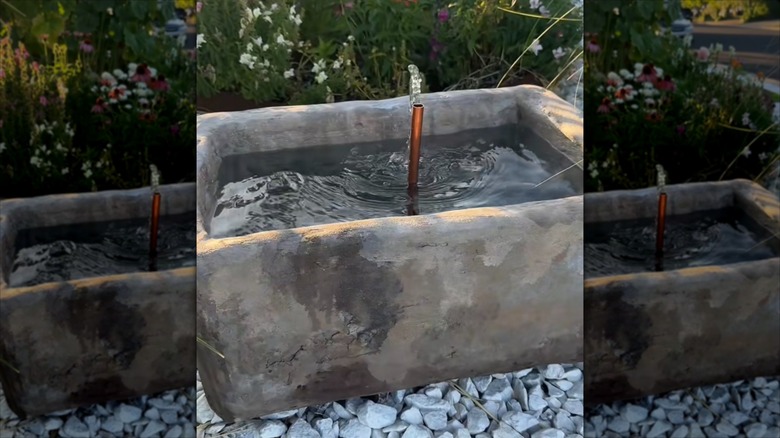
From there, carefully drill a hole in the bottom that's large enough to thread your pump through but small enough to seal in place. Then, coat the entire cooler in cement, being careful not to block the hole. Two coats should suffice. While @samantha.home.aesthetic used a vinyl concrete product, one commenter suggested that a product like Quikrete Hydraulic Water Stop Cement might hold up better under water. Either way, after letting it cure fully for an entire day, it's time to give it an aged limestone effect. Use a rag and splatter your paint around your concrete-covered cooler. Once dry, seal the inside with your waterproof spray. Even if you opt for a hydraulic cement, don't skip this step since sealing outdoor fountains prevents porous materials from leaking over time.
After threading your pump through the small hole, apply plenty of waterproofing caulk around it to keep the water inside. Finally, create a fountain spout out of the copper pipe. Choose a piece that's slightly taller than the height of your cooler, and aim for a snug fit around the pump outlet. Fill the cooler with water, turn on your pump, and enjoy your new water feature.