Use Thrift Store Doilies To DIY Beautiful Wall Art With Vintage Charm
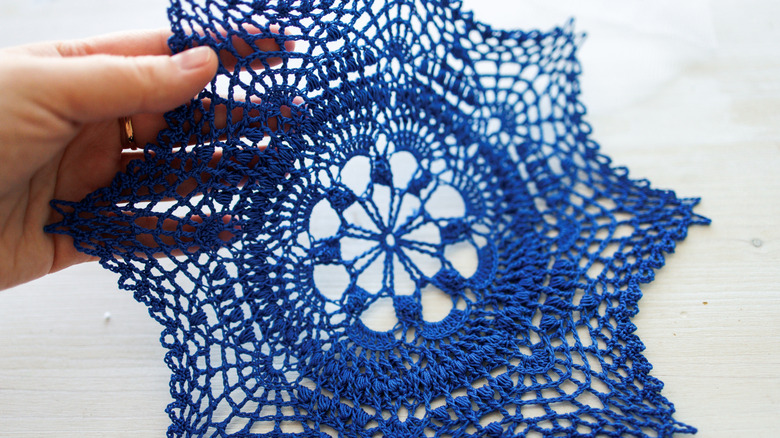
Doilies are more than just delicate pieces of home decor. For many of us, they stir up memories of the good old days. Perhaps your grandma laid doilies across every armrest, couch, and tabletop, or maybe your mom's pastime was crocheting the snowflake-like cloths. If you head to the thrift store, there's a good chance you'll be able to scoop some of them up. Make sure you do, as you can repurpose thrifted vintage doilies into the most gorgeous wall art, arranging several of the decorative designs on a fabric backing and putting the whole thing within a hangable picture frame. It's a DIY that's both simple and achievable in a variety of ways.
You only need basic supplies to transform doilies into hangable art, namely frames and fabric to use as the backdrop for your doilies. They're items you can also get at the thrift store. A vintage doily is already charming on its own, which is why the project doesn't require a long list of craft items. The lacy, intricate design speaks for itself and serves as a reminder of all the hard work that went into its creation. Plus, since each doily is unique, it means your art will be one of a kind, too.
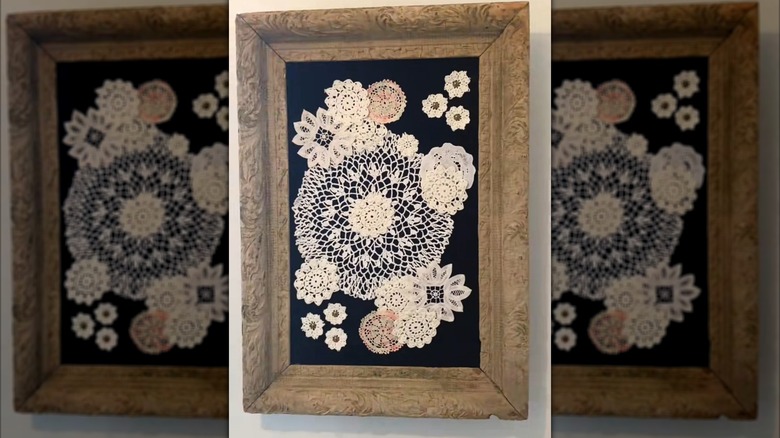
People have been decorating their homes with doilies for centuries. So, when you find them at the thrift store, who knows how much history they're holding onto? You can either grab one gigantic frame to make the sweetest wall art with your doilies or pick up multiple in various sizes. Look for fabric that will pair well with the vintage cloths, choosing complementary color combinations that suit the doilies, your design scheme, and the mood you want to create. Hold everything together to get an idea of how your piece will turn out. If something's not right, just keep searching!
How to turn your vintage doilies into art you'll cherish
Start by opening your frame and taking the back portion out. Remove the inner cardboard (or cut a new piece of cardboard to fit the frame's opening, if needed), and lay it on top of the upside-down fabric. Cut the fabric slightly larger than the piece of cardboard. Then, pull the fabric taut, wrapping the edges around to the back of the cardboard, and glue these to the cardboard. When choosing fabric for your backing, keep in mind that a material like velvet may provide a sophisticated look, but you could also use a vintage linen with a plain or old-fashioned print.
It's now time to add the doilies. Place one in the center of the fabric-covered cardboard piece. You can glue it down or quickly flip the piece into the frame, letting the glass keep it in place. If you'd prefer a collage of doilies, lay them out on the fabric to find the best placement. Then, glue them down before shutting the piece into the frame. When you turn it over, you'll have the prettiest wall art.
The last step is to figure out where to hang the frames so your doilies can be enjoyed all year long. A giant piece of art would look lovely in a bedroom or dining room. You could also create a stair or hallway gallery wall using multiple framed doilies. If you're feeling even more creative, an old window makes a great alternative to a picture frame for some fitting cottage flair. You could also skip framing the doilies altogether and tack them to the wall instead. However you do it, the delicate doily designs almost guarantee that the results will be beautiful!