The IKEA Hack That Turns Budget-Friendly Picture Ledges Into A Cool Side Table
The furniture you decorate your home with plays a big part in its overall aesthetic, which is why it's so frustrating when beautiful things come at a big cost. One way to avoid the high price is to hack cheap items into luxe-looking ones. In this transformation, two simple Ikea Mosslanda picture ledges, sold for about $13 a piece, are combined into the base of a chic table. There are many end table ideas that you can DIY or buy, but this one is the perfect mix of both.
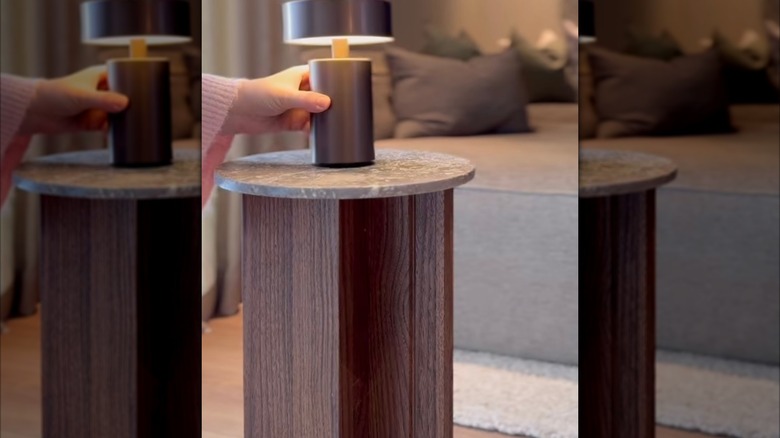
The key aspect of this project is the "L" shape of the shelves, which makes it easy to link them together with glue. Propping them up vertically gives height to the structure, which is topped by a marble slab. This is where you get to play around with the finished look and personalize it to your style. If you're more interested in farmhouse end table ideas for a casually chic home over a modern minimalist one, for example, go with a distressed wood circle instead of the faux marble. Consider the look and cost of materials to find something that suits your taste and budget.
Creating your Ikea Mosslanda side table
To get started on your Ikea Mosslanda hack, you'll need your two photo ledges, as well as a tabletop. A great place to source marble for this project is a countertop retailer. They often sell the remnants of counter slabs for cheap. You can also go with a wood disc, like Navorix's Acacia wood serving tray, or check out a local thrift shop for a table topper. Pick up some heavy-duty glue like Gorilla Construction Adhesive to hold it all together. Once you've gathered supplies, it's time to get to work on your budget-friendly hack.
Each shelf has a side that goes up against the wall and a side that juts out to hold the photos. Add your glue to the inside of the part that attaches to the wall, where the photos would normally go. Then, attach the same part of the other shelf where you put the glue. This should create an "S" shape that stands up on its own. Once the glue has dried, stand the structure up vertically and add a line of glue to the top edge. Finally, press your chosen tabletop onto the newly crafted base bottom-side down.
Once that's done, you can customize by painting your new furniture, adding peel-and-stick wallpaper to the top for a patterned look, or trimming the edges of the circle with jute rope for a nautical vibe. These are perfect for a living room, or as space-saving side tables for those with small bedrooms. Wherever you place them, you'll have affordable, one-of-a-kind decor for your home.