Transform Q-Tips Into Festive Winter Decor With This Creative DIY
With autumn behind us and snowy winter months ahead, this season is all about making the interior of our homes feel cozy and festive while the weather outside is frightful. And rather than spend even more money than you likely already are during one of the priciest months of the year, why not snuggle up with a cup of hot cocoa and create holiday decor during with family or friends? Not only will it save you some dough (and a trip out to the store in the cold), but you'll make priceless festive memories with loved ones that you get to relive every time you look at your creations.
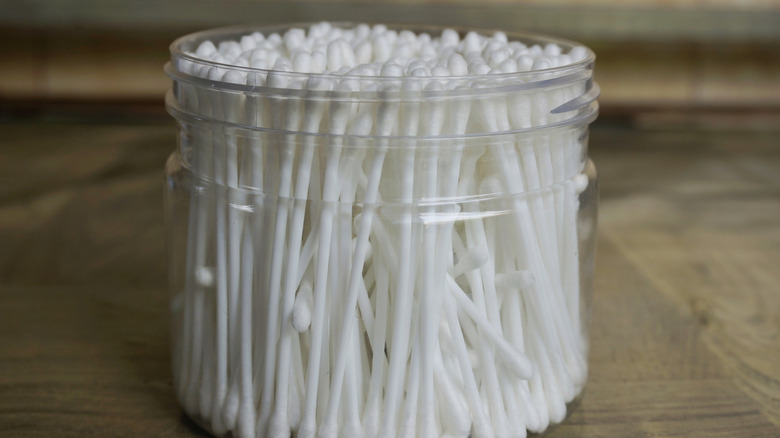
One such clever yet simple craft idea was shared by Marissa Charlotte (@marissa.charlotte) on TikTok, who used everyday cotton swabs to make festive winter snowflakes. Ideal as either tree ornaments, non-denominational all-winter-long seasonal decor, embellishments on your gift wrapping, or as an affordable way to make your holiday party amazing, these darling Q-Tip snowflakes are simply hot-glued together then wrapped in a fuzzy white yarn, making them a great beginner DIY craft for all ages (with a little hot glue supervision for the littlest crafters, though keep reading for an alternate version without hot glue too). You'll need to grab 12 cotton swabs per snowflake you're planning to make. In addition, you'll need wax paper, a glue gun, and white fuzzy yarn. Now you're ready to start a great winter craft project, while, of course, singing, "Let it snow, let it snow, let it snow!"
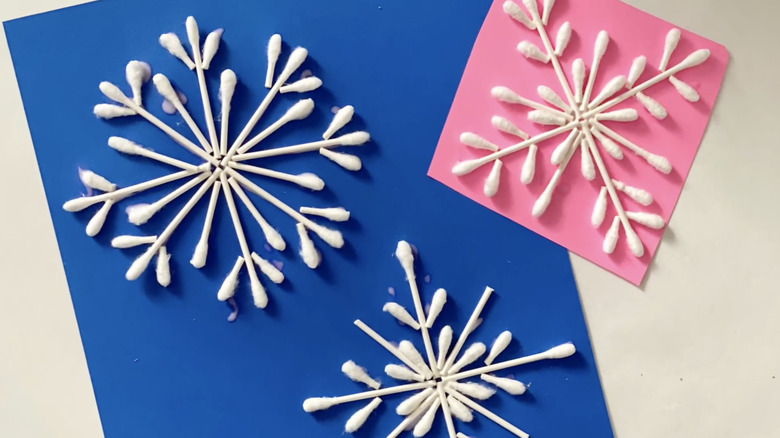
Hot glue cotton swabs in a snowflake shape then wrap with white yarn
To create your own Q-Tip snowflakes, place a piece of wax paper on your work surface. Hot glue won't stick to the wax, meaning you can assemble your snowflakes flat and then peel them from the wax paper when dry. Place a circle, roughly half-inch in diameter, of glue onto the wax paper and press in the tips of six cotton swabs radiating from the middle to form the main structure of the snowflake. For easy spacing, begin with one facing straight upwards and another facing downwards, followed by a V of two others on each side.
Next, bend the other six Q-Tips in half without breaking them, so they form a small V-shape. With the cotton tips facing outward, use a dab of hot glue to place a V near the end of each of the main six swabs. The arms of the small V should be about even with the tip of the main swab that extends beyond the connection point so it looks like three equal prongs at the end. Once all swabs have been secured, let the glue dry for a few minutes before pulling it off the wax paper.
The next step is to wrap each snowflake in fuzzy white yarn. Hot glue the end of the yarn to the middle of the snowflake and wind your way out and back on each arm, taking the time to wrap each of the three end prongs in the process. Use a dot of hot glue to secure the end once the swabs are completely covered, then add a hanging loop with the same yarn. Repeat this process for each snowflake in your project to create a winter wonderland.
Design ideas for personalizing and decorating with your Q-Tip snowflakes
While the TikTok demonstrates one way to make cotton swab snowflakes, there are many alternate approaches. As they say, no two snowflakes are alike. So feel free to change up the Q-Tip design for each one, altering the number of cotton tips, prongs, and/or arms. Keep in mind that the more you add, the more delicate the snowflake may become and the more challenging it'll be to wrap in yarn. However, you can also build intricate designs and opt to skip the yarn wrapping altogether, adding only a hanging loop for a more streamlined look. If you do choose to wrap them, feel free to deviate from the standard white yarn, creating color palettes of neutrals, gradients of white and blue, traditional green and red, metallic silver and gold, or even rainbow to fit your home's festive aesthetic. If you're feeling particularly brave, you could forgo the yarn and glitter-coat your snowflakes for a sparkly vibe.
If you're working with young children and want to skip the hot glue, as well as make the assembly process easier with more structure and stability, use a piece of construction paper as a backer to build your snowflake shape. Use craft glue to secure the cotton swabs to the paper. Let it dry, and cut the paper to a round or snowflake shape. Then add a hanging loop to the back to create adorable DIY holiday ornaments for all ages.
No matter which building approach or design you go for, hang a grouping of these adorable Q-Tip snowflakes on the tree, on a garland, or simply from the ceiling. You'll create your own winter wonderland on a budget and in just a few minutes with this clever DIY.