The Clever Hack That Makes Storing And Using Long Extension Cords A Breeze
We may receive a commission on purchases made from links.
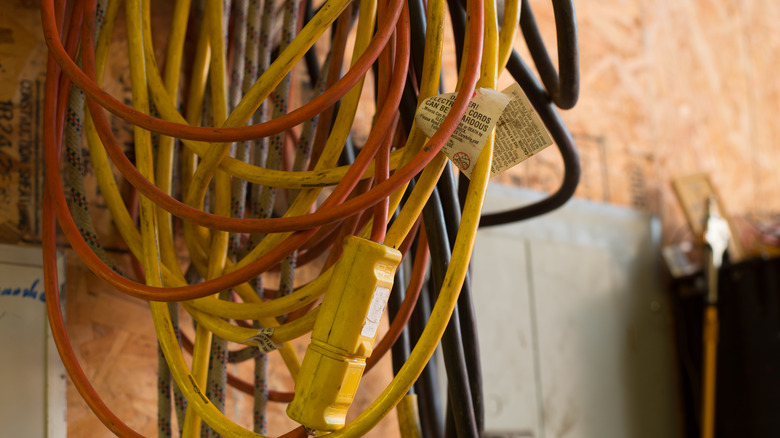
When is a 100-foot extension cord only 23 feet long? There are a lot of possible answers. For example, when you leave it in the yard to charge your kid's Power Wheels, then run over it with the mower. But the usual answer is when it's all tangled into a massive ball of tripping hazard and future inefficiency, like most extension cords. There are also a lot of solutions for storing and organizing extension cords, but the solution is the humble five-gallon paint bucket — a cheap, widely available, stackable storage solution with one particular advantage.
For this hack, you will coil your cord in the bucket after creating a hole in the bottom to feed the plug through, making it an act of intentional sabotage when someone borrows your cord but doesn't store it properly afterward (or possibly self-sabotage, if you're usually the guilty party). This bucket of genius can also be used to store an air compressor hose, Christmas lights, rope, etc.
One warning is called for with a storage solution like this. Drawing a lot of current through a coiled cord can cause it to heat up, which is one of the big problems with using long extension cords, because it reduces the cord's amperage capacity. Even if you don't need the full length, pull out a reasonable amount of the cable to prevent this from happening.
How to make your cord bucket
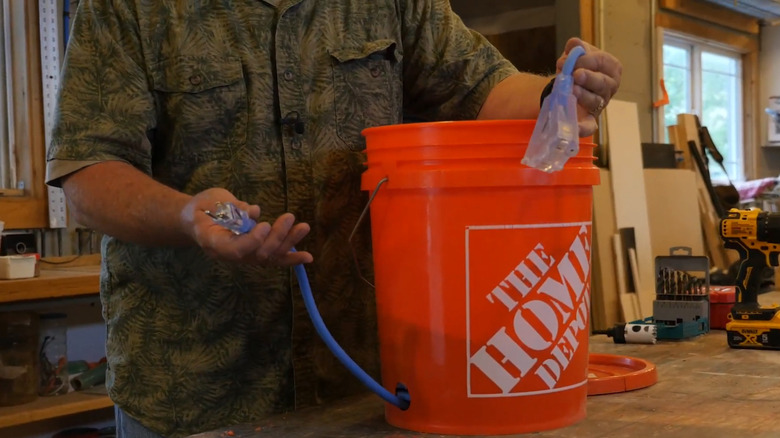
This is a simple project, for which you'll only need a drill, a bit, and maybe a hole saw, though you could probably get away with using a jigsaw, heat gun, or one of those terrifying hunting knives. We'll just pretend you're using a hole saw, with which you will make an opening near the bottom of the bucket that's big enough for the male end of the extension cord to pass through. You should also drill several 38-inch holes in the bottom of the bucket for drainage, in the event that your bucket finds itself open in a downpour. Then, feed a few feet of cord (male end, of course) through the hole you created from the inside.
Coil the cord in the bucket against the sidewalls, following the natural twist of the cord when you can to minimize chaos and tangles. A well-fed cord should leave a cylinder of open space in the middle of the bucket and the female end at the top of the coil. Push the cord's male end back toward the bucket, pulling the cord up through that center cylinder if necessary — don't push the male plug into the bucket; allow it to protrude through the hole a little, so you can grab it later. To use the cord bucket, pull out the male end, plug it into your power source, and start unwinding the coil's tap end to wherever you need it.
Making the cord bucket even better

Like any great idea, it's only minutes before someone has found a way to make it greater, and so it is with the cord bucket. Here are a few possibilities to try. Slit the outer edge of the lid every few inches to make the bucket easier to open and close. You could also buy a hinged bucket lid, like the Frabill Snap-On Lid, which will allow you to open only half of the lid when you're ready to feed out your cord.
Another trick is to make a cut from the edge of the lid, then drill a cord-width hole in the middle of that slit. Feed the tap through, and when you're using the cord, just take the lid with you wherever you're using the power. This will keep you from losing the lid. Consider adding 20-amp outlets to the lid and wiring the tap end of the cord to it, so that the lid itself becomes the outlet. You can do this either by adding a pigtail to the receptacles and plugging it in or by cutting off the original tap end and wiring it to the receptacles.
We have also seen a cord reel stored in the bucket atop a DIY lazy Susan mechanism, allowing you to reel in the cord either by turning the reel. A way to avoid the lazy Susan, at the expense of weight and noise, is to put a bunch of marbles in the bucket for the spool to ride on, which is sufficiently smooth for the job.