The Best Method For Removing Old Caulk From A Shower

We may receive a commission on purchases made from links.
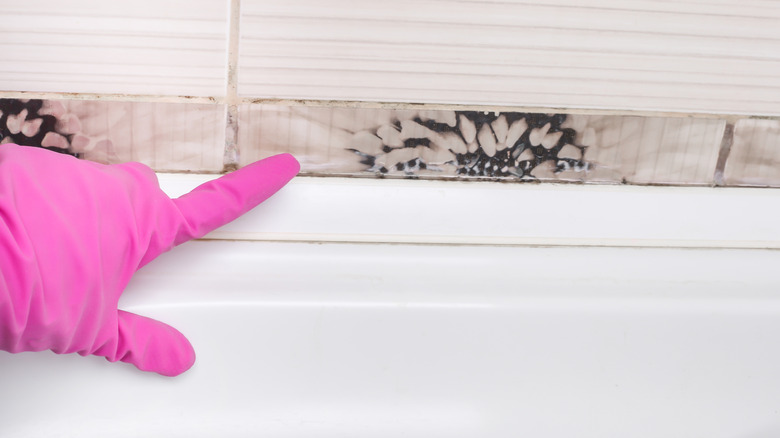
Have you noticed your bathroom has been starting to look a bit old and dingy? While it may be tempting to consider a fresh coat of paint or new tiles, you may want to try replacing your shower caulk first. Old sealant can often become cracked, discolored, or even moldy in wet places like bathrooms and kitchens. This does more than just create an unappealing look, however. Cracked caulk can make your home less energy efficient due to the lack of an airtight seal and moldy caulk can pose a health risk, too.
So, while you may know the tips and tricks for the perfect caulk job, have you learned how to remove an old layer of the stuff? Well, there are a few essential steps in this process because caulking is designed to be highly adherent and can therefore be difficult to remove. You'll score and scrape the old, discolored caulk, before cleaning the area (either with a wet towel or vinegar depending on the material of your shower), and then adding your new layer. To do this, you will need a sharp object like a precision knife or similar blade. In order to protect the surface of the area you are working in, you may want to use a sharp but non-metal option like these Plastic Razor Blade Scrapers from Walmart as they will prevent the shower being damaged while you remove the caulk. You will also need a putty scraper and a scrubber or wet towel.
Steps for removing old caulk
The first thing to do in order to remove old caulk is to score it. Using a knife or plastic razor blade, slowly run the sharp edge along its surface. Depending on how old the caulking is, you may then be able to peel a good amount of it off due to its adhesive qualities breaking down over time. If not, you may want to opt for an adhesive removal spray like Goo Gone Caulk Remover, which will help to loosen the bond and make the caulk easier to remove.
Afterwards, you can use your putty scraper or a similar object to manually scrape off the remainder of the sealant. It is very important to remove as much old caulk as possible because, if you don't, the new layer will not be able to stick to the surface of the shower as effectively. Finally, clean the entire area using either a wet towel or a homemade vinegar cleaning solution to get rid of all the small remaining flecks of caulk. Keep in mind, however, that vinegar can cause damage to natural stone, so if your shower is made of this material, it may be best to simply use water. Once the surface is cleaned, allow it to fully dry for around 24 hours before adding on a new layer of caulk so that it will be able to bond to the surface properly. However, you may want to look into the difference between caulking and silicone to see which is the best option for your shower moving forward.