The Quick And Easy Way To Fix Sinking Patio Pavers To Prevent Further Damage
When they are fresh and new, pavers — whether in a patio, driveway, or path — are a beautiful addition to any home, regardless if they are brick pavers or made from a special material. They are available in a spectrum of colors, sizes, and shapes; the patterns and visual texture they create add value to their ultra-practical function of creating a solid, durable outdoor surface. The curb appeal they foster also adds value to your house. But all of those benefits will erode if the pavers begin to sink out of alignment with each other. In fact, the paver surface will change from being an asset to a potentially dangerous hazard. Sunken pavers are not inevitable, but they are unfortunately common. How do you do an easy DIY repair for these pavers? With a little bit of know-how, a small amount of elbow grease, and a handy tool that you already own. A flat-blade screwdriver and some fancy sand.
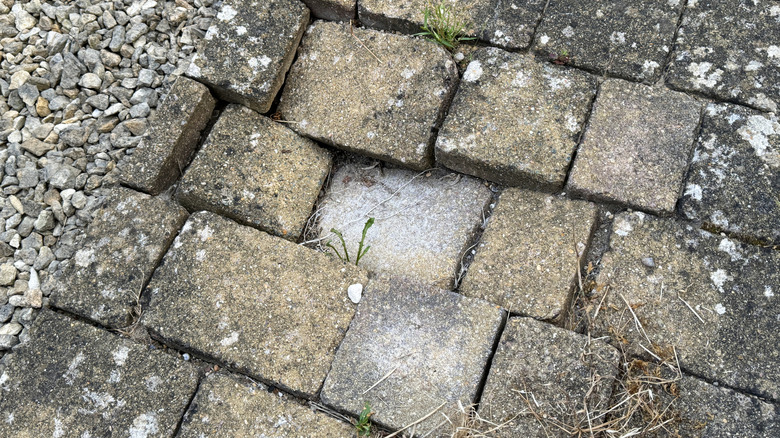
Curiously, sunken pavers are notoriously stubborn about being pried up and out of place. This is especially true of the first paver. You'd think that they would already be loose and easy to remove. Not so. That is where your flat-blade screwdriver comes into play. Sometimes identified as the most "abused" tool in your toolbox, considering they are used as scratch awls, chisels, marking knives, pry bars, can openers, and a host of other tasks beyond driving screws. But perhaps they are just the most versatile tool in the box, and in this case, you'll use it to lift the sunken pavers out of their depressed state. They are definitely the key to quickly and easily replacing sunken pavers.
Leveling your sunken pavers
The tools you'll need in addition to a screwdriver are a rubber mallet, level, and a trowel. You will also need some type of sand appropriate for working with pavers and a screed board. Start by gently tapping the pavers around the sunken paver or pavers to loosen them. Then, using the flat blade screwdriver, start prying the sunken paver up. You may need to "walk" it up a little at a time, prying on opposite edges of the paver. When you get it out, remove all the pavers that are or have begun to sink. Use the trowel to dig out the uneven surface below the removed pavers. If installed correctly, there should be a layer of gravel as a base, dig down to the gravel. Washed concrete sand is the best for supporting the pavers. Pour some into the opening. A screed board is just a length of lumber you can DIY and can use to drag it evenly across the surface of the sand to create a level base for your replacement pavers. You'll need it cut to fit the opening made when removing the pavers.
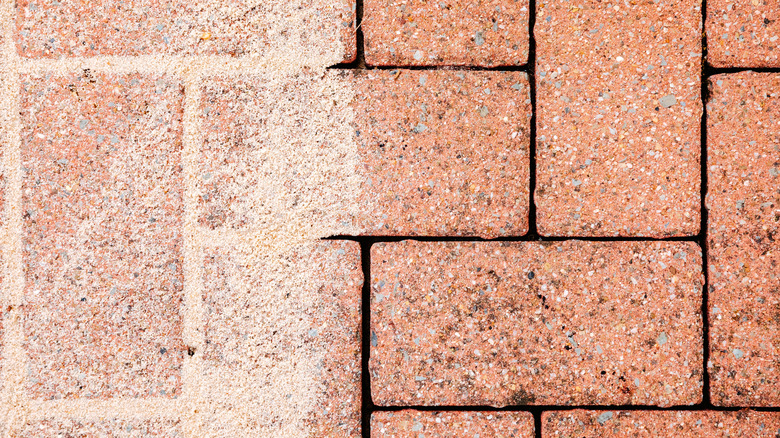
Build up the concrete sand so that the top of your replacement pavers (new or the removed pavers) align with the surface of the existing paver surface. Adjust the sand with the screed board. Put the pavers in place and check the alignment with your level. Use more sand to fill the gaps between them, gently tapping them in place with the mallet. Many folks recommend polymeric sand for this task, installed according to the directions on the bag. If the sand settles, add a bit more.