How To Build Basement Storage Shelves
We may receive a commission on purchases made from links.
If your house has a basement, consider yourself lucky because fewer than a quarter of the single-family homes built in 2018 — and only a third of the homes built in 2000 — have one, according to the National Association of Home Builders. Basement storage shelves are a good way to take advantage of your good fortune because they greatly improve the usability of the space available there. A shelving unit increases your storage space and helps protect the items you store by keeping them off the floor, which is often damp and sometimes moldy.
If you're looking for a DIY carpentry project that doesn't call for advanced skills, building basement storage shelves may be just the ticket. Depending on how you size the shelves, you may be able to build them with only a minimal amount of cutting, or you can have the cuts made for you at the lumberyard. Even if you have to do some cutting yourself, it's very basic work you can do with a circular saw or even a hand saw.
Although lumber prices have fallen off about 60 percent from what they were just after the pandemic lockdown, they are still almost as high as they ever were in the pre-COVID era, so building your own storage system may not be a money-saving venture if you buy new top-shelf lumber. For basic utility shelves, you can save a lot by using inexpensive 2x4 framing studs and plywood or cheaper alternatives. Or, this may be a golden opportunity to recycle leftover lumber from a remodeling project some old wood that's been sitting in the basement for years.
Consider Your Design Options
Consider Your Design Options
If you have woodworking experience, you can always apply it to create elaborate designs, but here we're talking about a basement storage solution, so it's fine to be purely functional. Nevertheless, instead of a utilitarian, heavy-duty storage shelving unit, you may want adjustable shelves, a freestanding unit with casters that you can wheel into the laundry room, or floating shelves that don't take up much space. You can DIY any of the following options fairly easily with basic carpentry skills:
-
Heavy-duty shelving: A common design for basement shelving consists of 2x4 support legs that extend the height of the shelving unit. The unit can accommodate up to five shelves, constructed with 2x4 frames and plywood shelf surfaces. You can make the shelves narrow to fit into a small space or very wide if you need more storage space for sports equipment, lawn tools, and the like.
-
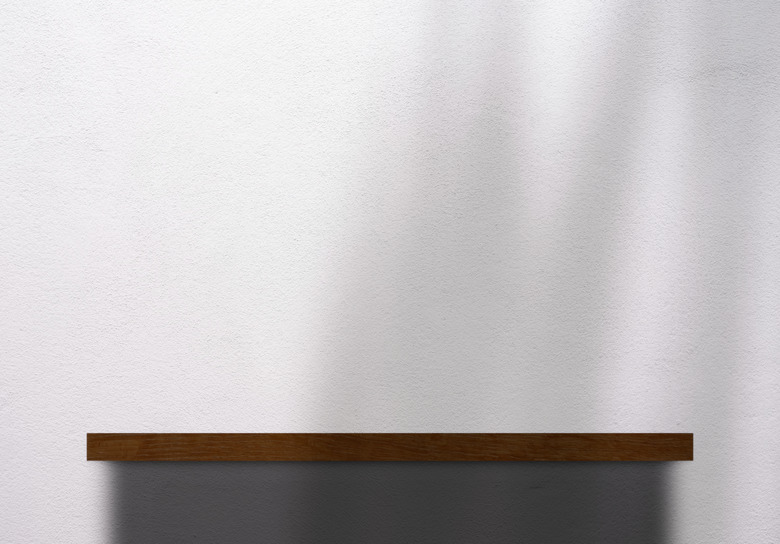
Floating wall shelves: If the walls in the basement are uncovered or even if they aren't, it makes sense to use the wall studs as supports for floating wood shelves made from plywood, oriented strandboard
(OSB), or 1-by lumber. You can buy metal brackets to attach to the studs for support, or you can build your own triangular brackets using plywood or 2x4 lumber.
-
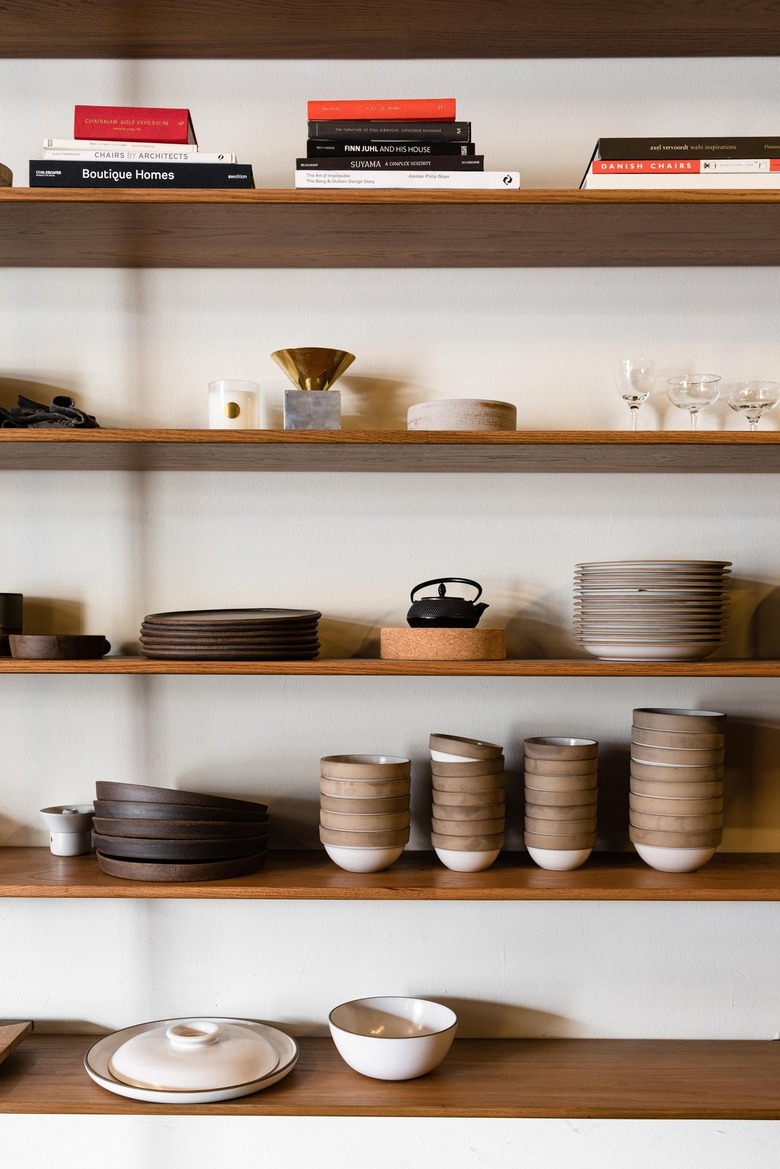
A-shelf: As the name suggests, this type of shelf is shaped like the letter "A." The pyramid shape doesn't provide as much storage room as a rectangular structure, but it's better-looking and more suitable for a finished basement that you use as a living space.
Materials for Basement Storage Shelves
Materials for Basement Storage Shelves
When you're building your own shelves from store-bought materials, it makes the most sense to use 2x4 lumber for framing and support, and the most economical way to buy it is in the form of framing studs. Studs milled from pine (or a similar softwood) are cut to a standard length of 92 5/8 inches and cost around $3 each, or about 37 cents per foot. They aren't pretty, and you may have to sort through the pile to find straight ones, but if you're concerned about appearance, you can sand and finish them.
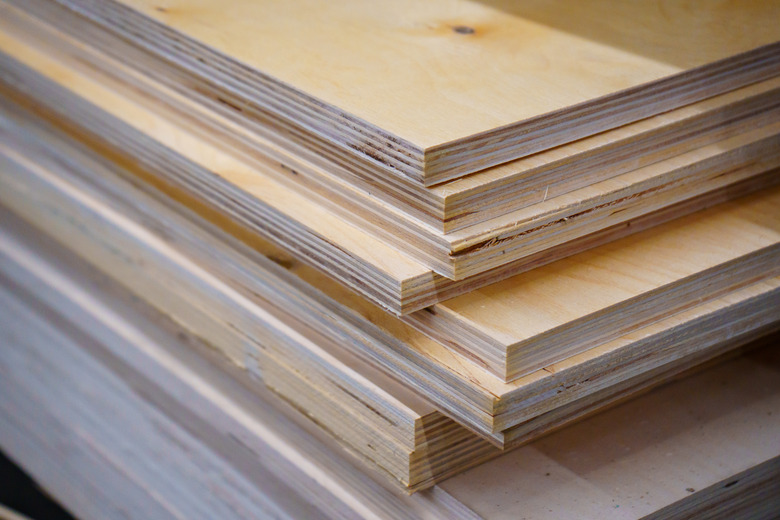
Plywood is the best-looking and most durable material for shelves, but it can be a little pricey, depending on the quality. If you choose 3/4-inch-thick sheets for extra stability, you're looking at about $36 for a 4 x 8-foot sheet of utility-grade and $60 and up for cabinet-grade material. OSB is a little cheaper at $27 per sheet, but it's a strictly utilitarian material that won't look good in a finished basement. You can reduce the cost of either material by reducing the thickness, but you'll have to build frames for the shelves or provide some extra support to prevent sagging.
Particleboard is another option that costs per sheet about the same as OSB, and it offers the advantage of being available in precut 8-, 10-, and 12-inch widths with rounded edges, suitable for open shelving. You can also buy particleboard shelving with a durable white plastic coating or choose pre-primed medium-density fiberboard (MDF) shelving, which is denser and heavier than particleboard. Cost is in the neighborhood of $3.50 per linear foot.
Things Needed
-
Two 4 x 8-foot sheets of 3/4-inch plywood, OSB, or particleboard
-
Four clamps
How to Make Basement Storage Shelves
How to Make Basement Storage Shelves
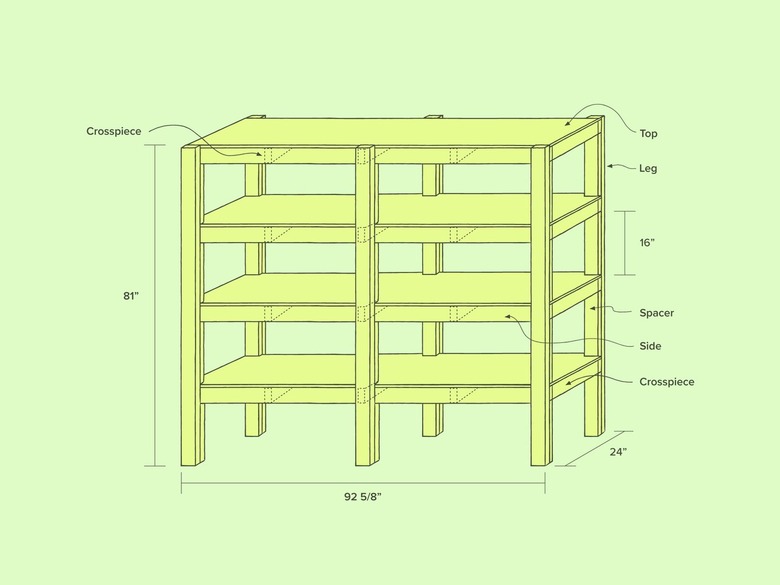
This heavy-duty shelving is made with 2x4 framing and plywood. It is a freestanding unit but can be anchored to a wall or other suitable structure and could also be used for garage storage shelves. The four-shelf unit shown is 92 5/8 inches long to take advantage of the full lengths of 2x4 studs and minimize the amount of cutting needed. The overall height is 81 inches, and each of the three shelf spaces (not including the top shelf) is 16 inches tall. The shelves are 24 inches deep.
1. Cut the Shelving Pieces
- Cut six 2x4 leg pieces to the desired total height for the shelving unit. In this case, the legs are 81 inches long.
- Set aside eight full-length 2x4 studs to use for the shelf frame sides.
- Cut 20 pieces of 2x4 lumber at 21 inches long for the shelf crosspieces.
- Cut 24 pieces of 2x4 lumber for the shelf spacers. These will support the shelves and determine the height of each shelf. The spacers can be any length you like (but 14 to 22 inches is a good range). You can cut sets of six spacers at different lengths to create shorter or taller shelves, as desired. In this example, all of the spacers are 16 inches long.
- Cut four shelf tops to size at 24 x 92 5/8 inches, using 3/4-inch plywood, particleboard, or OSB.
Cutting List
|
Part |
Quantity |
Dimensions |
Material |
|
Legs |
6 |
1 1/2" x 3 1/2" x 81" (or as desired) |
2x4 |
|
Shelf frame sides |
8 |
1 1/2" x 3 1/2" x 92 5/8" |
2x4 |
|
Shelf crosspieces |
20 |
1 1/2" x 3 1/2" x 21" |
2x4 |
|
Shelf spacers |
24 |
1 1/2" x 3 1/2" x 16" (or as desired) |
2x4 |
|
Shelf tops |
4 |
3/4" x 24" x 92 5/8" |
Plywood, particleboard, OSB |
2. Assemble the Shelf Frames
- Set two shelf side pieces and two crosspieces on a flat surface with their edges up. Position the crosspieces between the side pieces to make a frame that measures 24 x 92 5/8 inches.
- Screw the frame together using a drill and 3-inch T25 torx-drive screws, driving two screws on each joint.
- Position three more crosspieces evenly spaced inside the frame, and screw them to the side pieces.
- Construct three more shelf frames in the same way.
3. Attach Spacers to the Bottoms of the Legs
Attach one spacer face-to-face to the bottom of each of the six legs. Make the bottom of the spacer exactly flush with the bottom of the leg, and drive two 3-inch screws to secure it.
4. Assemble the Bottom Shelf
Begin assembling the unit with the legs standing upright. Once the four corner legs are upright with bottom shelf frame clamped in between them, the assembly will stand on its own.
- Stand up two of the legs, and fit one end of the shelf frame on top of the spacers on the legs. Align the end of the frame with the outside edges of the legs, and hold the frame in place with clamps.
- Rest the other end of the frame on the spacers of two more legs and secure it with clamps.
- Position the remaining two legs centered on the frame between the ends. Ensure that all six legs are resting on the floor.
- Use a square to make sure each leg is square (perfectly perpendicular) to the shelf frame, then screw the leg to the frame with two screws. Remove the clamps.
- Place one of the plywood shelf tops on the frames all outside edges are flush. Fasten the plywood to the frame with 2-inch screws.
Tip
If you prefer not to screw into the shelf top for any reason, you don't have to screw down the plywood. On all but the top shelf, the plywood will be held down by the shelf spacers supporting the shelf above.
5. Install the Other Shelves
Set six more spacers on top of the bottom shelf, and screw them to the inside faces of the legs. Set the next shelf frame on the spacers and screw it to the legs. and another shelf top onto the frame, and fasten as before. Repeat the same process for the third and fourth shelves.
Commercial Basement Shelving Options
Commercial Basement Shelving Options
If you don't want to DIY your basement storage shelves, retailers offer a variety of easy-to-assemble alternatives:
- Wire shelving: This type of shelving comes as standalone units with casters or as modular units that you stack to the desired height. It is lightweight and sturdy enough to support heavy storage containers, and if it has casters, you can use it to tote laundry around the basement.
- Adjustable wall shelves: The basic idea behind this type of shelving is that you attach tracks (called shelf standards) to the wall studs, insert brackets into the pre-made slots in the standards, and rest the shelving on the brackets. This isn't the most sturdy shelving you can buy, but it will provide a storage area for holiday decorations and the like. You can also use this shelving as a bookcase, and if you choose an attractive design, it can make for more gracious living in a finished basement or even a living room.
- Heavy-duty storage rack: For a quick and easy storage rack without a lot of effort or a major makeover to the space, consider basic metal or resin storage shelves and storage cabinets. They're easy to assemble and easy on the wallet, and some are adjustable to accommodate a variety of storage needs and improve basement organization.