How To Install Bifold Doors — a Step-By-Step Guide
We may receive a commission on purchases made from links.
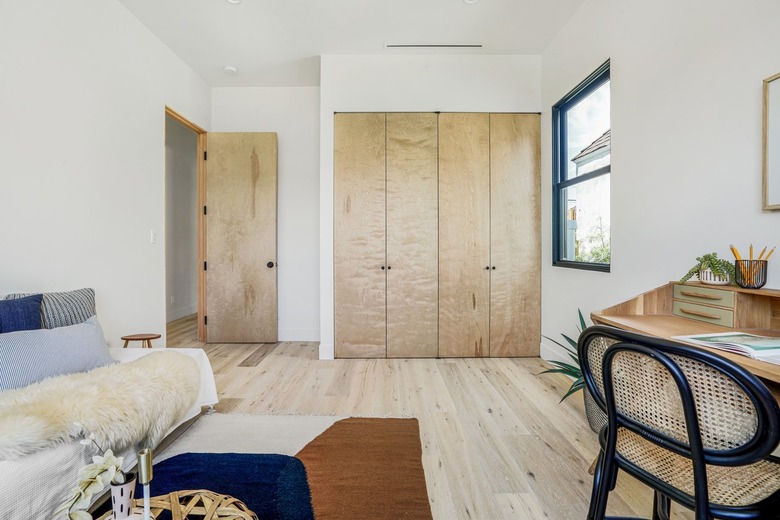
If you currently have closets with bypass sliding doors and are tired of having to reach behind them to get your clothes, you might want to consider installing bifold doors. Unlike sliding doors, bifold closet doors fold completely out of the way when open, giving you access to your entire closet and ensuring you have plenty of light for choosing your daily wardrobe.
If you consider yourself handy, it's fairly easy to figure out how to install bifold doors. The trickiest part of the whole operation is to ensure the doors you purchase fit the closet opening, but if it's a standard size, that shouldn't be a problem.
You can choose from several styles of bifolds, including those with flat panels, louvers, or glass inserts, or you can even make your own doors. Flat-panel doors are often hollow core, but a word to the wise: Hollow-core doors are flimsy and easily damaged, so if you're going to go with flat panels, you're better off with solid-core ones. They may be heavier to lift in place, but they are less likely to pop out of the tracks, and they are easier to modify if you need to fit them into a nonstandard door opening.
Measuring for Bifold Doors
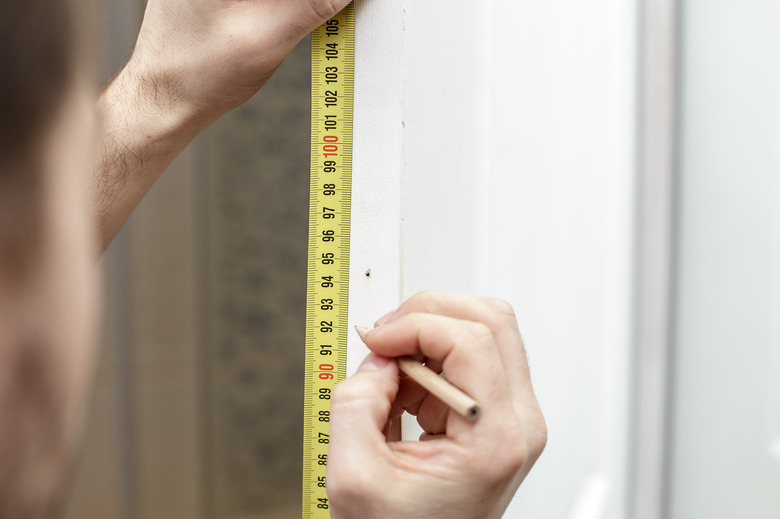
Measuring for Bifold Doors
You need accurate measurements of the height and the width of your door opening to find bifold doors that will fit. It's important to take the measurements from the jambs (the door frame) and not from any trim or tracks that may already be installed.
The doors you purchase should be about an inch narrower than the width of the door opening and 1 to 2 inches shorter than the height. Remember that each door panel is half the width of the actual door. You need clearance on the pivoting edge of the door to allow the door to clear the jamb, and you also need clearance on the opposite edge to allow the door to close without getting stuck. The gap in height allows the door to open and close without the bottom of the door rubbing on the floor.
Tip
You should check the door jambs for plumb (ensuring it's level) while you're making measurements. You can do this with a spirit level or by measuring width from the top, bottom and middle of the jamb and measuring height from the left, right, and middle of the top jamb. If the width and height measurements aren't the same, choose the smallest measurement to ensure your bifold doors will fit.
What Hardware Comes With Bifold Doors?
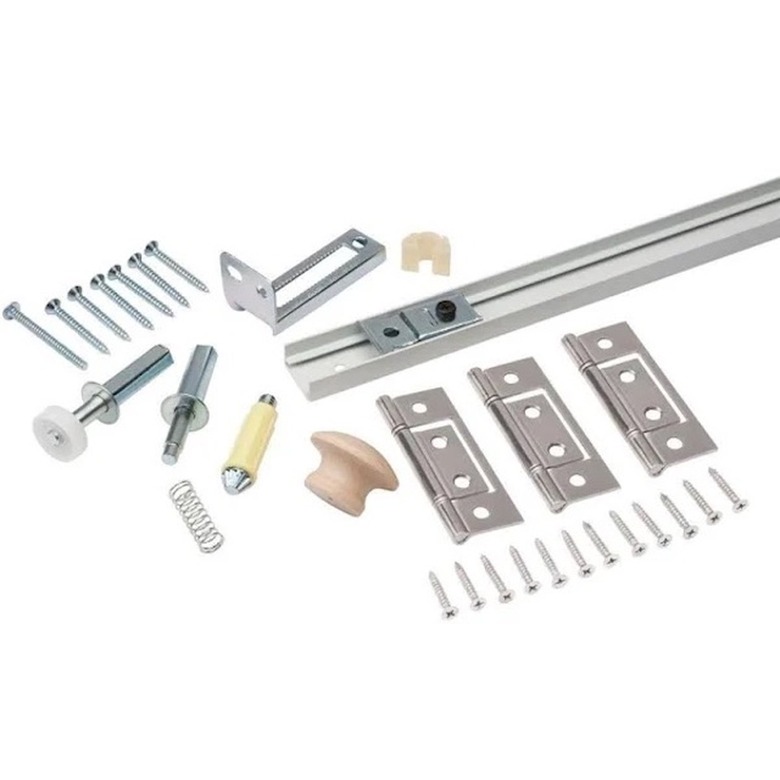
What Hardware Comes With Bifold Doors?
Bifold doors come with all the mounting hardware you need to hang them, so before you begin installation, it's a good idea to open the package and make sure everything is there. You should find the following items:
- Hinges: The door panels have to be connected with hinges. In most sets, the hinges are already installed, but if you purchase a set with loose panels, the hinges and screws should be supplied so you can connect the doors yourself.
- Top rail: A metal rail that spans the header in the door opening should be supplied in the kit. If you're purchasing a double bifold set for a wide door opening, there should be two rails with a connecting plate and screws to join them together.
- Pivot pins: In the kit, you'll find a spring-loaded top pivot that slips into a predrilled hole in the top of the door and a ribbed bottom pivot to support the door that slips into a hole in the bottom of the same side of the door. You should also find a guide roller that keeps the leading edge of the door connected to the track. The pivot sockets are preinstalled in the top rail.
- Bottom bracket: A single bifold door comes with one bottom bracket to support the bottom pivot, and a double bifold door has two. These look like corner brackets, and they have holes in both the vertical and horizontal parts to allow you to attach the bracket to the door jamb, to the floor, or both. Screws for the brackets are also provided.
- Aligners: If you purchase a double bifold door set, you'll need aligners to keep the leading edges of the doors aligned with each other when the doors are closed. These are metal plates that are bent with a 20- to 30-degree angle, and you'll screw them to the inside of the doors with the screws provided.
- Door hardware: The door pulls usually come with the kit. If you don't like the ones that are supplied, it's easy to find replacements.
Things Needed
How to Install Bifold Doors
How to Install Bifold Doors
Make all modifications needed to the doors, including trimming to size, before installation. If you plan to paint the doors, you can also do that before installation, but since the doors are easy to take down, you can also do that afterward. Of course, another thing you should do before you start installing the bifold door is to remove the existing door, including any tracks or trim. You'll also probably want to patch screw holes and touch up the paint so you can start with a clean, obstruction-free door frame.
1. Connect Pairs of Panels With Hinges
Unpack the door panels and lay them flat on the floor with the inside of each panel facing up. If they aren't already connected with hinges, set pairs of panels next to each other so you can do that. Align the top and bottom of each pair, butt the edges together, and place the hinges as directed by the manufacturer instructions. Mark the screw holes with a pencil, remove the hinges, and drill a pilot hole on each mark using a drill and an 1/8-inch drill bit. Set the hinges back in place and drive the screws supplied with them to secure to the panels.
2. Set the Pivot Pins and Guide Roller
Set the top pivot pin in the predrilled hole in the top edge of the door panel that will be closest to the jamb and tap it in lightly with a hammer. Set the guide roller in the top of the leading edge of the adjacent panel in the same way and then set the bottom pivot pin in the hole in bottom edge of the door panel closest to the jamb. If you're installing double bifolds, repeat this procedure with the other set of panels.
3. Install the Door Track
Cut the top rail to the same length as the door header (using a hacksaw if necessary). If you're installing a double bifold set with two rails, join them with the connector provided. Then, if you need to cut the rail to make it fit, cut equal amounts from both ends to keep the connector in the middle.
Set the rail in the middle of the door header at least 1 1/2 inches from the front edge, making sure both ends are an equal distance from the front edge. Mark the screw holes. Remove the track, drill pilot holes on each mark, and then replace the rail and drive screws to hold it.
4. Position the Upper Pivot Socket
Loosen the screw in the pivot socket, which is preinstalled in the top rail, and slide the socket about 1/2 inch away from the side jamb. Using a screwdriver, tighten the screw just enough to prevent it from moving but don't tighten it all the way. If you're hanging double bifolds, position the socket on the other end of the track in the same way.
5. Install the Bottom Bracket
Measure the distance of the top rail from the front of the door jamb and make a mark on the bottom of the jamb the same distance from the front. Align the front edge of the bottom bracket on the mark and move the bracket down until it's sitting on the floor. Mark the screw holes on the jamb, drill pilot holes, and screw the bracket to the jamb. When it's secure, drive another screw through the hole in the bottom of the bracket and into the floor. If you're installing double bifolds, screw the other bracket to the other jamb in the same way.
6. Hang the Door
Insert the top pivot pin into the pivot socket in the top rail and push the door up to depress the spring-loaded pin. Push the door up high enough for the bottom pivot to clear the edge of the bottom bracket. When it does, let the door down so the bottom pivot seats in the bracket. With both pivots in place, push down on the spring-loaded roller in the top corner of the leading edge of the door, position that edge under the top rail, and release the roller to allow it to seat inside the rail. Repeat this with the other set of doors if you're installing double bifolds.
7. Adjust the Pivots
Adjust the height of the door if necessary by lifting the door and screwing or unscrewing the bottom pivot. Turn the pivot clockwise to lower the door and counterclockwise to raise it. When the door is at the correct height, lift again and move the bottom pivot along the bottom bracket until the edge of the door is about 1/2 inch from the jamb. Now, loosen the screw on the top pivot bracket, slide it to make the edge of the door straight with respect to the jamb, and tighten the screw all the way. Repeat this on the other set of doors if it's a double bifold.
8. Install the Aligners (Double Bifolds Only)
Go inside the closet and close the doors. Screw one of the two aligners that come with the kit to the inside edge of one of the doors about 12 inches from the floor so that the curved section overlaps the other door and splays away from it. Install the other aligner on the other door just underneath that one so it faces in the opposite direction.
9. Install the Door Handle
The door handle typically goes on the face of the leading panel either in the middle of the panel or toward the leading edge and about 32 to 36 inches from the floor. Drill a hole, insert the handle screw from the back of the door, and screw on the handle from the front. Repeat for the other set of doors if it's a double bifold.
10. Test the Door
Open and close the bifold door to make sure it operates smoothly. If the leading edge closes too tightly against the jamb or the other door or if there's too wide a gap, adjust the positions of the pivots accordingly.