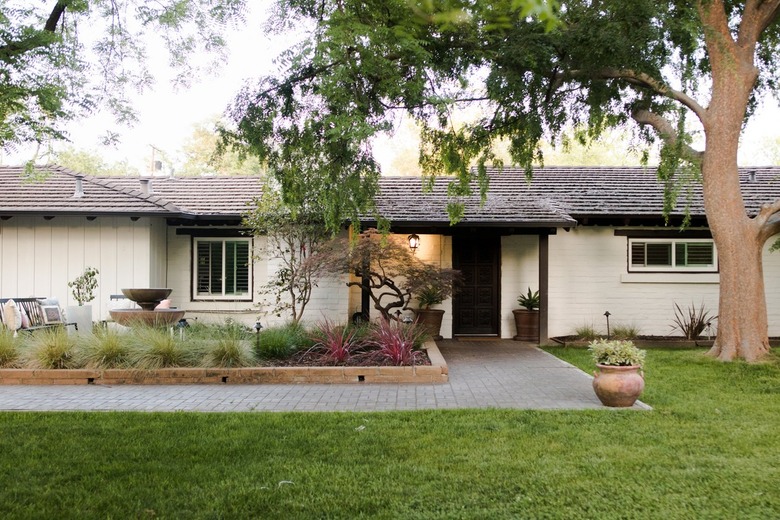
The Basics Of Asphalt Shingle Roof Installation — A Homeowner's Guide
You'll find asphalt shingles on some 70 percent of homes in the United States — and probably Canada too — for several reasons. A few of the most important are that they offer design versatility as well as sound protection and thermal insulation, they are relatively inexpensive, and they can be adapted to work on any type of sloping roof. Add to these attributes the fact that shingles are easy to install and repair, and it makes sense that even though other roofing systems are available, most homeowners opt for them.
If your house has an older roof due for replacement or you're building a new house or outbuilding, you may be wondering whether it makes sense to shingle a roof yourself. The answer is maybe. Installing an asphalt shingle roof can be a DIY project, but you need to consider a few important issues before you climb on the roof and start working. One of the most immediate and obvious is how to get the shingles on the roof. Each bundle weighs 50 to 80 pounds, and you'll need at least 50 of them for an average roof.
After considering the amount of work involved, chances are you'll opt for a roofing contractor and start calling around. To make sense of the many quotes you'll receive (you should get a minimum of three), it helps to know what's involved with replacing an old roof or installing a new one. This knowledge will help you understand what might be happening if you have problems, such as leaks or ice dams, in the future.
The Feasibility of DIY Shingle Installation
The Feasibility of DIY Shingle Installation
Besides being one of the most physically challenging home improvement projects you can undertake, roofing is also dangerous. Anyone approaching the house while work is in progress is at risk of being hit by falling objects, and the people working on the roof are also in danger of falling should a mishap occur. Professional roofers employ safety equipment, like roof jacks and harnesses, to protect themselves. Setting up that equipment, securing ladders, and following safe work procedures is just as important as the roofing work itself and can be daunting for DIYers.
Another important consideration is the difficulty of hoisting materials onto the roof and disposing of old materials during a teardown. Roofers typically have hoists, and they bring a dumpster into which they can throw the old roofing. They make it look easy, but if you're doing the job yourself, it can be anything but easy, especially if you have to replace a rotted or sagging roof deck. The prospect of walking on a partially demolished roof carrying a full sheet of plywood should give anyone pause.
Generally speaking, you should consider doing your own roofing work only if it involves a straightforward job on a simple roof with few or no challenging elements, such as dormers, chimneys, valleys, or skylights. Intervening features like these are difficult to get right, and any mistakes will almost surely lead to leaks, which will very likely lead to expensive repairs inside the house. If you do attempt to replace your roofing, it's a good idea to get advice and/or help from an expert for any tricky areas. Also confirm with the shingle manufacturer and your insurance company (if the project is covered by an insurance claim) to make sure DIY installation is OK under the warranty or insurance policy.
Shingling a Roof From the Bottom Up
Shingling a Roof From the Bottom Up
The asphalt shingles are the most visible components of a shingled roof, but it's what's underneath that plays an important role in keeping water out of your house. Beginning from the roof framing itself, here's what goes into removal of an old roof and construction of a new one.
Start With Tearing Off the Old Roof
A roof tearoff isn't so much a difficult job as it is physically demanding. You basically remove the old shingles using a pry bar or a special shovellike tool and then pull off the underlayment and the flashing. If any of the roof decking, which is the wooden surface to which the shingles are attached, is damaged, those areas have to go too. One of the biggest challenges is collecting the used materials for disposal. It's usually a good idea to rent a dumpster for this.
Inspect the Roof Decking
The decking forms the bottom of the roof covering. The most common type of decking is sheets of exterior-grade plywood or oriented strandboard, but builders still occasionally lay planks of wood perpendicularly across the rafters. The thickness of the decking depends on the spacing of the rafters, but it's most commonly 1/2 or 5/8 inches.
The decking must be securely fastened to the rafters with screws or nails, and if any part of it is water damaged, that part needs to be replaced.
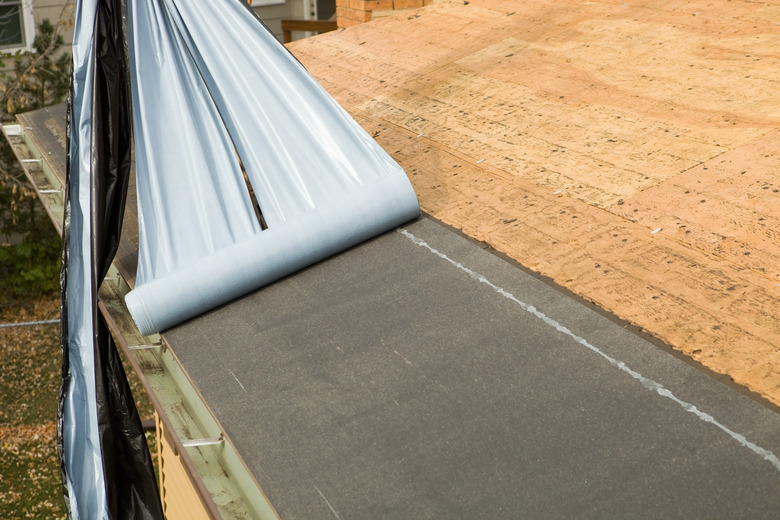
Install Underlayment and Drip Edge
Roofs in moderate climates typically need only one layer of underlayment (which is a material that helps with water protection) but those in cold climates with freezing temperatures need two. When it's required for ice and water protection, a thin, self-sticking, waterproof membrane is applied directly to the decking from the bottom of the roof to a point at least 2 feet beyond the line formed by the interior wall. Before you install this underlayment, you first nail drip edge flashing to the bottom edge of the roof (the eave edge) so the underlayment can cover it.
The next layer of underlayment (which is the only layer in temperate climates) is traditionally #15 or #30 roofing felt paper (#30 is heavier and more expensive and provides better protection), but various synthetic underlayment materials have become increasingly popular. Roofers lay the underlayment perpendicular to the rafters starting at the bottom of the roof and working toward the ridge with each course overlapping the lower one by a few inches. After that, they install drip edge on the rake edge of the roof, which is the edge that slopes toward the ridge.
Flashing and Vents Come Next
Flashing consists of strips of plastic or noncorroding metal, usually galvanized steel, that provide extra leak protection in places where water is likely to collect. These include valleys, where two sloping roof sections join to form an inside corner, and places where the roof meets a side wall, dormer, or other obstruction. Valley flashing is typically pre-molded in long strips, and step flashing, which is used where a slope meets a wall, consists of short 90-degree sections that overlap. The flashing gets nailed down and sealed to the roof deck with roof sealant.
This phase of roof installation also includes installation of roof vents. After determining where each vent should go, you make a cutout for it and install it along with the flashing that comes with it. You can install ordinary roof vents or a single ridge vent along each roof ridge. The number of vents you need depends on the square footage of the attic space, and they are important. If you don't provide enough venting, excess heat in the attic shortens the life of the shingles.
Finally, the Shingles and Gutters
Shingle installation begins at the lower edge of the roof and proceeds toward the ridge (the top). The first course of shingles overlaps the drip edge by 1/2 to 3/4 inches and gets nailed to the roof deck with roofing nails. To ensure the shingles follow a straight line, roofers typically snap a chalk line on the underlayment to mark the upper edge of the course they are installing. These days, almost every roofer uses a nail gun to drive fasteners.
The last course of shingles stops just below the roof ridge, and roofers nail ridge cap shingles to straddle the ridge and overlap the shingles on both sides of the roof. Installation begins on the side of the roof that faces the prevailing wind and goes the other way, which helps prevent the wind from blowing them off. If you have a ridge vent, it takes the place of the ridge caps and gets installed now.
The final step in roof installation is to hang the gutters on the eaves. They go on the fascia boards just under the drip edge and slope toward the downspouts, which direct runoff from the roof away from the foundation.
Types of Asphalt Shingles
Types of Asphalt Shingles
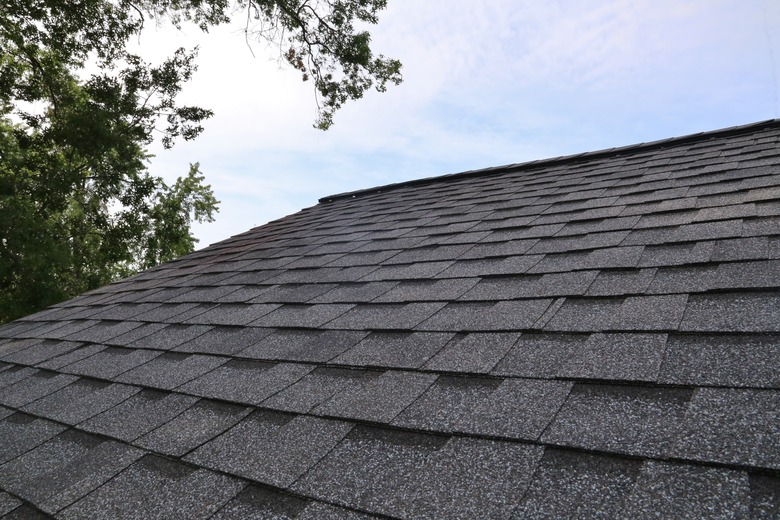
The bulk of homeowners choose three-tab shingles, which are 30 to 36 inches long and 12 inches wide and are so named because the exposed part of each shingle is separated into three sections to mimic the appearance of slate tiles. The alternative is architectural shingles, which have the same basic composition, including granules on the outermost layer to help deflect UV sunlight, but have a thicker profile and are heavier.
Architectural shingles are often called dimensional shingles because their bulkier, more angular appearance makes the roof surface appear three-dimensional. Because of their extra bulk, which can add 450 pounds per 100 square feet, architectural shingles are better able to resist high winds, rain, ice, and snow, and they typically come with a longer warranty period. They cost more than three-tab shingles, but they last longer, so the cost usually evens out in the long run.
Although installation procedures are basically the same for both types of shingles, the extra weight of architectural shingles presents potential problems. However, because they provide so many benefits over three-tab shingles, including better resistance to the elements, a longer life span, and better aesthetics, homeowners are increasingly opting for them.
Re-Roofing vs. Roof Replacement
Re-Roofing vs. Roof Replacement
Re-roofing involves covering an old roof with new shingles, and it's an option as long as the roof has only a single layer of existing shingles. If the roof already has two layers of shingles, a third layer will add too much weight, and the roof will sag or the building structure won't be able to support it. Nevertheless, it's a less expensive option than the alternative — roof replacement — which involves tearing off the existing roof down to the decking and starting over.
Even though it's more expensive, most roofers recommend roof replacement over re-roofing. Removing the existing shingles and underlayment is the only way to tell if water has been leaking under the old shingles and if any part of the roof deck or metal flashing is damaged. It also gives you an opportunity to upgrade all the roofing materials, including the underlayment and flashing, and extend the life span of the existing roof.
The cost of a roof replacement is the main drawback and is the number-one reason you may want to consider re-roofing. You should only do this if:
- There is only a single layer of shingles.
- The roof deck is in good condition with no sagging or visible rotting or water damage at the eaves.
- You aren't experiencing significant leaking. Go in the attic to get a good look at the underside of the roof deck to verify this.
One powerful reason to consider a full roof replacement is that the work will be guaranteed. Roofers typically warrant their work for 10 years, so you're covered during that period if leaks occur or if anything else happens.