Water Heater Installation Basics — A Start To Finish Guide
We may receive a commission on purchases made from links.
In most homes, the water heater goes relatively unnoticed as it hums along year after year, producing enough hot water to keep everyone happy. Water heaters are not particularly complicated pieces of equipment, but they can break down, usually when you are in the middle of taking a shower. Sometimes, they can be repaired, but other times, the unit is too far gone, and the only remedy is replacement.
Types of Water Heaters
Types of Water Heaters
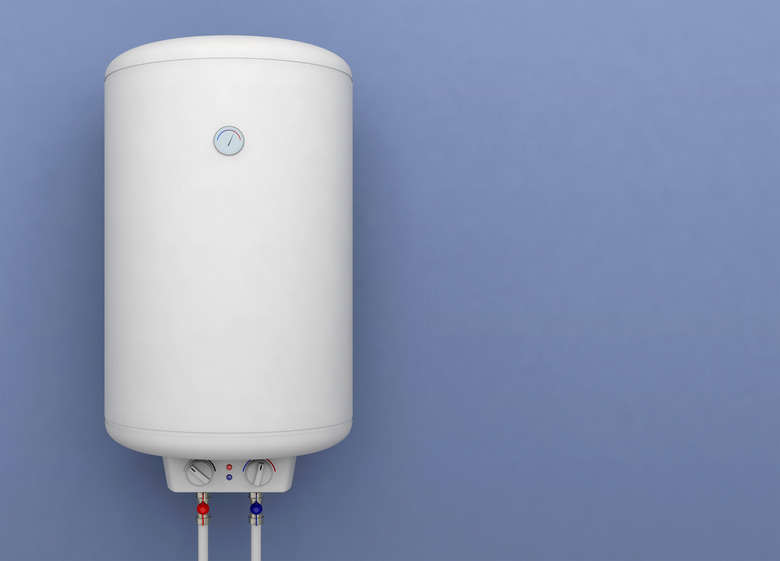
In most homes, the water heater operates by electricity or gas, either natural gas or propane. The most common type are storage water heaters whose storage tanks can vary in size from 35 gallons to 80 gallons. The storage size is usually determined by the number of people living in the house and their hot water needs. In addition to standard tank storage water heaters, high-tech heat pump water heaters and heaters that supply hot water on demand without a storage tank are also available.
Most people replace their water heaters with the same type of unit. If you are happy with the service of the old heater, keep the same size. If not, consider going up in size. Be careful, though, because water heaters are often installed in tight spaces. Newer units tend to be wider and taller than older ones to accommodate more insulation to make them more energy efficient.
Water Heater Preinstallation Prep
Water Heater Preinstallation Prep
Some areas require a permit for a water heater replacement, especially if you are replacing a gas water heater. Call your local building department for details.
Be sure to find out what size vent pipe you will need for a gas water heater; it will be either 3 or 4 inches in diameter. The vent pipe connects the water heater exhaust to the flue where the gases are vented to the outdoors. The most common type relies on natural, or atmospheric, venting where the water heater flue gases rise through a masonry chimney or a dedicated metal flue that goes up through the roof of the house.
There are also direct-vent and power-vented systems. Both of these types are vented through a wall. Consult a professional plumber for replacing this type of water heater.
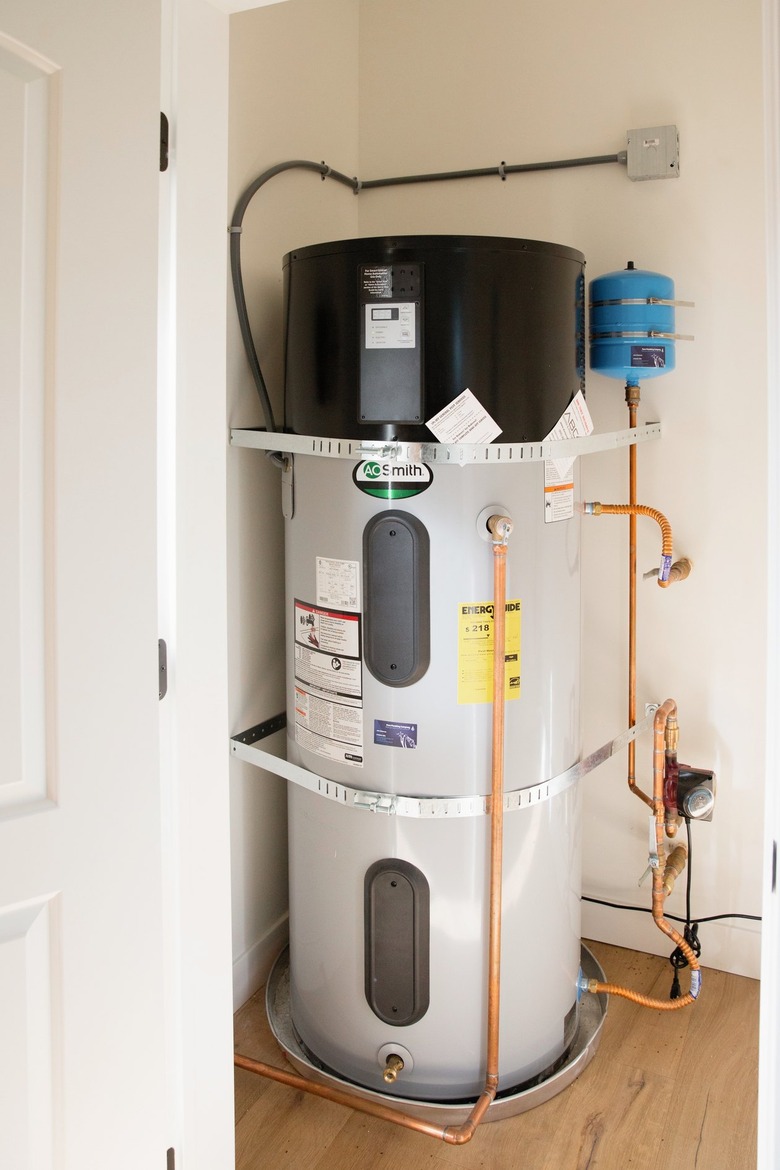
Your new installation may require an expansion tank. When water heats, it expands. In the past, houses had an open-loop system where the extra water would flow back into the municipal water supply. Many of today's building codes require backflow preventers and check valves to keep that backflow from happening, creating closed-loop water systems. Houses with a closed-loop system require expansion tanks.
That extra water has to go somewhere, or it adds pressure to the water heater tank. All houses with a closed-loop system require an expansion tank. The tank is attached to the cold water supply line near the water heater. It absorbs the pressure created by the expanding water supply. Consult a plumber regarding sizing the tank and installation.
Some building codes, especially those in earthquake prone areas, require that water heaters be attached to the house framing with seismic restraining straps. Check with the building department for requirements in your area. If your current water heater has them, they are probably required.
How to Install a Gas Water Heater

How to Install a Gas Water Heater
1. Cut the Power
Close the gas shutoff valve. This valve should be located on the gas pipe that feeds into the water heater. The valve handle should be perpendicular to the gas pipe when the valve is closed. Unscrew the seismic restraining straps if they are in place.
2. Drain the Tank
Close the water shutoff valve that controls the water heater. The valve is usually located on the cold water pipe near the heater, but if there isn't one, close the main shutoff valve for the house. Open a hot water tap on the lowest floor of the house to drain the pipes. Then, hook up a garden hose to the drain valve located near the bottom of the water heater tank. Drain it into a nearby sink or floor drain. Be careful when draining the tank because the water will still be very hot.
3. Disconnect the Gas Piping
Uninstalling a gas water heater will depend on the type of connections you have. For black pipe, unscrew the union, which is a large nut on the gas pipe that is near where the gas line enters the water heater. Use two wrenches, unscrewing with one while applying slight pressure in the opposite direction below the union with the other to keep the gas line from twisting. Then, use a wrench to disconnect the gas pipe from the gas control valve, which you'll find on the front of the storage tank. For flexible connectors, unscrew the nuts to disconnect the gas line. At the top of the water heater, detach the vent pipe by removing the screws at its base.
4. Disconnect the Plumbing
There are different types of piping that connect the water heater to the water supply. Flexible connectors usually have built-in attachment nuts; use a wrench to loosen the nuts at the water heater and where the connector meets the house plumbing. Old-school plumbers like to use copper tubing that they solder in place. For soldered fittings, use a tubing cutter to cut the pipe about 6 inches above where the pipe enters the water heater. Move the old water heater out of the way.
5. Position the New Water Heater
Place the new water heater on a water heater drain pan. The pan will catch leaking water from the tank or water and steam if the T&P valve (temperature and pressure) is activated. Look for one with a hose outlet so that you can run a hose to a floor drain. Position the heater so that the controls are easy to reach and the water inlet and outlet ports are in a place that makes connection to the household plumbing easy.
6. Install the T&P Valve
The T&P valve relieves excessive pressure that may build up in the water heater. The valve may come installed, but if it isn't, wrap the threads with plumbers' tape and screw it into the opening, which will be on the top of the unit or the side near the top. The valve opening should face the floor. Attach a threaded discharge pipe long enough to run from the valve to the water heater drain pan.
7. Connect the Plumbing
For flexible connectors, apply plumbers' tape to the threads on the hot and cold water inlet ports and tighten the nuts on the connectors. The other end of the connector is usually attached to the copper piping in the house with compression fittings. You can find the right fittings for other types of plumbing, such as PEX. For solid copper pipes, solder a female adapter to a 6-inch length of 3/4-inch copper and attach that to the inlet ports. Use the appropriate fittings to connect the new piping to the house's plumbing.
Tip
When joining dissimilar metals, such as copper piping and the steel inlet ports on the water heater, corrosion can result. Some areas require the use of dielectric fittings, which keep the two metals separated, to help avoid corrosion and possible leaks.
8. Connect the Gas Piping
For black pipe, reverse the order you used to disconnect the pipe. Apply pipe joint compound to the threads of the pipe that connects to the controls and then work backward, tightening the union nut last. For flexible connectors, follow the manufacturer's directions, but usually, the connectors have built-in compression fittings. On top of the heater, attach the vent pipe over the exhaust opening using sheet metal screws.
9. Test for Gas Leaks
Mix water and a small amount of dish soap in a spray bottle. Turn on the gas. Spray all of the joints with the soap solution. If you see bubbles, there is a gas leak. Turn off the gas and retighten the fittings. The control knob on the water heater should be in the "off" position.
10. Fill the Storage Tank
Turn the water supply back on. Open hot water faucets on an upper floor. When the water begins to flow from the faucets, the storage tank is full. Close the faucets. Don't restore power to the water heater until the tank is full because the heating elements could be damaged if they operate when the tank is empty.
11. Restore the Power
The gas valve should be open and parallel with the gas line. Follow the manufacturer's directions for setting the water temperature. The directions for starting up the unit and lighting the pilot light on the gas water heater are printed right on the storage tank. Reattach the seismic restraining straps if necessary.
12. Check for Backdrafting
Once the unit has heated the water in the tank, which could take an hour or two, open a few hot water taps. Wait until you hear the water heater click on and then close the taps and wait a few minutes. Hold a lighted incense stick or even a match near the flue opening at the top of the water heater. Smoke should rise up the flue. If it doesn't, the flue is not drawing properly, and you should shut down the water heater by closing the gas valve and then call a plumber.
How to Install an Electric Water Heater
How to Install an Electric Water Heater
1. Cut the Power
If there is a junction box near the water heater, you can flip the switch to shut off the power. If not, close the circuit breaker that controls the water heater at the panel box.
2. Drain the Tank
Close the water shutoff valve that controls the water heater. The valve is usually located on the cold water pipe near the heater, but if there isn't one, close the main shutoff valve for the house. Open a hot water tap on the lowest floor of the house to drain the pipes. Then, hook up a garden hose to the drain valve located near the bottom of the water heater tank. Drain it into a nearby sink or floor drain. Be careful when draining the tank because the water will still be very hot.
3. Disconnect the Wiring
Locate the water heater junction box on the top of the unit, and open its cover. There will be two wires from the water heater connected to two from the incoming power cable with wire nuts. The ground wire from the power cable will be connected to a green grounding screw. After double-checking that the power is off by using a voltage tester, disconnect the wires. Disconnect the conduit or sheathing that houses the incoming wires by loosening the nut or screws that hold it in place.
4. Disconnect the Plumbing
There are different types of piping that connect the water heater to the water supply. Flexible connectors usually have built-in attachment nuts; use a wrench to loosen the nuts at the water heater and where the connector meets the house plumbing. Old-school plumbers like to use copper tubing that they solder in place. For soldered fittings, use a tubing cutter to cut the pipe about 6 inches above where the pipe enters the water heater. Move the old water heater out of the way.
5. Position the New Water Heater
Place the new water heater on a water heater drain pan. The pan will catch leaking water from the tank or water and steam if the T&P valve (temperature and pressure) is activated. Look for one with a hose outlet so that you can run a hose to a floor drain. Position the heater so that the controls are easy to reach and the water inlet and outlet ports are in a place that makes connection to the household plumbing easy.
6. Install the T&P Valve
The T&P valve relieves excessive pressure that may build up in the water heater. The valve may come installed, but if it isn't, wrap the threads with plumbers' tape and screw it into the opening, which will be on the top of the unit or the side near the top. The valve opening should face the floor. Attach a threaded discharge pipe long enough to run from the valve to the water heater drain pan.
7. Connect the Plumbing
For flexible connectors, apply plumbers' tape to the threads on the hot and cold water inlet ports and tighten the nuts on the connectors. The other end of the connector is usually attached to the copper piping in the house with compression fittings. You can find the right fittings for other types of plumbing, such as PEX. For solid copper pipes, solder a female adapter to a 6-inch length of 3/4-inch copper and attach that to the inlet ports. Use the appropriate fittings to connect the new piping to the house's plumbing.
8. Connect the Wiring
Follow the directions from the water heater manufacturer to connect the wiring. Usually, you will connect the black wire from the water heater to the black wire from the incoming cable and connect the other water heater wire to the white incoming wire. This is a 240-volt circuit, and the white wire is hot rather than neutral. Connect the ground wire to the grounding screw. Reattach the conduit or sheathing and close the junction box.
9. Fill the Storage Tank
Turn the water supply back on. Open hot water faucets on an upper floor. When the water begins to flow from the faucets, the storage tank is full. Close the faucets. Don't restore power to the water heater until the tank is full because the heating elements could be damaged if they operate when the tank is empty.
10. Restore the Power
For an electric water heater, push the circuit breaker to the "on" position. Follow the manufacturer's directions for setting the water temperature. Reattach the seismic restraining straps if necessary. The water in the heater should reach the desired temperature in an hour or two.