How To Install A Window Air Conditioning Unit

We may receive a commission on purchases made from links.
When you don't want to (or can't afford to) install central A/C but still need to cool down in the summer, a window air conditioning unit is often your best bet for keeping temperatures bearable inside your home. Installing a window air conditioner is a job you can DIY, although in this case, "DIY" stands for "do it yourselves" — because you'll definitely need a helper to lift and place the unit, which could slip and fall through the window if you lose your grip trying to do the job yourself. Window A/C units typically come with everything you need for installation, and while the procedure is straightforward, you may need to check the manual for model-specific details.
But before you even get to the installation, you need to buy a unit appropriate for the space you want to cool, and you have to find a suitable window in which to mount it. Even before that, you need to make sure you're allowed to install one because some homeowners' associations and apartment management companies sometimes prohibit their use. If you're affected by such a ban, all is not lost. A high-quality portable air conditioner can do everything a window unit can do, and one of these requires no installation.
Choosing a Window for a Window Air Conditioner
Choosing a Window for a Window Air Conditioner
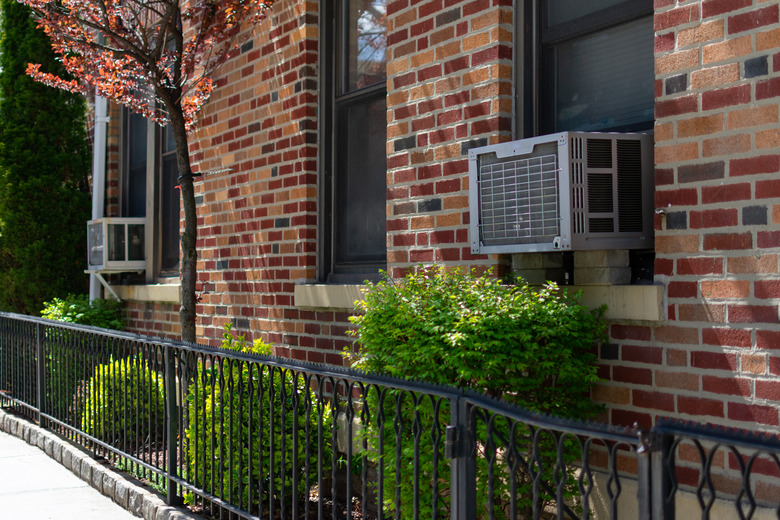
It goes without saying that any room you want to cool with a window air conditioner has to have a window, but not just any window will do. Most window air conditioner units are designed for double-hung windows with a fixed upper sash and a sliding lower one. You can buy units that fit in slider windows, but they are shaped differently than standard ones, and they only work in a sliding window, not one that you open and close with a crank (like a classic casement window).
The window you choose should be fully or partially shaded because if it's in full sun, the air conditioner will work extra hard to do its job, raising your electricity bill and possibly shortening the life of the unit. The window should also be structurally sound with no rot and be located above a good drainage area. The window needs to also be near a GFCI-protected electrical receptacle; most window A/C units come with a rather short 6-foot power cord, and manufacturers as well as the electrical code discourage the permanent use of extension cords. Connecting your unit to power with an extension cord may void the warranty even if you use the proper cord.
 James Andrews/iStock/GettyImages
Sizing Your Window Air Conditioner
Sizing Your Window Air Conditioner
When it comes to a window air conditioner, size refers to its physical dimensions as well as its cooling capacity. Obviously, the A/C unit must fit into the window, so you need to measure the width and height of the window opening. It's OK if the unit you choose is smaller than the available space because most have flanges to fill in the gaps, but it can't be larger.
To determine the cooling capacity, you need to measure the room dimensions and calculate the area of the space to be cooled. Cooling capacity is measured in British thermal units, or BTUs, and it ranges from 5,000 to 12,500 BTUs for window air conditioners. Unsure of which size? Here are examples of the BTU levels required for different square footages:
- A 5,000- to 6,500-BTU unit will service 100 to 300 square feet.
- A 7,000- to 8,500-BTU unit can handle 250 to 400 square feet
- A 9,800- to 12,500-BTU unit can handle 350 to 650 square feet
It's important to get the capacity right because if the air conditioner is too small, it will work too hard and won't provide complete cooling, but if it's too large, it will cycle on and off too frequently and fail to remove humidity, leaving you feeling cold and clammy.
Air conditioners also vary in energy efficiency, which is measured by their energy efficiency ratio (EER) as well as their combined energy efficiency ratio (CEER), which takes into account energy consumed when the unit is in standby mode. The higher the EER, which can range from 8 to 12, the more efficient the window A/C unit, and an EER above 10 is recommended. If you choose a model with the ENERGY STAR label, you'll be guaranteed of having one with the best possible EER and CEER.
Do You Need a Support Bracket?
Do You Need a Support Bracket?
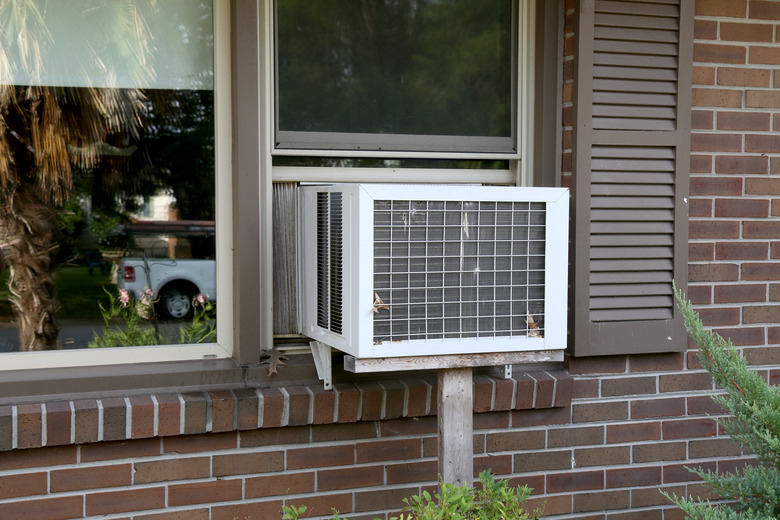
Window air conditioners usually aren't supplied with brackets, and most of them are designed to sit securely in the window without extra support. Some communities, such as New York City, require support brackets, however, and even when they aren't required, they provide extra insurance against falling, which is especially important for second-story and higher windows. You have to buy the bracket yourself and add the cost to the project, and installing it is an extra step in the air conditioner installation procedure.
In the past, the only available brackets had angled supports that had to be bolted to the side of the building, but modern brackets are designed to be installed without screws or bolts. Costing less than $100, these units consist of horizontal platforms that clamp to the windowsill and angled supports with rubber pads that rest against the siding and are held in place by the weight of the air conditioner. The simplicity of the design makes installation easy, and no tools are needed.
How to Install a Window Air Conditioner
1. Unpack the Air Conditioner
Remove the air conditioner from the box, being careful to stay away from the back of the unit, which has sharp metal edges that can cut you. Wear gloves if necessary. Unpack all the enclosed parts and then take out the instruction manual and check the parts against the parts list to make sure you have everything that's supposed to be there. You'll want to keep the manual handy because it contains model-specific details to which you'll probably need to refer.
One important detail is whether or not you need to install the air conditioner with a slight angle toward the outside to allow condensate to drain. Some manufacturers build in angled drains so the units can be installed level, and if yours is one of these, the manual will say so. If you don't see this specified in the manual, assume the air conditioner must be sloped to the outside.
2. Prepare the Window Opening
Open the window all the way and install weatherstripping on the bottom of the sash or if you're installing a unit in a sliding window, on the inside edge of the sliding panel. Weatherstripping is often provided in the box but if not, purchase it beforehand.
If you're going to install a support bracket, now is the time to do it. Follow the installation instructions that come with the bracket. If it's one that installs without fasteners, you typically place it on the windowsill with the outdoor supports resting against the siding and tighten clamps to secure it to the window frame. Use a torpedo level to set the platform level or at a slight angle (about a half bubble) toward the outside as instructed by the manufacturer.
3. Attach the Side Panels to the A/C Unit
An air conditioner designed for installation in a double-hung window has two accordion panels to seal the gap between the sides of the air conditioner and the window frame. Connect these side panels to the air conditioner according to the manufacturer's instructions. The process usually involves screwing metal tracks to the sides of the unit with a Phillips screwdriver or drill and feeding the groove on the inside of each flange onto the track.
 Imagesbybarbara/iStock/GettyImages
4. Drop the Air Conditioner Into the Window Opening
Get someone to help you with this step because most air conditioning units are too heavy for one person to safely lift it into a window. Rest the back of the unit, which is the heaviest part, on the windowsill or support platform and walk it carefully backward until the metal flange around the front of the unit is flush against the window frame.
While your helper holds the unit in place, put a level on the part of the unit that's outside to make sure it's level or has the required slope. Adjust as needed and then close the window sash firmly against the top of the unit and behind the upper flange. Screw L-brackets to the top of the window sash and to the window frame to prevent the window from opening.
5. Secure the Air Conditioner to the Window Frame
Pull out the side panels and screw them to the window frame. Then, screw the top and bottom flanges to the window sash and the windowsill respectively. The screws you need are usually provided with the unit. If the manufacturer provided extra hardware to reinforce the connection to the windowsill, install this now. If this is a permanent installation — meaning you don't plan to remove the air conditioner during the winter — it's a good idea to seal the gaps between the top and bottom of the flanges with silicone caulk.
6. Plug In the Unit and Turn It On
Plug the air conditioner into a wall receptacle, set the thermostat to cool and turn it on. You should hear the hum of the compressor and immediately feel cool air coming from the grille.
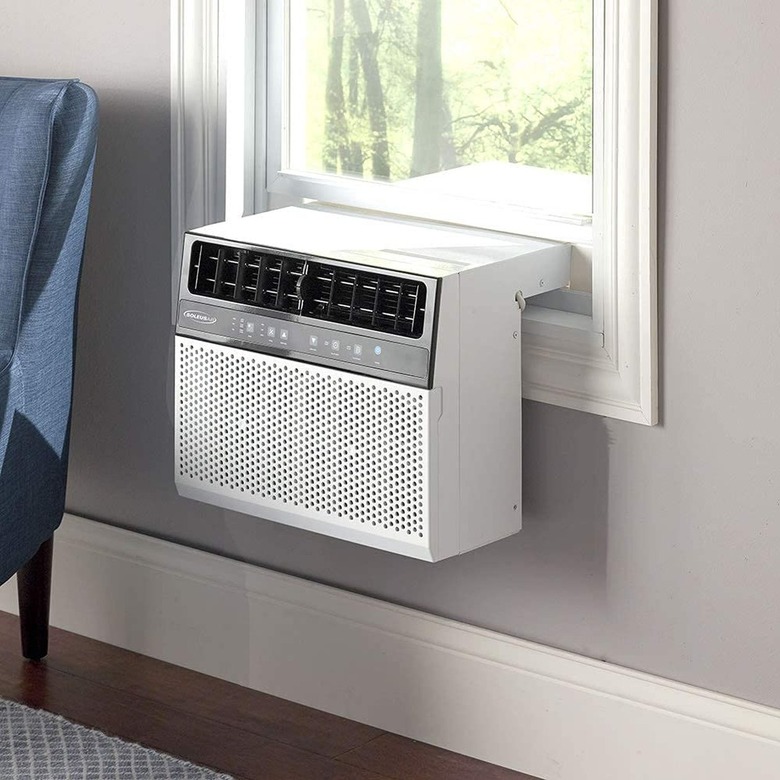 Amazon
Some Less Common Installations
Some Less Common Installations
If the only type of window you have available for an air conditioner is a horizontal sliding one, a tall unit designed specifically for this application is recommended. You don't have to worry about gaps on the side of the unit, but there will be one above it. The unit may or may not come with a panel for sealing this gap, and if a panel isn't supplied, you can make your own from a rigid material, such as Plexiglas or plywood. Panels are effective as long as they provide support for the top of the air conditioner to prevent it from tipping out of the window, and the edges are well-sealed to prevent hot air from outside from being drawn indoors.
A casement window that swings open and closed is not a suitable candidate for an air conditioner unless you remove the window altogether. If you decide to do this, a standard unit designed for sash windows is probably the best option because you can seal the sides of the unit with the provided side panels and fabricate your own panel to seal the gap above the unit. If the idea of a plywood panel adorning your window fills you with something less than joy, consider building a custom window to fill the space above the air conditioner. You can also opt for a through-the-wall air conditioner, which fits into a custom-size hole cut into the wall; no window is required.
Do you want to minimize gaps altogether? Your best bets are a saddle or U-shaped window A/C unit. The indoor and outdoor parts of a saddle unit hang down below the windowsill and are joined by a thin section of duct, and the unit straddles the windowsill like a cowboy in a saddle. A U-shaped A/C unit installs like a conventional one, but it has a space between the indoor and outdoor sections that is large enough for the window to partially close between them. Both units allow the upper window to close almost all the way, leaving only a gap of a few inches to be filled between the air conditioner and the window frame.
References
- GE Appliances: Air Conditioner EER, CEER and SEER Rating
- Consumer Reports: How to Properly Size a Window Air Conditioner
- Sylvane: How to Install a Window Air Conditioner
- PickHvac: How to Install a Window Air Conditioner?
- YouTube: MegaSafetyFirst – Installing a Window Air Conditioning Unit – How to (DIY)