Cleaning And Sanding A Wood Deck For Restaining
We may receive a commission on purchases made from links.
As time goes by and your deck gets pummeled with rain, baked by sunlight and tweaked by changes in temperature and humidity, it's bound to look worse for the wear, and one of the advantages of a wood deck over composite and vinyl is that you can restore it to "new deck" condition with a deck stain. To get the deck ready for a new coat of stain, you want the wood to be open and ready to absorb it, and that may call for sanding, especially if the deck boards have splintered or curled.
No one has time to sand a deck with a pad sander, and a flooring drum sander is far too aggressive. Fortunately, there's an in-between option that won't decimate wood decking and will allow you to work in a standing position, and that's an orbital flooring sander. Before you go to the rental outlet, though, make sure the deck absolutely needs sanding. Most of the time, it doesn't.
When Does a Wood Deck Need Sanding?
When Does a Wood Deck Need Sanding?
Deck deterioration happens slowly, and you may fail to note its progress until one day, you trip on the lifting edge of a deck board, or you move a plant container and notice how much the colors of the covered deck boards differ from the exposed ones. A certain amount of graying is inevitable with wood decking, particularly redwood and cedar, but when the gray turns to black and slippery areas appear, things have probably gone far enough to warrant action.
You might have to replace rotted, warped or cracked boards, and restaining is warranted if you see flaking finish or blotches indicating that the finish has worn off any of the decking boards. Sanding doesn't always have to precede restaining because you can usually remove an existing finish with a deck stripper and clean the exposed wood with a deck cleaner, or you can use a pressure washer. Replacing decking boards calls for sanding, though, because new wood hardly ever matches old wood unless you sand, even under a stain.
Sanding is also a good idea when old wood begins to splinter, which can happen for a number of reasons, including excessively hot, dry weather or overly aggressive pressure washing. No one wants to walk on a splintering wood deck, especially in bare feet, and sanding is the best way to smooth out splinters. Railings can also benefit from sanding as they splinter in hot, dry weather, and you can do this with a pad sander.
Preparing for Restaining Without Sanding
Preparing for Restaining Without Sanding
Unless you've seriously neglected your wood deck, it probably just needs a good cleaning before you apply a new coat of deck stain. You'll want to wash off dirt and dark mildew stains, remove any old sealer or wood finish that would prevent the stain from penetrating and possibly lighten the color of the wood. You can often do all three with a power washer, but it's surprisingly easy to do damage with a high-pressure stream of water.
To prevent damage from a pressure washer, use a machine that develops moderate pressure — no more than 2,500 PSI — and use tips with fan-shaped spray patterns, which would be the white one (40 degrees) or green one (25 degrees) supplied with the machine. The yellow tip (15 degrees) can be used sparingly for tough stains, but never use the red one (0 degrees) on a wood deck.
Deck cleaning chemicals offer a less aggressive way to strip, clean and brighten a wood deck, but you'll probably have to use more than one because they have different functions. Begin with a deck stripper if the deck has an existing finish, which you can identify by noting whether water beads up on the wood surface. Follow up with a wood cleaner, which contains detergents to dissolve dirt and grime, and finish with a wood brightener, which is a product that usually contains sodium hypochlorite, oxalic acid or sodium percarbonate, a type of oxygenated bleach. Oxygen bleach is the most eco-friendly wood brightener and is easiest on surrounding foliage.
Each of these products must be applied individually, and the deck should be rinsed thoroughly with a garden hose after each application, so even though you can do the entire cleaning and brightening job in a day, you might want to spread it out over a few days to give the wood time to dry between applications. You should wait at least a few days to a week after cleaning the deck before applying wood stain to give the wood time to dry.
Things Needed
-
Drill (if needed)
-
Screwdriver bit (if needed)
-
Wet/dry vacuum (if needed)
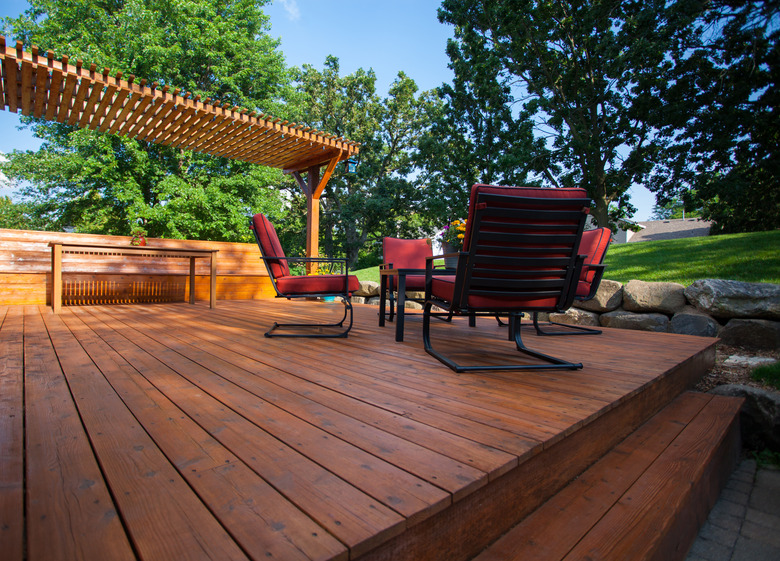
 Kameleon007/iStock/GettyImages
How to Clean, Sand and Restain a Wood Deck
How to Clean, Sand and Restain a Wood Deck
When your wood deck needs a complete makeover with a new coat of wood stain, it might also need some repairs, and these should be completed before you do anything else. You may find that one or more support structures have rotted, and it's essential to replace these for the safety of anyone who uses the deck. Once the structure of the deck and railing is sound, you can start the work of upgrading the deck's appearance, and since you've decided to sand, you can put less energy into cleaning because the sander will do most of that for you.
1. Pound Down or Replace Lifting Nails
Inspect the entire deck for lifting nails and pound them back down with a hammer. Use a hammer with a smooth head, not a serrated one, to avoid leaving ugly hammer marks on the decking. Make sure the head of each nail is completely sunk below the surface of the wood so you don't hit it with the sander. If your deck has screws instead of nails, reset any screws as needed using a drill and screwdriver bit.
Tip
It's a good idea to replace lifting nails with 3-inch deck screws, which won't back out. If a lot of nails are backing out, it's a sign that the deck needs the extra fastening power of screws in places, even though a mixture of screws and nails may look incongruous.
2. Wash the Deck With a Wood Cleaner
Wash the deck with a deck cleaner to remove oils and deposits that can gum up the sandpaper. Mix the cleaner in a bucket with water according to the directions on the container and apply it with a garden sprayer. Scrub with a stiff push broom and then rinse the deck with a garden hose and allow at least 48 hours of drying time. Some deck cleaners come in bottles that automatically mix the product with water when you attach the bottle to your hose.
3. Clean Debris From Between the Boards
Use a stiff putty knife to dislodge leaves, sticks and other debris from between the decking boards to prevent it from getting in the way of the sander. Sweep the deck thoroughly.
4. Sand the Main Part of the Deck
Install a sheet of 60- or 80-grit sandpaper on an orbital flooring sander. Use 60-grit paper if the wood is cupped and needs to be leveled; otherwise, 80 grit is usually coarse enough. Set the sander upright in a corner of the deck, turn it on and walk it lengthwise along the planks to the opposite corner. When you reach the end, move the sander to the next row and walk back to the original corner. The sander is weighted and will do the sanding by itself, so there's no need to apply pressure. All you have to do is keep it under control and steer it.
5. Sand the Corners and Edges
The rectangular pad of the orbital flooring sander can reach into fairly tight corners, but there will be some places it can't reach, so you'll have to do these by hand with a pad sander. Use the same sandpaper grit you're using with the large sander.
6. Clean Up the Sanding Dust
Sweep the deck clean with a soft-bristle broom or vacuum it with a wet/dry vacuum cleaner. Some dust will remain in the pores of the wood, and you can remove this with a damp rag.
7. Apply a Coat of Deck Stain
The easiest and most effective way to stain a deck is to use a handheld airless spray gun, but some stains are thin enough for a garden sprayer. Shake the can of stain well or open and stir thoroughly with a stir stick. Pour the stain into the sprayer and spray a 10-square-foot area. Then, go over the area lightly with a paintbrush or roller to even the coverage. Move on to the next section, repeat and then continue until you've covered the deck. Remember to work toward a stairway or doorway so you don't have to walk over the wet stain.
Tip
- Always read the directions for the product you use before you choose an application method. While most products can brushed and sprayed, not all can be rolled without risking overlap marks.
- Stain is going to drip through the gaps between the boards, so remember to clear out the area underneath the deck and cover the ground with a tarp.
8. Apply a Second Coat if Necessary
Let the stain dry overnight and then apply a second coat if the color isn't dark enough. You usually don't need another coat, and again, it's important to read the directions for the product you choose because some semitransparent stains are designed to form a film on the surface of the wood and should not be recoated.
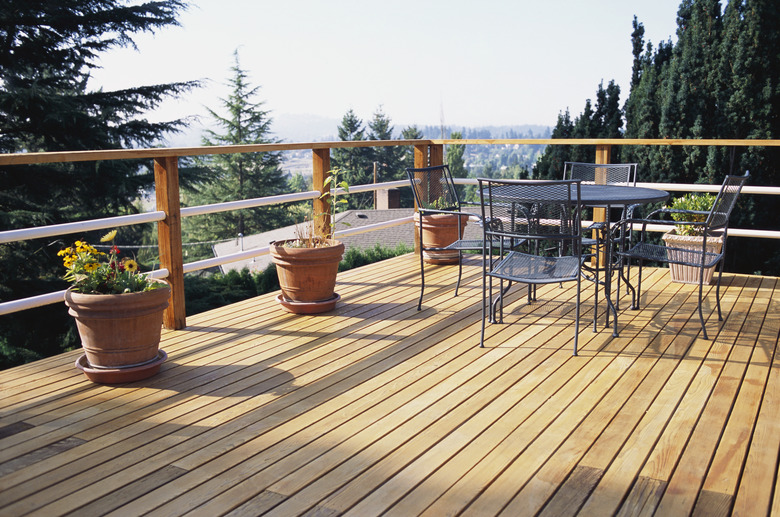 David Papazian/The Image Bank/GettyImages
Sanding and Restaining Railings
Sanding and Restaining Railings
Deck railings are more likely than the decking itself to be in need of sanding and restaining given that they are more exposed to the elements on all sides. Direct sunlight is hard on railings, especially the top rails where you put your hands, and splintering is all too common and potentially more uncomfortable. Sanding will knock the splinters down, and it will also remove any loose finish that has started to flake off.
You want a smoother final finish for the handrails than for the deck boards, which means sanding with a finer sandpaper grit — 100 grit is usually the finest you need — but to remove old finish without having to use a chemical stripper, sand first with 80 grit. Of course, you're going to need stripper if the rails have an opaque stain and you want to use a transparent one, but it takes a really good reason to do that given that it's a lot less work to simply use another opaque stain (also, clear sealers provide very little protection from sunlight). After going over all the railings with the coarse paper, use 100-grit paper with your sander to smooth down the handrails and then wipe everything with a cloth to remove sanding dust.
A handheld airless sprayer is a great tool for staining deck railings, especially if the railings have balusters that also need staining. Keep a paintbrush handy to brush over the wood after you've sprayed it, especially on the handrail, and don't forget to put a drop cloth down on the deck under where you're working and to cover nearby shrubs and bushes with sheets or tarps. Stain the railings before the deck so if any stain does get on the decking, you can sand it off before you stain the deck.