How To Install Landscape Lighting
We may receive a commission on purchases made from links.
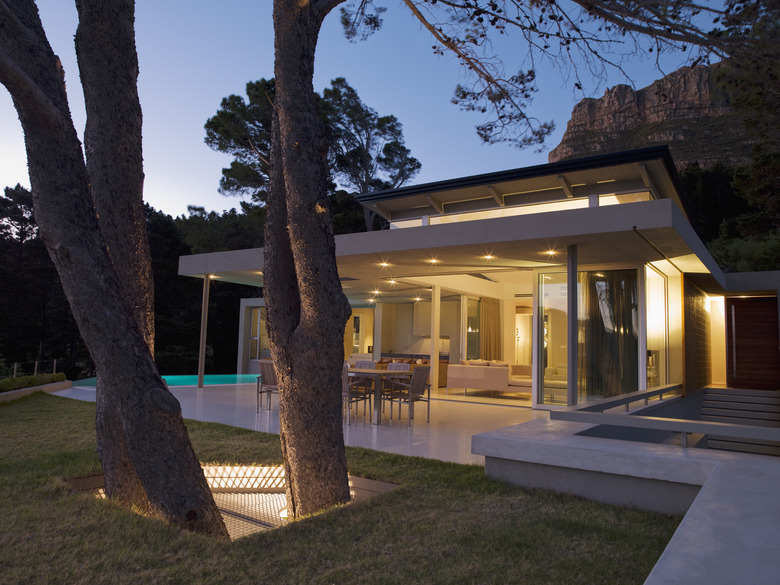
Landscape lighting can improve security and safety around your home by illuminating dark areas, but for many people, the real virtue in outdoor lighting lies in the aesthetic appeal of painting the landscape with light to highlight key elements during the darkness of night. Whatever your goals, there are several ways to add landscape lighting to your yard. One method—installing low-voltage systems—is a particularly good choice for DIYers.
Landscape Lighting Systems
Landscape Lighting Systems
There are three common types of landscape lighting systems:
Line-voltage lighting: This form of landscape lighting system uses standard 120-volt current with underground feeder cables that supply power to light fixtures. This system offers the very best illumination, but it usually must be installed by a professional electrician. If security and safety are your main goals, this is the best system. Installation requires a building permit, and it's a difficult job for DIYers.
Solar light fixtures: Landscape lights powered by small solar cells mounted on the fixtures have become increasingly common and practical. There is really nothing to install since you simply position the light fixtures wherever you want them. To work effectively, the fixtures must receive plenty of sunlight to recharge their built-in batteries. Although new bulb technology has made the illumination much better, you may be disappointed in the dimness of solar-powered landscape lights. Solar-powered lights can work for adding spots of decorative lighting, but they aren't well-suited for improving safety and security.
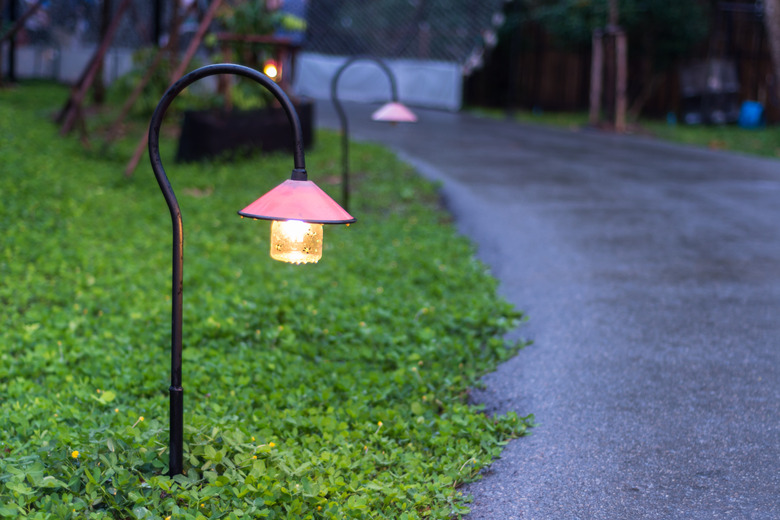
Low-voltage lighting: In low-voltage lighting systems, the lights are fed by 12-volt current that is stepped down from standard 120-volt current by a simple plug-in transformer. Small-gauge cables buried at shallow depth carry the low-voltage current to the various light fixtures in the system. The modern LED bulbs now used in low-voltage systems offer better illumination than most solar light fixtures, and installation is considerably easier than with line-voltage systems. Installing low-voltage lighting doesn't require a building permit, and it is extremely friendly to DIY installation.
 PanuRuangjan/iStock/GettyImages
Low-Voltage Lighting Kits
Low-Voltage Lighting Kits
Low-voltage lighting fixtures are often sold in convenient kits that include everything you need: a plug-in transformer/control unit, a light sensor, low-voltage cable, cable connectors and a selection of light fixtures. These kits are sometimes tailored for common applications. For example, you can buy a kit that includes a number of path lights for lining a sidewalk or a selection of deck lights to mount on the posts or steps. Other kits might include a variety of light fixtures: path lights, downlights and spotlights for illuminating trees and shrubs.
If you buy a kit, make sure it includes the fixtures you want and that the transformer has a wattage rating sufficient to expand the system at a later date. Costs for a kit can range from less than $100 to several hundred dollars.
Low-Voltage Lighting Components
Low-Voltage Lighting Components
You can also piece together your own low-voltage lighting system by buying the components separately. Begin with a transformer/control unit with a wattage rating sufficient for the system you have in mind. Transformers range in size from 60 watts to 300 watts, and it's best to buy one that is larger than you think you need. Having an oversized transformer will ensure that the light fixtures get plenty of current, and it makes it possible to expand the system in the future. Many experts, including those at Fine Gardening, advise that the combined wattage of the landscape light fixtures should be no more than 70 percent of the transformer capacity.
After selecting a transformer, you'll need to purchase the low-voltage light fixtures, which typically draw 3 to 15 watts each. Light fixtures now come in many styles, including simple path lights, spotlights, in-ground lights and a variety of deck lights that can be mounted on steps, posts and railings. You can mix and match these components at will. Finally, you'll need to purchase low-voltage cable and connectors for linking the transformer and light fixtures.
 Bespalyi/iStock/GettyImages
Installing Low-Voltage Landscape Lights
Installing Low-Voltage Landscape Lights
Low-voltage landscape lighting systems are surprisingly easy to install. All you need are the lighting system components, access to a convenient GFCI outlet and a shovel to bury the cable.
1. Plan the Layout
Review your landscape and plan the position for each light fixture. It is a common impulse to use lots of light fixtures outdoors, but this is usually a mistake. Too much lighting overwhelms a nighttime landscape, while a few well-chosen lights create a better ambiance. Make sure to include lights where they are needed for safety, such as near steps and along dark pathways.
2. Mount the Transformer/Control Box
Choose a convenient location for mounting the transformer/control box for your system. The transformer must be plugged into a GFCI outlet. This can be located on the outside wall of your home, or you can use an indoor GFCI outlet and then run the low-voltage circuit wires out through the wall. Remember, though, that some transformers are designed only for outdoor installation. When you've chosen a location within reach of a GFCI outlet, mount the transformer securely to the wall.
3. Mount the Light Sensor
Some low-voltage lighting systems are controlled by a simple programmable timer and others by a light sensor eye that turns on the system when darkness sets in. If your system uses a light sensor, mount the eye in a convenient location where it can read the outdoor light levels. If your transformer and control box are mounted indoors, this can involve drilling a small hole so you can run the sensor wire out through the wall. Note that some transformers have a light sensor on the transformer itself, so the unit must be installed outdoors.
4. Assemble the Light Fixtures
If the individual light fixtures come unassembled, unbox them and put them together. Typical path lights have a spiked base, a riser tube and a lamp head with a lens. Assembly can involve inserting LED bulbs, attaching the lamp lens and threading wires through the riser tubes. When assembled, each fixture should have a wire lead that will be used to connect the fixture to the low-voltage circuit.
5. Position the Light Fixtures and Cable
Lay the assembled light fixtures around your landscape in their chosen locations. Deck lights can be laid on the steps or railing in their planned locations.
Next, lay out low-voltage cable from the transformer to the first light fixture and then to subsequent light fixtures in a continuous run. Complicated layouts may require that you run branches off the low-voltage circuit. Plan the circuit route carefully to avoid any obstacles, such as underground irrigation pipes.
6. Connect the Light Fixtures
Next, use low-voltage connectors to join the wire lead on each light fixture to the low-voltage circuit cable. The method for doing this will vary slightly depending on the manufacturer. Some styles use a small connector box that is disassembled so that you can insert the low-voltage circuit wire as well as the light fixture wire. Other connector styles use two screw-on caps to join the wires.
7. Test the System
With the fixtures attached to the low-voltage circuit, it's best to test the system before burying the cables.
Attach the front end of the low-voltage circuit wire to the screw terminals on the transformer and then plug it into the GFCI outlet. Set the control box to the simple "on" setting and then check each light fixture to make sure they are all illuminated. Once you are confident that each light fixture is functioning, you can complete the work.
 dowell/Moment/GettyImages
8. Anchor the Cables and Fixtures
Unplug the transformer/control box and then bury all the cables. On lawn areas, use a flat spade to create a narrow trench by digging into the earth at least 6 inches and levering the shovel back and forth. If your lawn has a sprinkler system, take care not to damage water pipes while digging.
Gently tuck the cable into the trench and then use your foot to press the soil back together. In garden areas, the cable can be buried beneath a thick layer of mulch. For low-voltage lights on decks, staple the low-voltage cable along the railings and stair treads or to the underside of the deck to hide it from view as best as you can.
As you work along the circuit, anchor each light fixture as you reach it. With landscape lights, this will usually mean embedding a stake into the ground. For deck lights, it involves screwing the light fixture to the deck steps or railings.
9. Program and Test the System
Follow the manufacturer's instructions for setting the control box timer or automatic light sensor. For the first night or two, watch your yard periodically through the night to make sure the lights are operating and that they are positioned correctly. It is a fairly easy matter to add additional lights if you find areas that need more light.