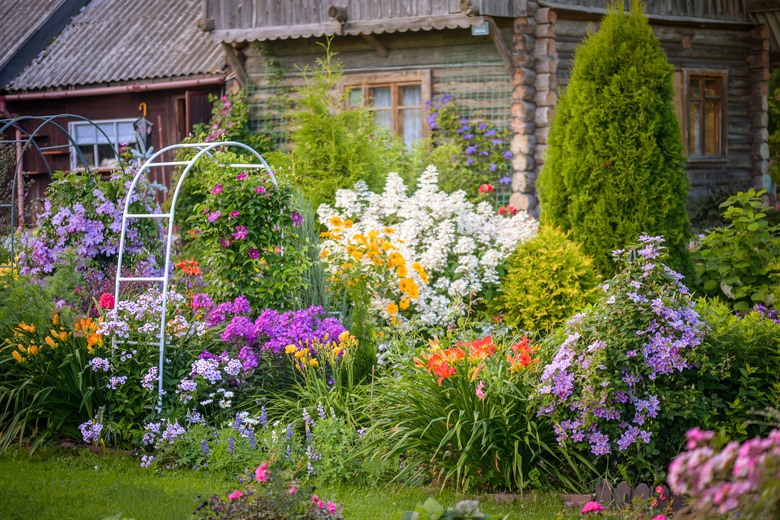
Preparing A Landscape Bed For Planting
We may receive a commission on purchases made from links.
Planting is often the most enjoyable part of landscape work, so it's divine justice that it's the final step and not the first one. While the amount of site preparation you'll need to do depends on the landscape bed in question, many require time-intensive and labor-intensive work — like weed removal, soil testing, grading, cultivating the soil and adding soil amendments — before the first seeds are sown or plants are installed. The quickest way to get to planting is to walk through the landscape preparation step by step.
How to Prepare a Landscape Bed for Planting
1. Inspect the Landscape Bed
Before you begin the process of preparing a landscape bed for planting, take a long, hard look. You'll want to ascertain what kind of work you have in front of you.
Check out how much sun the bed gets and whether there are trees or shrubs encroaching on it. Touch the soil in the bed. Soil tends to get packed down over time. If it is as hard as concrete, you may as well know it now.
If the bed has already given service, you need to know if there are plants living in it that you want to keep. Identify the plants growing in the bed and see if they are happy there. Are they thriving or just surviving? If it is the latter, compare the sun exposure of the site with the plants' preferred exposure. Look for signs of insect pests, diseased leaves or diseased limbs and determine whether water runoff is a problem.
2. Till the Landscape Bed
Weeds are nothing more than plants growing where you don't want them. Whether the unwanted plants in your flower bed are dandelions or the neighbor's invasive ivy, they need to be removed, roots and all. Get out the surface weeds before you begin tilling the soil.
You will need to till the soil to a depth of at least 12 inches. As you do this, keep your eye out for weed roots and get them out too. It's easiest to use a rototiller, but this can be more complicated in an established landscape bed with keeper plants. You'll need to be careful with your tools when you turn up the soil to avoid hurting the keeper plants' roots. Before tilling, don't forget to call 811, the national call-before-you-dig hotline to have all underground utilities marked.
While you are digging or tilling, take out any rocks or chunks of concrete or gravel that you come across, since they aren't going to provide nourishment for your plants. Remove old stakes that are not currently in use and set them aside. If you planted green cover crops in the bed, work those into the soil to provide needed organic matter. You can also work compost into the soil to provide organic matter.
3. Check Water Runoff
The level of the soil determines which direction rainwater and irrigation will travel as it runs off an area. Landscape designers call this "grading." For example, if the land around your home slopes toward the house, any water passing through the soil will travel toward your home and can cause problems.
According to the University of Georgia Extension, you'll want to make sure that garden beds slope away from the house and that water from any drain spouts is directed away from the garden beds. If the bed is not near a building, direct the water runoff away from the bed center. Generally, you can alter a planting bed's grading by building up soil and sloping it in the direction you want runoff to travel. Be sure to use topsoil or some other dense soil.
There may be soil issues that make grading with topsoil ineffective. If the site continues to show poor drainage, it may have a "hard pan" — a layer of hard-packed soil — under the surface. Break this up by deep tilling and incorporating organic matter.
 scaliger/iStock/GettyImages
4. Determine Soil Condition
Good soil means happy plants, and sometimes, your native soil doesn't have what it takes. If your garden bed is well-established with happy plants, the odds are that your current soil is essentially appropriate, providing the support and nutrients that plants require. However, if this is a new bed or if it has not been cultivated for some years, you'll want to take a closer look at the soil.
Soil type has a lot to do with soil preparation, according to Texas A&M AgriLife Extension. Check the soil in the bed area and determine if it is sand, loam or clay. If your soil is porous and sandy, it won't hold water very well, whereas heavy clay soils may hold it too well, preventing efficient drainage. Both can be improved by working in organic matter. This helps sandy soil retain water and provide support, and it helps loosen clay while adding nutrients to the soil.
Soil testing isn't necessary to figure out soil type, but it can help determine whether there are adequate amounts of the primary nutrients in the soil. The top three nutrients that landscape plants require are nitrogen, phosphorus and potassium. To find out for sure, you can buy a simple soil test kit at your garden store. Alternatively, contact your local cooperative extension service for details on how and where to take a soil sample for testing.
5. Improve the Soil
If you have determined that the soil in your planting bed is sandy or heavy, plan ahead. A few months before planting, work leaves, straw and grass clippings into the soil and allow them to decompose. Composted manure also enriches the soil but must be added well ahead of planting. Organic compost can be added quite close to planting time. Don't add more than 4 inches of organic material.
If the soil in your planting bed produced healthy plants in the recent past, you still should add organic material. Soil improvement is a process, not a destination. Layer a few inches of organic compost onto the soil surface and then work it in well. Ideally, this should be done at least a week before planting.
Adding compost to the soil will increase the nutrients in your soil. If testing established that your soil is very deficient in nitrogen, magnesium or potassium, purchase appropriate fertilizer at the garden store and add it to the soil, working it in well before planting, at the rate indicated on the soil-test results.
 KatarzynaBialasiewicz/iStock/GettyImages
6. Irrigate the Landscape Bed
The time to think about plant care is while you are preparing a landscape bed. Plants require varying levels of sun, sufficient water and nutrients for optimal growth, and you can optimize their chances by taking a few extra steps.
Figure out the needs of the plants you are going to install. If they require full sun, make sure that nearby shrubs and trees aren't blocking sunlight to the site. Cut back overhanging branches. While you are at it, trim shrubs that are crowding the area to allow for good air flow and reduce competing demands for nutrition.
Determine a convenient irrigation system for the bed. If possible, install a drip irrigation system that will get water to the roots of plants efficiently without getting it on the plants' leaves. Alternatively, make sure the bed is within easy reach of your hose.
You can lock moisture into the soil and also keep down weeds by using mulch. Almost anything that can be layered over the soil classifies as mulch, but the best mulches are organic and break down over time, improving the soil. Apply a 3-inch layer of mulch over the soil surface after planting, keeping it well away from stems and trunks.