How To Build A DIY Timber Retaining Wall
We may receive a commission on purchases made from links.
Building a timber retaining wall is a good way to create a flat area in your landscape for a patio or flower bed, and it's sometimes necessary just to control erosion or to protect a small, existing structure or hardscape feature. When speaking of "timber" as opposed to the more generic term "wood," landscapers are usually speaking of 6x6 pressure-treated lumber rather than 2x6 or 2x8 pressure-treated boards, which require posts for support. Timber is beefy enough to stand on its own, although it needs to be pinned together and supported with braces known as deadmen to effectively hold back dirt.
If you intend to DIY your own timber retaining wall, plan on keeping the height below 3 feet. Most building authorities require a permit for anything higher than that, says Retaining Wall Companies. The permitting process involves a plan drawn up in conjunction with an engineer, and the wall likely needs deep postholes that may require heavy machinery to dig. A 3-foot wall is still a major home improvement project that's going to involve a lot of digging, shoveling and heavy lifting; you can do it yourself, but you'll definitely want the help of at least one other person.
What Makes a Good Timber Retaining Wall?
What Makes a Good Timber Retaining Wall?
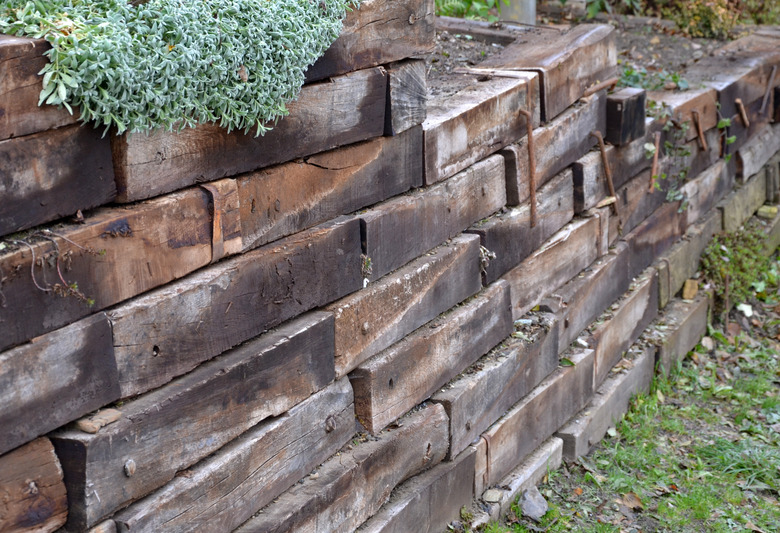
Unlike a decorative garden wall, a retaining wall has a job to do, which is to hold back soil, so it needs to be strong and built of long-lasting materials. While they don't last as long as concrete, brick or stone, 6x6 landscaping timbers are pressure-treated with a wood preservative that fights rot and confers a typical service life of 20 years or more, and they weigh enough to provide good inertial resistance.
Contractors increase the ability of a retaining wall to hold back dirt by constructing it with a slight batter, which means it slopes toward the dirt it's holding back. They also take advantage of the weight of the dirt being held back by attaching the wall to anchors that extend under the dirt. These anchors can be geogrids made of high-tensile woven fabric, as described by CRH, or some other material, but for a timber retaining wall, the most common ones are wooden braces known as deadmen that extend laterally behind the wall and are usually anchored by crosspieces at their ends.
A good wood retaining wall sits on a solid footing of compacted gravel, and it has sufficient drainage behind it to protect the wood from moisture deterioration. The timbers are pinned to one another and to the ground, usually with steel reinforcement bar, or rebar, or with landscape screws. Adding a corner or a zigzag pattern gives the wall more strength. One of the most important characteristics is that the wall is high enough to prevent dirt from spilling over the top. If you don't have a permit, remember to keep it under 3 feet.
 beekeepx/iStock/GettyImages
Before You Start the Project
Before You Start the Project
Like a fence, a retaining wall should never encroach on a neighbor's property, so you need to stake out the property line and ensure that you have enough room for the wall, the backfill material and the deadmen, which typically means the wall should be several feet from the property line.
And speaking of backfill, every cubic foot you add will require the removal of the same amount of native dirt, so if you're planning a long wall, plan ahead so you know what to do with all of that dirt. You can replace most of it, but you may prefer to backfill with planting soil instead. In that case, you may have a place for the dirt in another part of the yard, but if you don't, you'll need a truck to haul it away (or a willing neighbor with their own way of picking it up).
The project involves digging a trench for a gravel footing, which needs to be at least 12 inches deep. Before you start digging, call 811, a national hotline set up by utility companies, and request to have the underground utility lines marked on your property (a free service). This is a requirement that prevents you from slicing an electric or telephone cable and necessitating an expensive repair for which you'll get the bill.
Things Needed
-
Impact driver
How to Build a Timber Retaining Wall
1. Stake Out the Perimeter of the Wall
Drive stakes in the ground to demarcate the ends and corners of the wall. Stretch a string between each pair of opposing stakes a few inches above the ground. Then, use the string as a guide to mark a line on the ground with marking paint.
2. Dig a Trench
Dig a trench along the line that is 12 inches deep and 8 to 10 inches wide. The sides of the trench do not have to be straight, so you can do the entire job with a round-point shovel or, if it's a long wall, a trench digger. If you choose to do the job with a motorized trencher, you'll probably have to rent it (as this is a piece of specialty equipment that's very expensive and only used for this particular type of job). Compact the bottom of the trench with a hand tamper.
3. Backfill With Gravel
Fill the bottom of the trench with 3/4-inch drain rock to a depth of 6 inches below the top of the trench. Tamp the gravel with a hand tamper to compact it and form a solid base for the wall.
4. Set and Anchor the First Row of Timbers
Drill three 9/16-inch holes through one 8-foot length of 6x6 pressure-treated timber, and lay the timber in the trench. Use a 4-foot level to make sure it's level, adjusting the gravel if needed, and drive a 4-foot length of 1/2-inch rebar into the ground through each of the holes, using a small sledgehammer, to anchor the timber to the ground. Rebar comes in long lengths, but it's easy to cut with a hacksaw.
When setting timber at a corner, make notches in the ends using a circular saw so you can set one end on top of the other and then drill holes through both ends and drive a piece of rebar to anchor the corner.
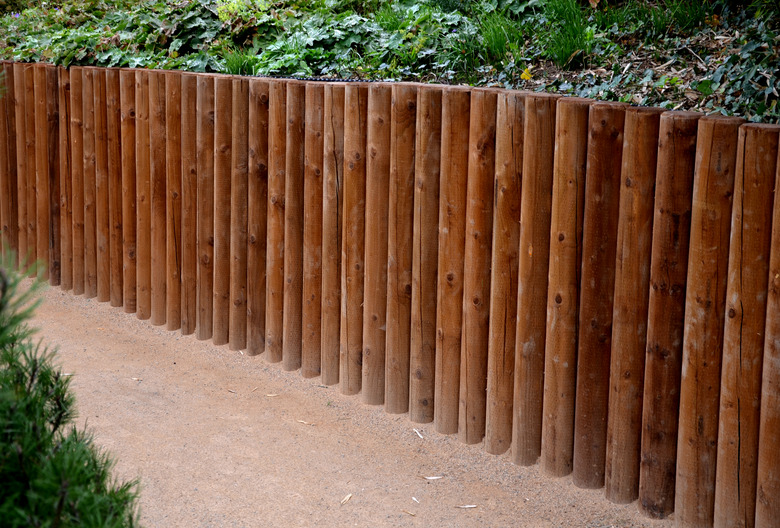
 mtreasure/iStock/GettyImages
5. Lay the Second Row
Set the second course of timber on top of the first, staggering the end joints by at least 4 feet and offsetting the front edges from 3/8 to 1/2 inch behind those of the lower course to create a batter. Secure the second course to the first with 10-inch landscape screws. Drill a 3/4-inch countersink hole about an inch deep into the wood with a spade bit before driving each screw so you can sink the head. Drive the screws with an impact driver and a hex bit.
6. Create a Drainage Outlet
Pour 3/4-inch drain rock behind the wall to a depth of 1 to 2 inches, building the layer higher in the middle than at the ends to create a drainage flow. Place 3-inch perforated pipe on top of the gravel and then cover it with more gravel. Cover the excavated part of the slope behind the wall with landscape fabric or filter fabric and pull the fabric over the pipe.
7. Add Deadmen Braces
Lay a third row of timber on the wall, staggering the end joints and offsetting the front edges behind those of the lower course and secure the course with screws. Construct two or more T-shaped deadmen—or two pieces of timber that are fastened together—that are from 4 to 6 feet long with a 3-foot crosspiece attached with landscape screws.
Screw the deadmen to the top of the wall with the "T" extending into the hillside behind the wall. Stake the "T" into the ground with rebar. You may have to dig trenches for the deadmen. It's best to have at least two deadmen separated by 6 to 8 feet but add more if the length of the wall is more than 10 feet and space them 6 to 8 feet apart.
8. Finish the Wall
Continue laying timbers, staggering and offsetting them as before and securing them with screws to the final height of the wall. When you're done, hang a plumb bob from the top row and verify the batter by noting the distance of the bob from the bottom row. For a 3-foot wall, this distance should be at least 2 to 3 inches.
9. Backfill With Dirt
Shovel dirt that you excavated from the hillside or some other filler material behind the wall to cover the drainage rock, filter fabric and deadmen. Bring the filler level to within 6 to 12 inches of the top of the wall. Landscaper Steve Boheme, writing for the Record Herald, recommends diverting water away from the backfill to prevent erosion and moisture deterioration to the timbers.
Adding Steps to a Timber Retaining Wall
Adding Steps to a Timber Retaining Wall
Pressure-treated timbers make good steps, and while you can put steps directly in front of the wall, they look better and are more useful if you do as Allan Block recommends and leave a space for them when building the wall. This would consist of two corners formed by perpendicular walls extending toward the hillside. This creates an alcove into which you can stack timbers or build a conventional staircase with stringers and treads.
To determine the number of steps, measure the vertical rise from the bottom to the top of the wall using a tape measure and divide that number by the height of the treads, which is 5 1/2 inches for 6x6 timbers. If you flatten out the ground inside the alcove, you can place timbers on top of one another, anchoring them to the ground and to one another, or you can construct a pair of stringers with a 7-inch rise, fasten them to the sides of the alcove and screw treads to the stringers.
Stacking timbers is probably the easier method. Create the base by laying timbers side by side and anchoring them to the ground with rebar and then place a second layer and screw them down with landscape screws, leaving the first two timbers in the base exposed to act as the first step (this makes each step about 11 inches deep). Continue adding layers in this way, leaving the two timbers in the layer underneath exposed until you reach the last step, which is ideally at the same level as the ground at the top of the stairway.