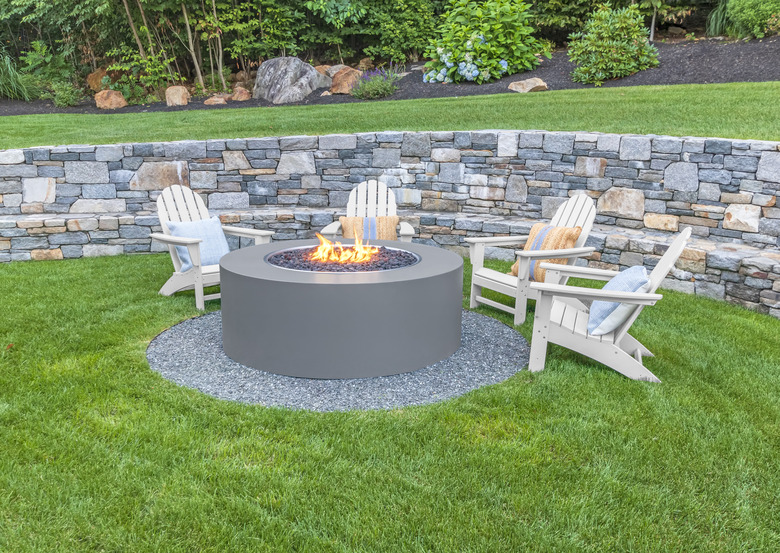
How To Build A Mortared Stone Wall To Beautify Your Backyard
We may receive a commission on purchases made from links.
Few landscape projects add more value to a home than building a mortared stone wall. Not only does it serve as a secure boundary to your property, but a stone wall built with natural stones bonded together with mortar also adds an elegance and durability that just can't be matched by any fence. While the work is physically hard and time consuming, it is not technically difficult, and a DIYer who wants to attempt this work will save a lot of money.
Planning a Mortared Stone Wall
Planning a Mortared Stone Wall
Building with natural stone is a complicated skill that takes many years to perfect, but DIYers can achieve good results if they simplify the construction. Follow local code guidelines for the location and height of your wall and obtain a building permit if required for your local municipality. For DIYers, limiting the wall to 3 feet or so in height makes the job much more manageable. Before construction on your mortared stone wall begins, you'll need to pour a good solid concrete footing for your wall following code guidelines that will specify depth and any reinforcement requirements.
In most regions, the footing will need to extend down below the winter frost line. This means that your footing may require a relatively thin 8-inch poured concrete slab if you live in a mild climate, or it may need to be 3 to 4 feet or even more if you live in a region with extreme winters. Small slabs can be poured with bagged dry concrete you mix yourself, while large foundations will probably require concrete delivery from a ready-mix company.
A mortared stone wall can be built with almost any type of natural stone, but DIYers will find it easiest to use cut blocks of limestone, sandstone or granite. These blocks will be roughly the same thickness but will have varying lengths that make it relatively easy to assemble the wall. As the Natural Stone Council observes, limestone is a relatively affordable stone for landscape use, as huge quantities are quarried in the U.S., mostly in the Midwest. This is not a stone that needs to be shipped from overseas sources. The look of limestone can vary depending on where it was quarried, so make sure you review actual samples before ordering it for delivery.
Overview of Construction
Overview of Construction
If you were to view it in time-lapse photography, the process of building a mortared stone wall would seem rather simple. A trench for the footing is dug, forms are built and concrete is poured for the footing and allowed to cure. Then, rows of stones are stacked atop one another one at a time and are adhered in place with mortar. For a freestanding mortared stone wall, there are generally two rows of face stones laid side by side down the length of the wall, with occasional tie stones set perpendicular to the face stones, which span across the width of the wall to give the structure lateral strength.
In practice, though, the work is hard and time consuming. It is best to give yourself a full week or more to build even a short wall, laying one course of stone at a time and allowing the mortar to dry as each course is laid. Such a wall will be quite heavy, so it is very important that it remains perfectly plumb and level as each course of stone is added to the wall. An off-balance wall will be very unstable and dangerous to any unsuspecting leaner or clumsy person who accidentally backs into it.
Before beginning construction on your wall, call 811—the national before-you-dig hotline—to ensure that you won't be running into any utility lines with your shovel. Once you've determined it's safe to begin, dig and pour a concrete footing to serve as the wall's foundation following local code requirements. Make sure the concrete has fully cured before you begin the wall construction.
 Susan Perry/iStock/GettyImages
How to Build a Mortared Stone Garden Wall
1. Dry-Fit the First Course of Stone
Snap a chalk line on the top of the footing to outline the stone wall. The wall should be centered on the footing, and the footing should extend 6 to 12 inches beyond the base of the wall on all sides.
Using the largest, heaviest stones, dry-fit the first course of the wall inside the outline on the footing. These large stones in the first course are known as the "base" stones. The ends should have single stones spanning the entire width of the wall if possible. These end, or "lead," stones will be crucial to the strength and stability of the wall, and they should have straight faces and square corners. If possible, there should be a similar tie stone that spans the width of the wall every 3 feet or so along the length of the wall.
Normally, the length of the wall consists of two rows of face stones laid parallel to one another, sometimes with a space between them which is filled with rubble or other fill material. The tie stones interrupt the rows of face stones and are set perpendicular to them to span from one face of the wall to the opposite face. They serve to reinforce the lateral strength of the wall and keep the two faces from separating.
When you arrive at an acceptable layout for the first course, move all the stones just off the foundation, keeping them arranged in the same layout.
2. Cut Stones Where Needed
It is sometimes possible to arrange stones so that few if any need to be cut. Usually, you will find it necessary to cut some stones to create a tight fit on each course. For DIYers, this is best done with a circular saw fitted with a diamond-tipped masonry blade. Cutting stone is a very noisy and dusty operation, so make sure to wear hearing protection, eye protection and a dust mask while doing this work.
Mark the stone where you want to cut it and then saw into the stone with the circular saw. This is easiest if you make several passes of the saw at increasing blade depths. If you can't saw completely through the stone, then complete the cleaving by inserting a wide masonry chisel into the saw kerf and striking the chisel sharply with a hammer. The stone should cleave nicely along the saw kerf.
3. Set the First Course of Stone
Mix up a large batch of type N or type S mortar and trowel an even, 2-inch layer of mortar over the footing inside the outline. Beginning at one side of the wall outline, position the stones for the first course. Continue positioning stones into the mortar to complete the first course. Periodically, check with a long level to make sure the course is remaining level. Where necessary, you can tap stones down into the mortar to maintain a level surface.
When all stones for the first course have been laid, pack any voids between stones with mortar using a trowel. If there are spaces larger than 2 inches between stones, they can be packed with a combination of rubble, gravel and mortar. When the joints are filled, scrape away ("rake") any extra mortar with a scrap 2x4 and then use a whisk broom to brush the joints. If mortar has stained the faces of any stones, wash them with a wet sponge.
This first course will need to dry for a full 24 hours to form a firm base for subsequent courses. While it is drying, erect string guidelines as a reference for building the rest of the wall.
4. Set the Guidelines
Drive stakes at both ends of the foundation aligned with one face of the wall. Hang a taut mason's string between the stakes and adjust it to level using a line level. This string will form a guideline to gauge the vertical and horizontal alignment of each course of stone as you stack it. After each course, you will raise the string higher to serve as a guide for the next course.
5. Install Additional Courses of Stone
Repeating steps 3, 4 and 5, dry-fit and lay the subsequent courses on a bed of mortar, cutting stones where necessary. Strive for a "running bond" layout that avoids vertical joints that are directly in line with a joint below. At the ends of the wall, alternating courses should have full-width lead stones that span the width of the wall. These will serve as tie stones to keep the wall together. Each course should have additional tie stones that will span the full width of the wall from face to face, positioned every 3 feet or so along the wall's length. This will help strengthen the wall and prevent separation of the two rows of face stones.
As you lay each course, make sure it is carefully aligned with the guide string and periodically use a long level to verify that the wall is remaining plumb and level. Fill gaps between stones with mortar and rake them smooth after each course. Wash away any mortar that stains the face of the stones.
6. Install Cap Stones
At the top of the wall, you can install special cap stones if you wish. Typically, the cap stones are the row of tie stones that span the full width of the wall. Reserve the flattest stones for the cap course. You can also use manufactured pavers made of poured concrete or machine-sawn natural stone pavers for the final cap course. Rake the joints between stones smooth and then brush them with a whisk broom.
7. Wash the Wall
Let the wall's mortar cure for a full week and then wash the face of the stones with a mixture of muriatic acid and water. First, wet the wall thoroughly and then apply the acid solution. Then, immediately hose down the wall. This will remove any mortar residue on the stones.
References
- Better Homes & Gardens: How to Lay a Mortared Stone Wall
- Black & Decker The Complete Guide to Concrete & Masonry, 4th Edition, by Editors of Cool Springs Press (Cool Springs Press, 2015)
- The Stone Trust: How to Build Walls
- Home Depot: How to Build Mortared Stone Walls
- Natural Stone Council: Material Fact Sheet: Limestone