Create A Modern Plant Stand From A Surprising Everyday Product
We may receive a commission on purchases made from links.
Who's ready for another easy and inexpensive DIY hack? This one combines a $20 trash can with cut dowel rods to make a cool, contemporary plant stand that elevates your houseplants — figuratively and literally.
 Carrie Waller
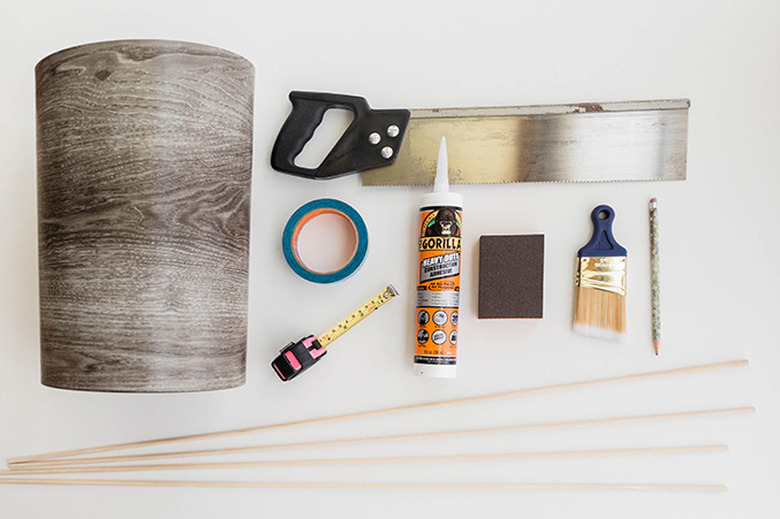
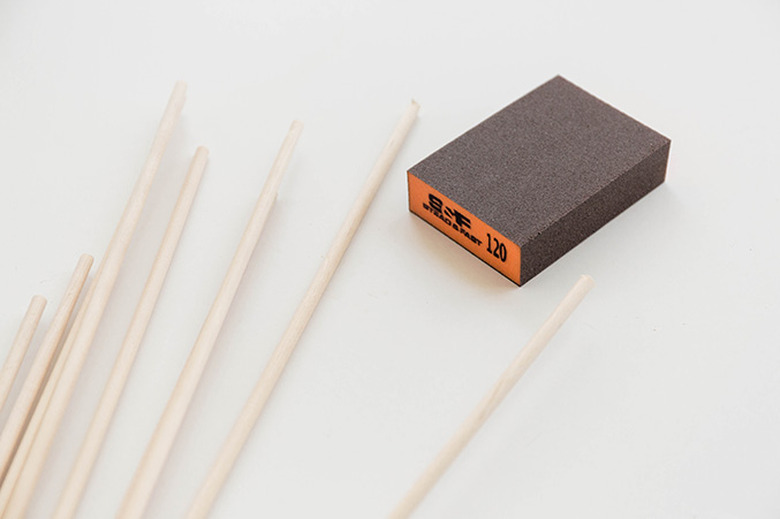
Things Needed
-
Pencil
-
Miter saw (this manual miter box works, too!)
-
Scrap cardboard
 Carrie Waller
Step 1
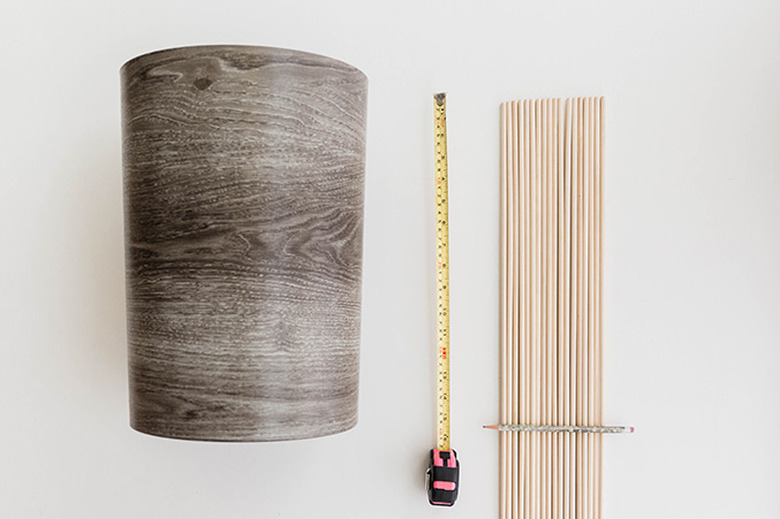
For this project, you'll need to cut roughly 140 dowels to size to cover the trash can. This count allows for extras that you can choose from if some dowels are a little warped. Measure and mark the dowel rods with a pencil so that they'll each be 1/4-inch taller than the sides of your trash can. You'll get two cut dowels out of each singular rod in this pack of 36-inch rods.
 Carrie Waller
Step 2
Cut the dowels to size using a miter saw. You can opt to use a manual miter box if you don't have access to that kind of power tool, just note that it will take longer! You can cut several dowel rods at once to save time.
 Carrie Waller
Step 3
Sand the cut ends of the dowels smooth using a sanding sponge.
 Carrie Waller
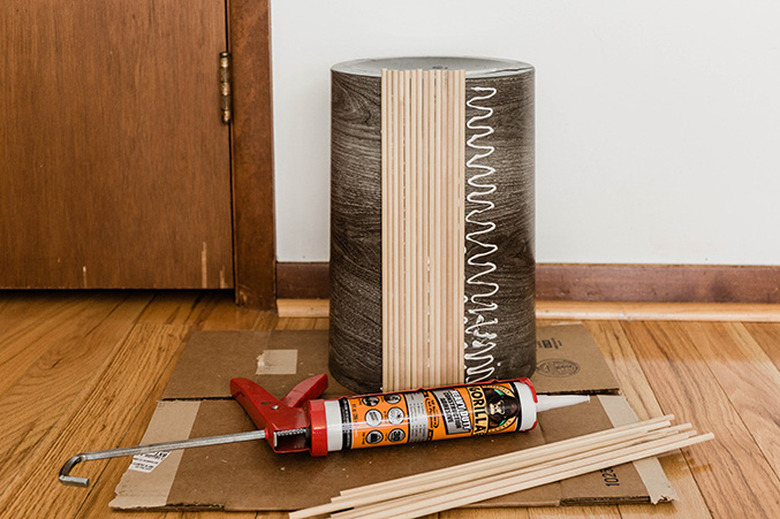
Step 4
Flip the trash can over so that it's upside down, and place it on a piece of scrap cardboard to protect your surface underneath. Squeeze a 2- to 3-inch wide squiggle line of construction adhesive down the side of the trash can using a caulking gun. Press cut dowel rods straight up and down into the construction adhesive one by one, holding them in place for 30 seconds before moving on to the next. The 1/4-inch overhang you added to the rod length in step one should be oriented at the top so that it exceeds the height of the can.
Step 5
After you've covered an 8-to-10-inch-wide section of the trash can, tie a piece of string tightly around the rods and the trash can, and let the adhesive set for about 15 minutes. Then, remove the string and do another 8-to-10-inch section. Continue attaching the rods to the trash can in this fashion until you cover the entire can. We suggest listening to a good podcast during this step!
 Carrie Waller
NOTE: When you get to the end, chances are good that you'll be left with a slightly uneven section that your rods won't fit into. Don't stress! DIYs are never totally perfect. Just fill in as much as you can, and rest assured that, once you paint the gap black like the rest of the can in a later step, you'll hardly notice. We just turned that spot back toward the wall so no one ever sees it.
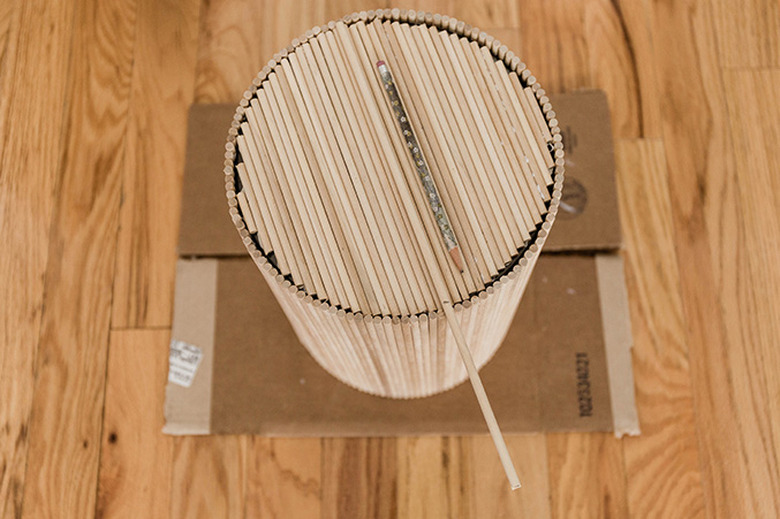
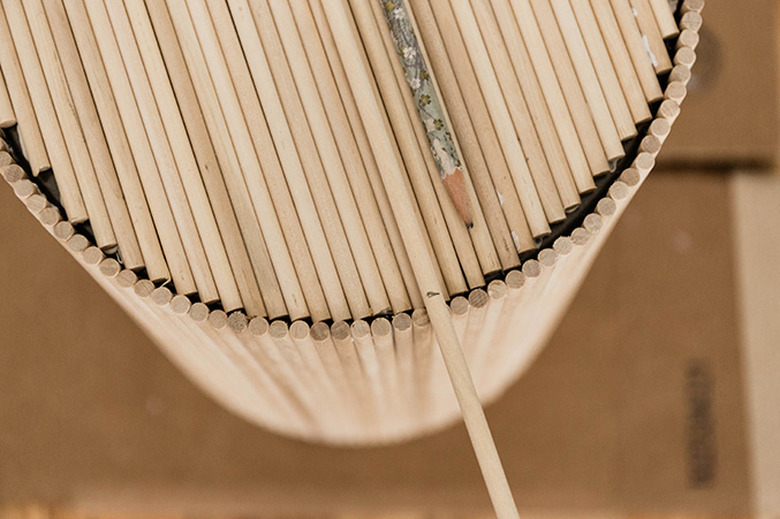
Step 6
To fill in and cover the top of the trash can, hold your extra rods up where they'll go, mark where they need to be cut with a pencil, and cut them using a manual miter box. Glue each one in place with more construction adhesive. Again, the gaps will be less noticeable once painted.
 Carrie Waller
 Carrie Waller
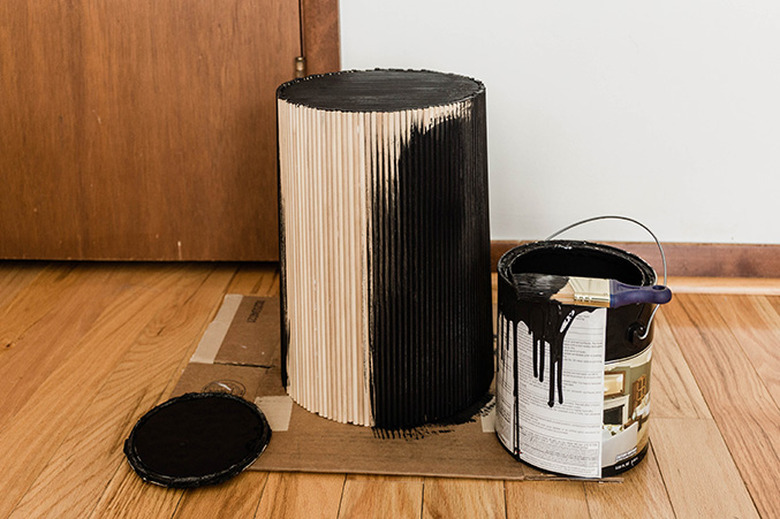
Step 7
Allow the dowel rods to cure overnight on the trash can, and then use a paint brush to coat the top and sides with flat black paint. We did two coats of paint (with a 30-minute dry time in between) to get an even finish.
 Carrie Waller
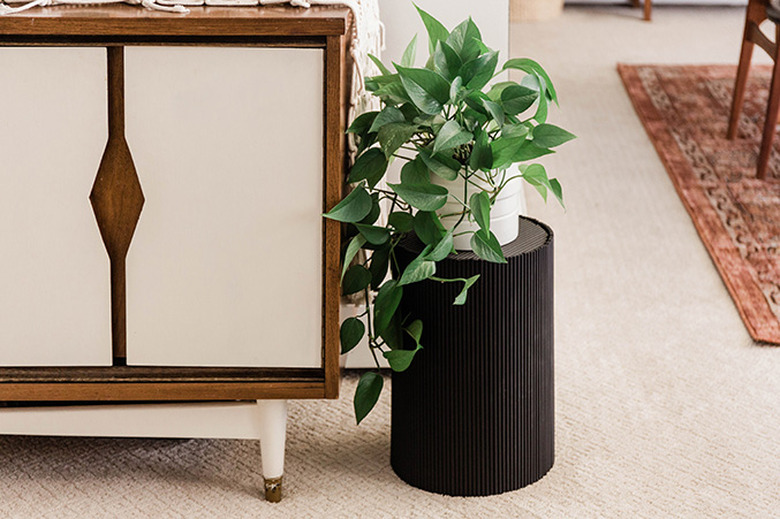
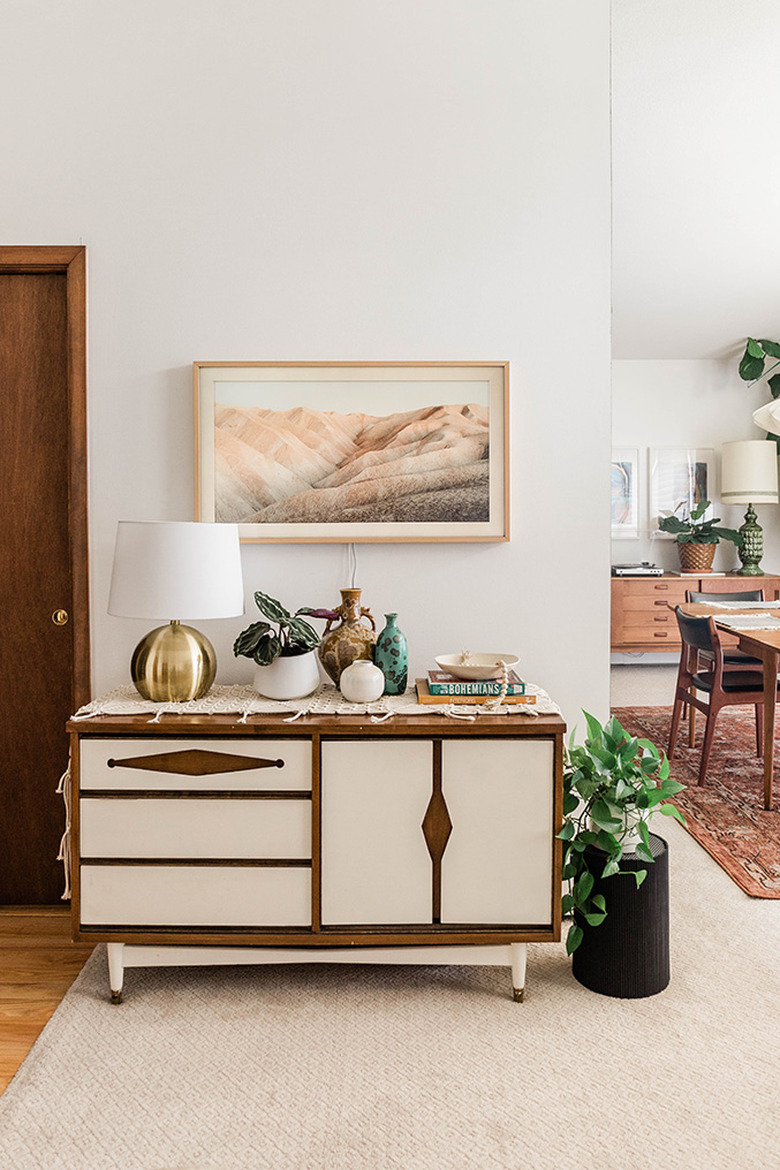
Set your newly constructed mod plant stand in place, and top it with potted greenery for a cool accent in any space!
 Carrie Waller
 Carrie Waller