The Definitive Guide To Planning And Styling A Gallery Wall
We may receive a commission on purchases made from links.
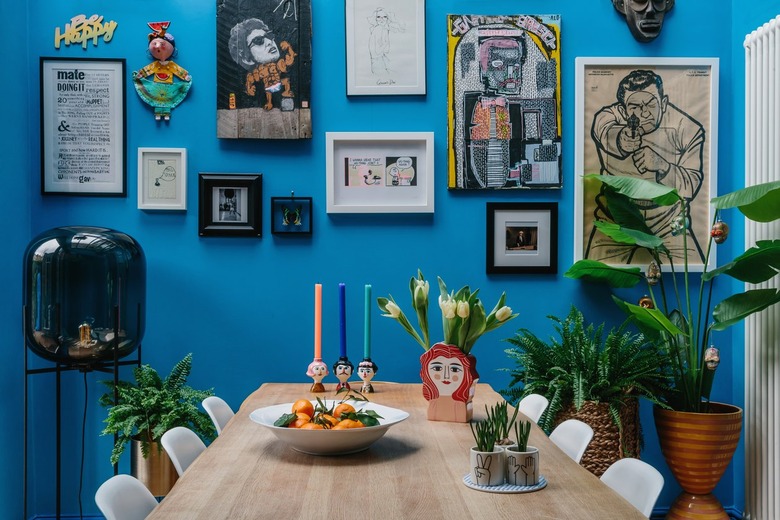
A well-designed gallery wall can be a game changer for your home. Not only are they lovely to look at, but a beautiful salon-inspired display can turn an empty wall into a statement piece in no time. "A gallery wall, also called a salon wall, is a wall arranged with a collection of artworks, photographs, mementos, or objets d'art, often expressing a theme," explains interior designer Loren Audrey Taylor. "This method of showing art was born out of necessity in the 17th century France where French salons began displaying walls filled floor to ceiling with art because wall space was restricted."
However, installing a gorgeous gallery wall takes time, patience, and above all else, the right tools. To help guide you through the process, we asked a few of our interior designer friends for their advice. From picking picture frames to tips for hanging, here's how to plot, plan, and pull off a one-of-a-kind gallery wall at home.
Step 1: Get inspired.
Step 1: Get
inspired.
Whether it's an asymmetrical display or clean-lined grid you're after, Abbe Fenimore of Studio Ten 25 says you'll need to decide what type of arrangement you're going for before you design a gallery wall. "Know the look you are going for and plan for it by searching for inspiration on Pinterest or other design sites," she explains.
Step 2: Pick a theme.
Step 2: Pick a theme.
Once you've settled on the style of your salon wall, the next step is to decide what images you'd to like to include. "Start by picking a theme," Kendall Wilkinson says. "Family, wedding, travel, children, what story do you want to share?" After you decide what kinds of images you want to show off, Wilkinson recommends selecting a mix of different images to create a dynamic display. "Pick a variety of pictures in color, black and white, and in varying sizes," she says. "Don't get too exact or precious."
Step 3: Select your frames.
Step 3: Select your frames.
After you've selected the artwork you'd like to use, Wilkinson says it's time to choose what frames will work best. "While you can use a variety of frame styles and finishes on a gallery wall, it often helps to have one unifying element," she explains. If you're torn about what kind of picture frames to use, she suggests opting for ones with the same color of frame or using white matting to surround all of the images, to pull the look together.
Step 4: Make a plan.
Step 4: Make a
plan.
Before you can actually start hanging your artwork, Taylor says you'll need to have a firm plan in place. "Begin by planning on grid paper or laying the items on a blanket on the floor to see how they interact with each other," she says. She also recommends using craft paper to create templates that are the exact size and shape of each piece of art you'll be hanging, so you can play around with different arrangements until you pick the best one.
Step 5: Choose a centerpiece.
Step 5: Choose a centerpiece.
Once the art is framed, Jade Joyner of Metal + Petal says you will need to pick the image the gallery wall is going to revolve around. "I like to start with the main centerpiece and then work from the outside in," she explains. "You can create symmetry by spacing them out evenly." In order to make your display look balanced, Taylor suggests hanging your main piece at eye-level, and centering the rest of the design around it.
Step 6: Gather your tools.
Step 6: Gather your
tools.
Make no mistake about it: The right tools can make or break your gallery wall. "Along with either a hammer and nails or 3M Command Strips, you will need a level, blue painter's tape (to mark the top and bottom of each frame to ensure correct spacing), and a lead-based pencil (because it cleans up easier)," she says. "Also have a measuring tape and yard stick handy, in case the painter's tape doesn't stay taut."
Step 7: Hang time.
Step 7: Hang
time.
With a firm plan and centerpiece in place, Wilkinson says you can officially begin installing your gallery wall. "Start by hanging your main picture and then building around it by determining how many images each row will have," she says. "Remember to use your painter's tape to mark the top and bottom of the pictures and remove any pencil marks (and leftover tape) when you're finished."
Step 8: Shake things up.
Step 8: Shake things up.
The best thing about gallery walls is that you can easily switch things around to create a new vibe in a space. "Changing out the image or art is the easiest way to update your gallery wall," Fenimore says. "If you really want to take it up a notch, replace the frames with a fun mix of styles and finishes while keeping the subject cohesive. I love to incorporate framed pieces with glass and art on canvas in floating frames."