Bathroom Vanity Cabinet Remodel: A Homeowner's DIY Guide
We may receive a commission on purchases made from links.
Remodeling a bathroom doesn't necessarily mean replacing all the elements within it. For instance, updating the bathroom vanity with a fresh coat of paint and new cabinet hardware can give it a fresh new look, as can replacing the faucet or the sink. If the shape or size of the vanity cabinet doesn't work well in the bathroom, replace it with a piece of repurposed furniture or a different style of bathroom vanity.
With so many options for updating the vanity during a bathroom remodel, it's simply a matter of how much effort and cash you're willing to put into the makeover project.
Fresh Paint and Hardware
Fresh Paint and Hardware
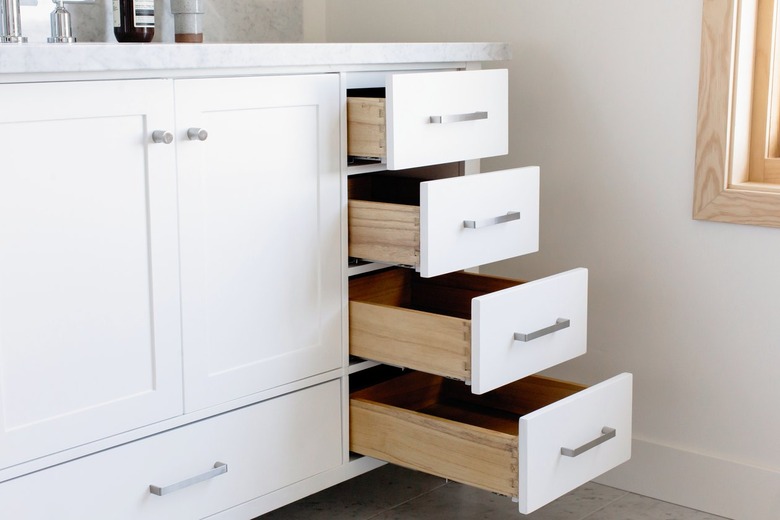
One of the easiest and least expensive ways to give your bathroom vanity a DIY update is to repaint it and update the hardware as needed. For instance, many inexpensive vanities sold in home improvement stores are lacking a bit when it comes to style, but they're perfectly functional, even offering a bit of storage space. Consider painting the cabinet a shade that pairs well with the room's color scheme or opt for a bold color to turn the vanity into a focal point in the room.
Before grabbing a paintbrush, remove the cabinet hardware, mask off the countertop area to avoid painting it and clean the vanity thoroughly with a product that is suitable for the material. Once it dries, apply a coat of primer that is suitable for the vanity material, wait for it to dry again and then apply layers of your favorite latex paint color.
If you like the style and color of the current hardware, simply put it back in place. Otherwise, you can spray-paint it to give it a new finish, such as an oil-rubbed bronze look, or you can replace it completely. Be sure to measure the distance from hole to hole on drawer pulls and handles that have more than one screw hole. Also measure the length of the screws to ensure the new hardware fits. Big-box home improvement stores such as Home Depot carry a vast array of cabinet handles, hinges and knobs.
 Hunker in Partnership With Acme Real Estate
Replace the Countertop
Replace the Countertop
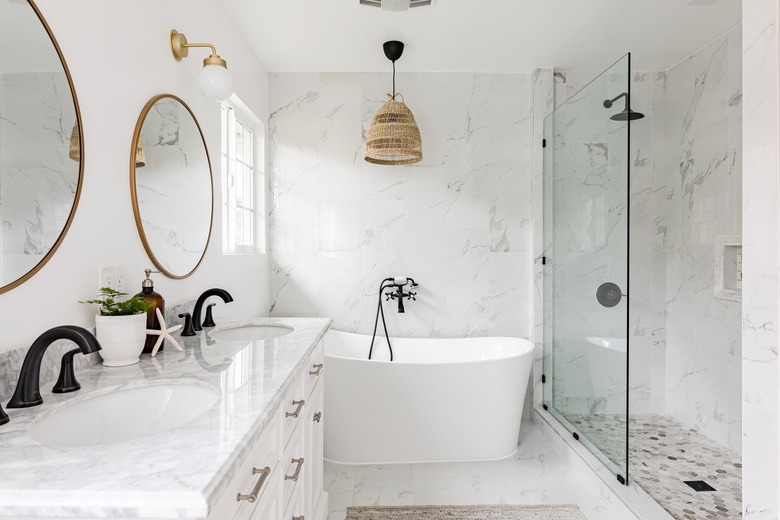
If you're happy with the shape, size and style of the vanity cabinet itself, replacing the countertop is another way to update it. This process is a little more involved, as you'll have to disconnect all the pipes and water lines before removing the countertop or the sink. Before disconnecting any of the water lines, turn them off; the handles are within or behind the vanity. Turn on the hot and cold water at the faucet to ensure the water has shut off completely and to drain any remaining water in the line. If the water doesn't turn off completely, you'll have to shut off the house's water for a while, according to Willow Lane Cabinetry.
You'll also have to disconnect the sink's water lines from the faucet and loosen the nut above the P-trap to be able to remove the vanity top and/or sink. If caulk seals any areas of the sink or vanity top, a utility knife helps loosen the caulk's grip. Some sinks are glued to the vanity, while others are held with screws. With glue, you may have a hard time removing the sink without damaging it, especially if you are using a chisel between the sink and vanity top.
The new vanity top can be any material you like, from engineered quartz to granite to concrete. Sticking with a countertop the same size as the old one is usually a good idea if you're keeping the vanity base cabinet. It could be difficult to cut a hole for the sink in a stone countertop, so keep this in mind when shopping for the top. You may also have to level the top of the vanity cabinet with shims before installing a new countertop, as things shift over time. It is also often easier to install the sink in the countertop before putting the countertop back on the vanity.
Test-fit the new countertop in place, checking it with a level from front to back and side to side. Lift the top off the cabinet so a helper can apply a bead of adhesive caulk around the entire top of the cabinet. Set the top down in permanent position. Wait for the caulk to dry before adding a sink or doing any other work that may move the top out of position.
 Mitch Geiser
Old Furniture, New Bathroom Vanity
Old Furniture, New Bathroom Vanity
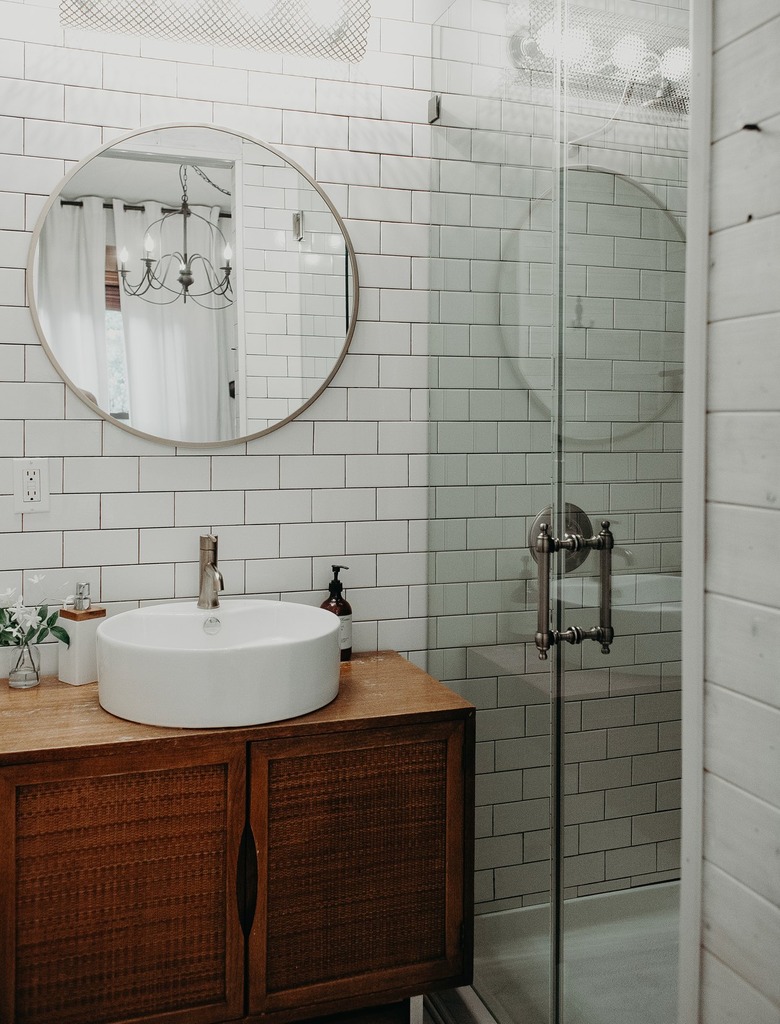
Replacing the entire bathroom vanity with a repurposed dresser is another way to update the space during bathroom remodeling. This may save money compared to buying a new vanity, but it requires a bit more preparation. Smaller dressers and cabinets that fit into the bathroom space work well, provided that the height suits your needs for a bathroom sink.
Sand, prime and paint the entire vanity exterior beforehand and then apply several coats of polyurethane, especially on top, to protect it from moisture. Making a cardboard template of the sink bottom comes in handy for tracing the sink position on the top of the dresser if you are using a drop-in sink. For a vessel sink, you only need a hole as wide as the drain opening or as indicated in the paperwork included with the sink.
Tip
The procedure for installing a new sink or a new faucet in a new vanity and in an existing one are quite similar, which both require accurately sized holes in the vanity top for the sink and the faucet assembly. Always read the paperwork included with new faucets or sinks, as the instructions indicate any installation peculiarities that may apply to that particular model.
- Once the sink template has been traced in an ideal location atop the dresser, mark the positions for the faucet's water lines as well. Remember to position the faucet so the end of the spout reaches over the lowest point of the sink near the drain to prevent excessive splashing.
- Use a jigsaw to cut out a hole for a sink or a hole saw to cut smaller round holes for plumbing.
- Test-fit everything in place, as this will help determine which areas within the furniture may need to be cut out, such as the sides or bottoms of some drawers and part of the dresser back. Keep the P-trap and drainage plumbing in mind as well, as every part of the plumbing requires space.
- Use a jigsaw or circular saw to cut out portions of the furniture as needed.
- Fit the sink and faucet hardware in place again, ultimately securing the sink with adhesive caulk or as indicated in the sink's paperwork.
- Connect the water lines to the faucet and the drain assembly within your new vanity before turning the water back on.